21
5. PREPARING FOR OPERATION
Entering the paper length Enter the paper length.
Range of input Saddle stitching: 178.0 to 508.0 mm/7.01 to 20.00 inch
(When connect with DBM-2KT: 178.0 to 500.0 mm/7.01 to 19.69 inch)
Stitch Off: 178.0 to 508.0 mm/7.01 to 20.00 inch
Side stitching (Corner stitching): 140.0 to 364.0 mm/5.51 to 14.33 inch
(Side stitchable length: Above 182.0 mm/7.17 inch)
*
When set to “Fold On”: 178.0 to 364.0 mm/7.01 to 14.33 inch
Entering the paper width Enter the paper width.
Range of input Saddle stitching and Stitch Off: 120.0 to 356.0 mm/4.72 to 14.02 inch
Side stitching (Corner stitching): 210.0 to 356.0 mm/8.27 to 14.02 inch
Stitching position display Length from the paper leading edge to stitching position.
When the paper length is entered, the standard stitching position will automatically be set.
(Can be changed)
*
Standard stitching position: (Paper length ÷ 2) mm/inch
Range of input Saddle stitching: 89.0 to 254.0 mm/3.50 to 10.00 inch
(However, the difference with the paper length is in the range of 89 to 359 mm/3.50 to 14.24
inch)
Folding position display Length from the paper leading edge to stitching position.
When the paper length is entered, the standard folding position will automatically be set. (Can
be changed)
*
Standard folding position: (Paper length ÷ 2) mm/inch
Range of input 89.0 to 254.0 mm/3.50 to 10.00 inch
(However, the difference with the paper length is in the range of 89 to 254 mm/3.50 to 10.00
inch)
Stitching width display The width between both stitches.
When the paper width is entered, the standard width will automatically be set. (Can be
changed)
*
Standard stitching position: (Paper length ÷ 2) mm/inch
However, if the paper width is less than 140 mm/5.51 inch, the stitching width will be set to
70.0 mm/2.76 inch (minimum stitching interval).
The stitching position will also avoid the stitch prohibited area.
Range of input From 70.0 mm/2.76 inch to (Paper width –28.0 mm/1.10 inch)
Stitching cannot be carried out within 14 mm/0.55 inch from the side edges.
After entering the paper size, press the [Next key] to proceed to the next step.
When the binding mode is set to “Trim On”, the “Set Trimming Position” screen will appear. If set to “Trim Off”, the [Confirm
Settings] screen will appear.
As paper size is restricted according to binding conditions, the machine will not proceed to the next step if the paper size
entered is not appropriate.
Pressing the [Back key] returns to the <Select Trimming Mode> screen.
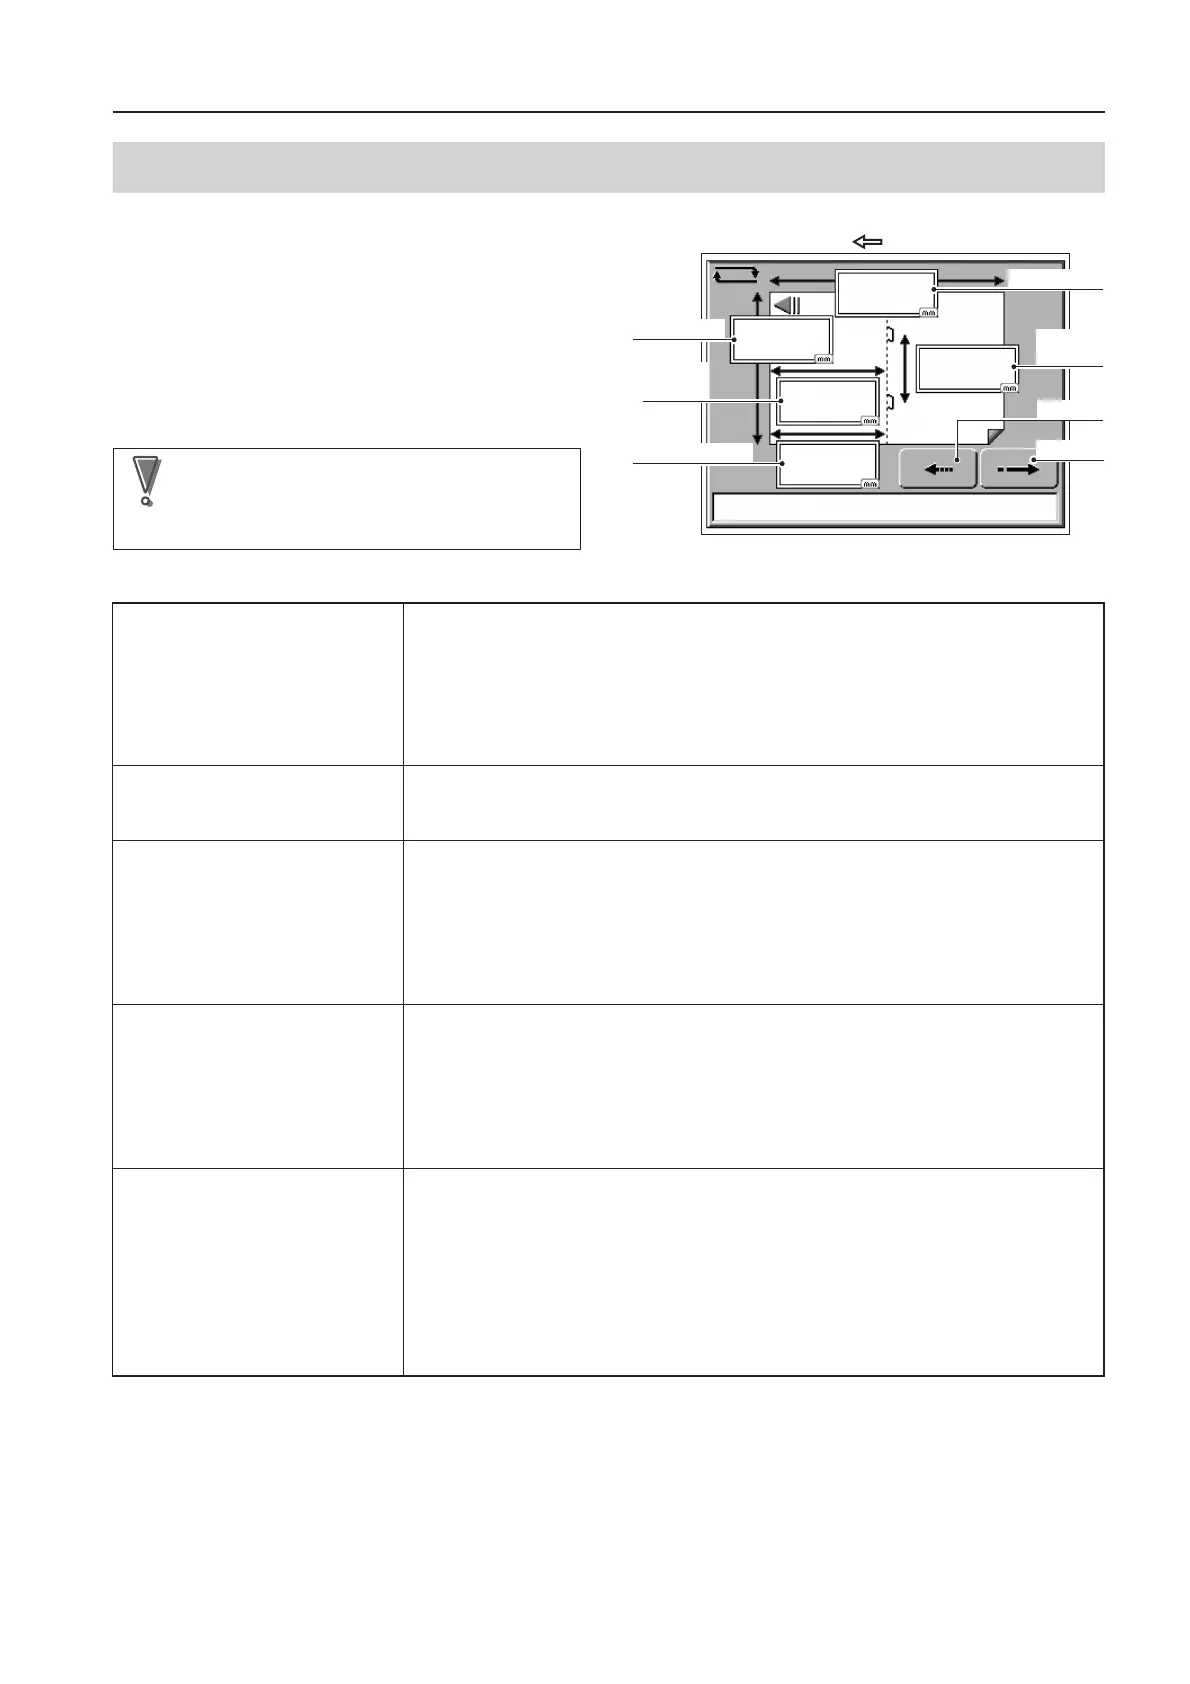
❊ Entering paper size
Paper width
Stitching
position
Folding position
297. 0
420. 0
210. 0
210. 0
148. 5
Next key
Back key
Stitching
width
Paper length
Paper conveyance direction
<Enter Paper Size> Screen
Enter the paper length and width.
Standard values for the stitching/folding positions and
stitching width are displayed according to the paper size
entered.
Pressing inside the box showing a value resets the value
to 0. Enter the desired values using the [Numerical keys],
and press the [Return key] on the numerical pad to
confirm. Pressing the box again before pressing the
[Return key] returns the original value.
NoteNote
The values in this screen are original figures you
entered.
They remain the same no matter how finely
adjusted later according to binding conditions.
 Loading...