75
12. STITCHER HEAD
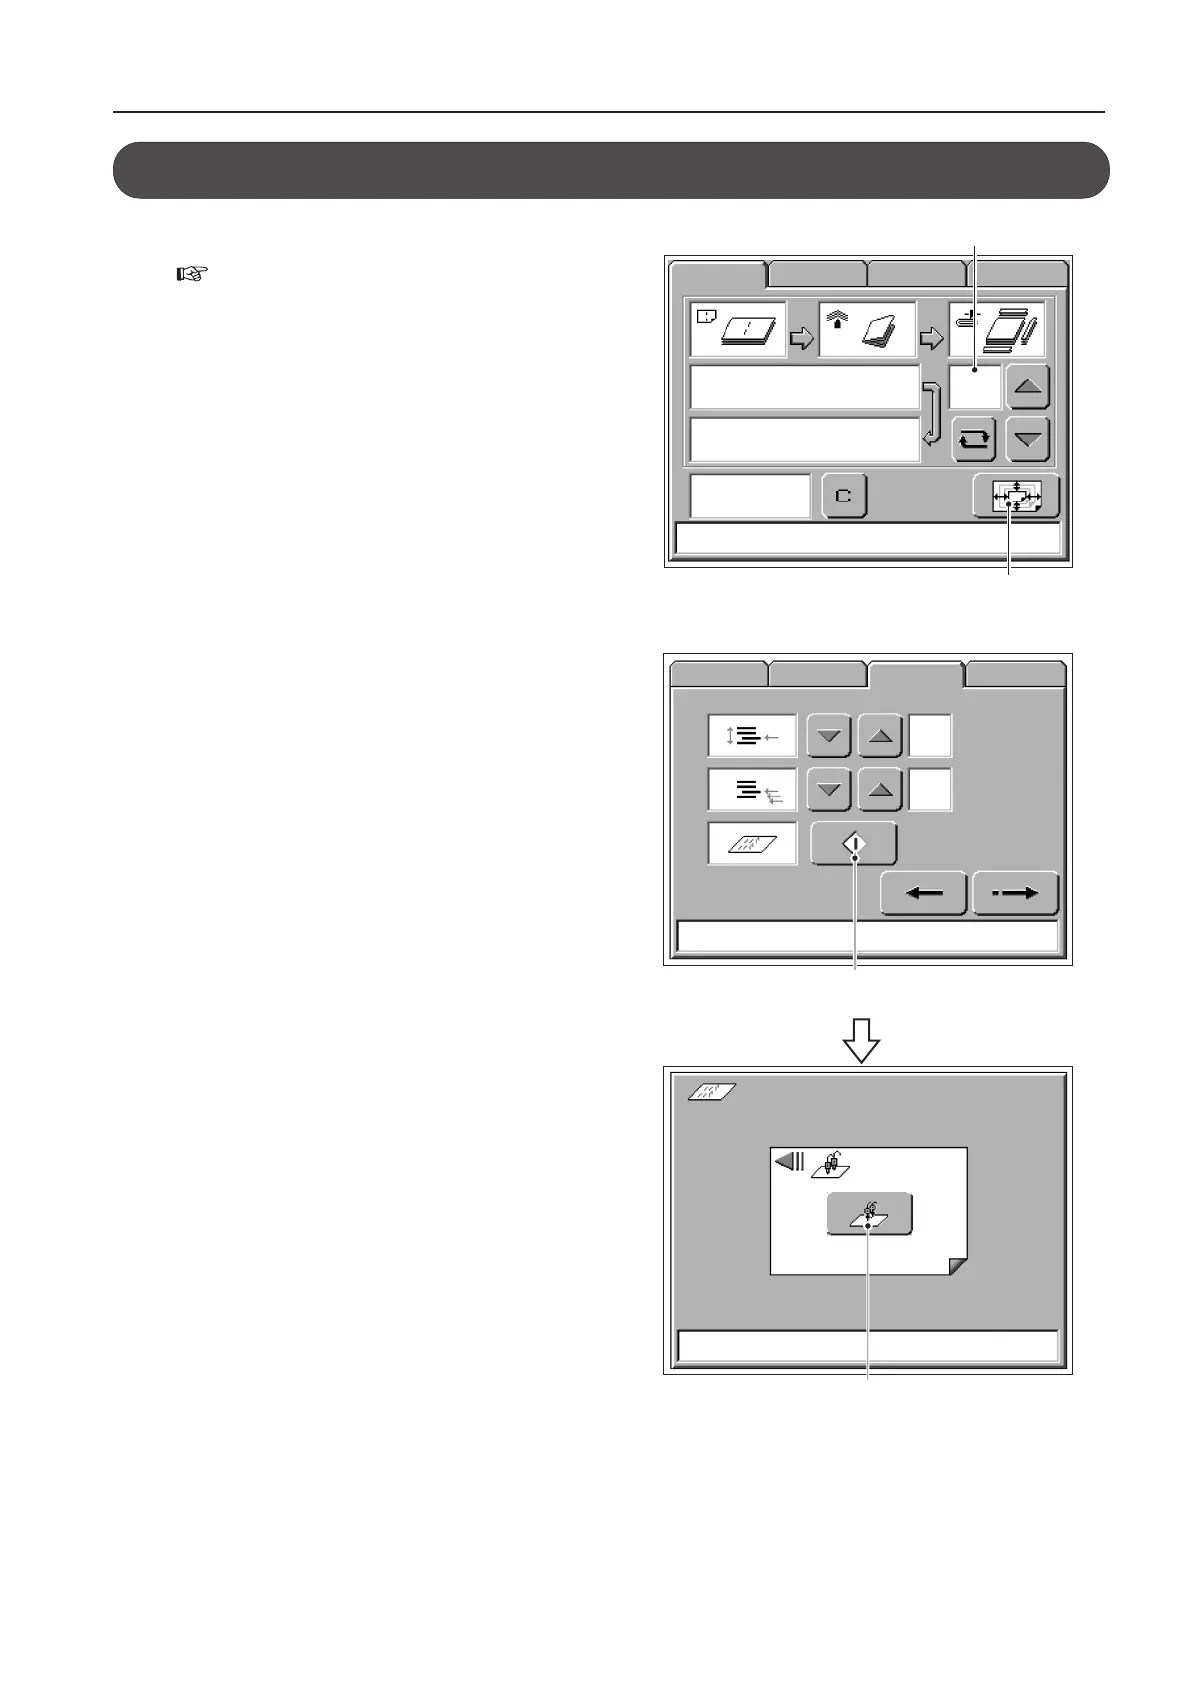
<Option Menu 2> Screen
<Stitch Test Action> Screen
MAINMENU ADJUST ACCESSOROPTION
Stitch Test key
Stitch Test Action key
33
33
3
Load the same size paper as the paper of
the selected memory number on the
upstream unit.
44
44
4
Display the <Option Menu 2> by pressing
the option and [Next key] in order.
55
55
5
Press the [Stitch Test key].
The <Stitch Test> screen appears.
66
66
6
Press the [Start key] of this machine or
upstream unit.
One set of paper is sent from the upstream unit to
the stitching stopper.
12-4. Stitching Tests
11
11
1
Turn On the power of this machine.
( Refer to page 14 “5-1. Power On”.)
22
22
2
Select a memory number that includes the
saddle stitching process from the main
menu, and press the [Size Change key].
01
00250
420. 0
x
297 . 0
207. 0
x
277 . 0
<Select Binding Mode> Screen
MAINMENU ADJUST OPTION ACCESSOR
Memory No.
Size Change key