13 of 44
User Manual for the GSC400 Programmer and PC Interface
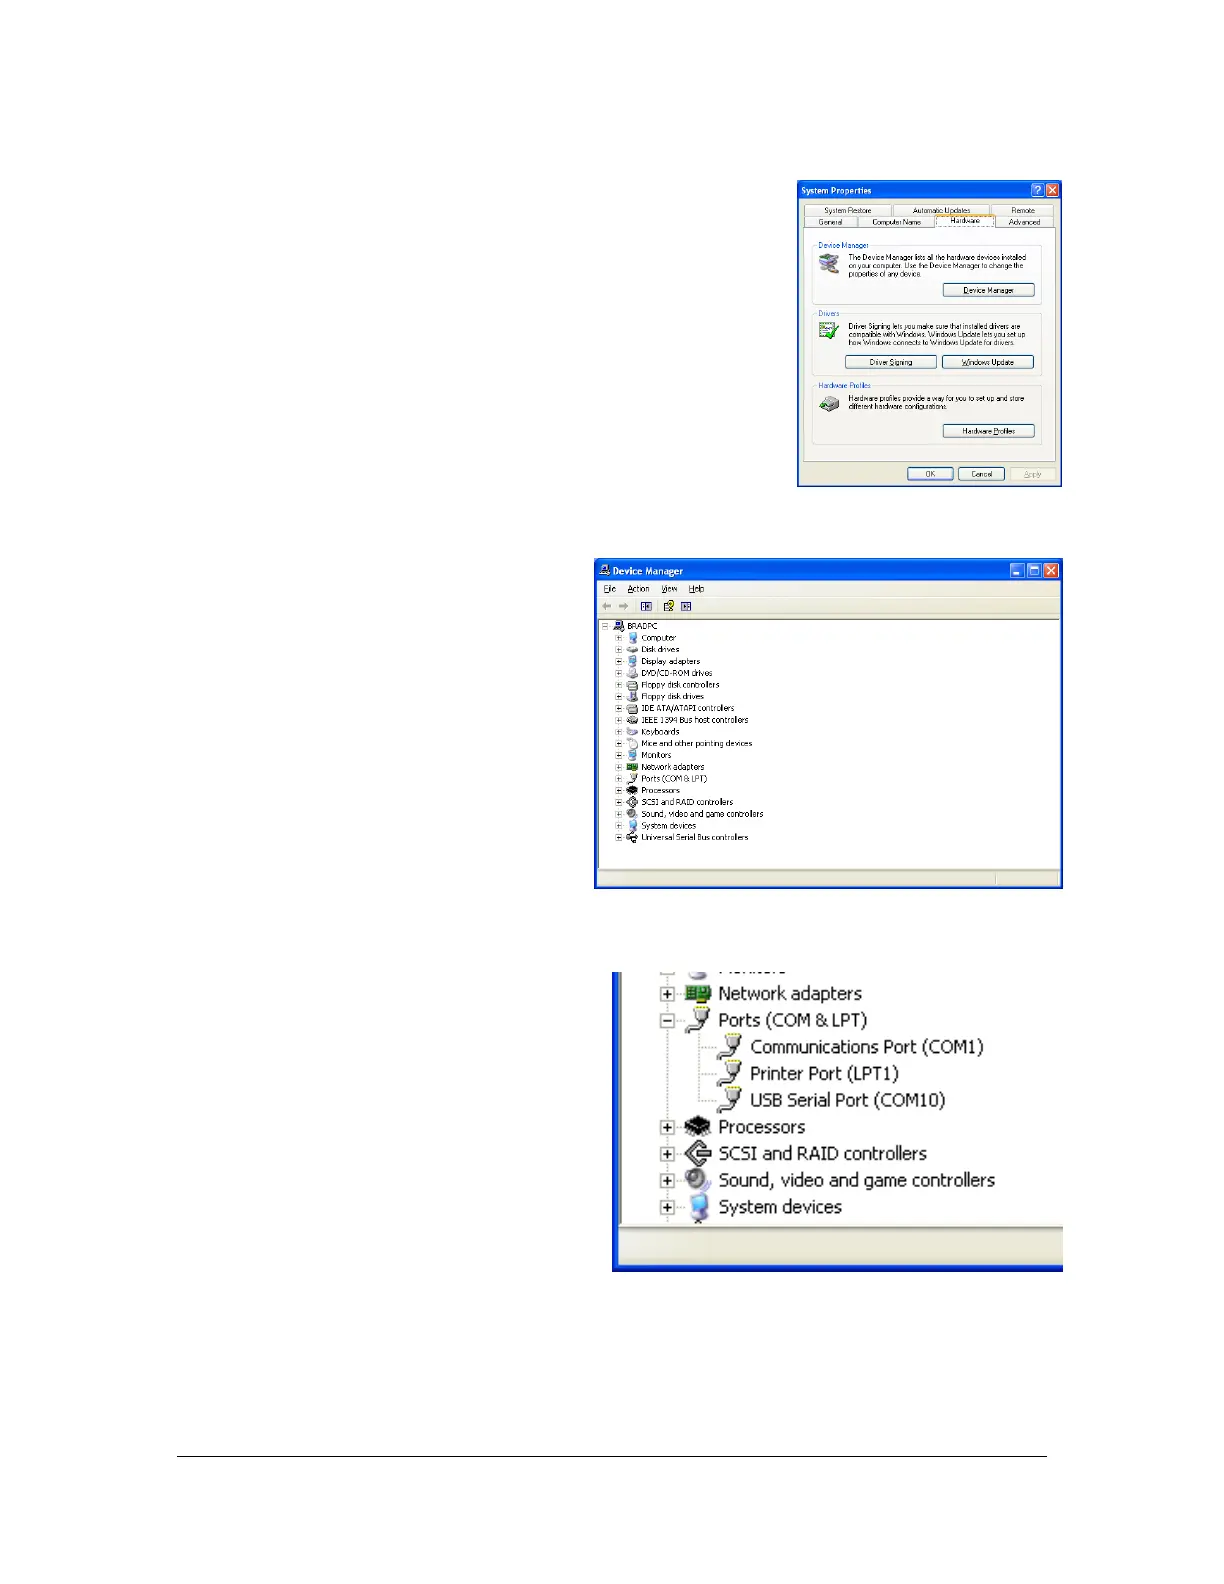
c. Click on the “Device Manager” button located
near the top of the window.
d. A new window, “Device
Manager”, will be displayed
over the “System Properties”
window. Scroll down to “Ports
(COM & LPT)” and click on
the “+” sign next to the icon.
e. This will expand the selection
and you should now see all the
available COM and LPT
(printer) ports available.
One of the entries in the list
should say “USB Serial Port”
and next to this should be the
COM port it is using in brackets.
This is the COM port you need
to select in the GSC400 PC
Interface. Note that this may
change each time you plug into the USB cable.
In this example the USB driver uses COM10. This is a problem as the PC
Interface only allows COM1 to COM8 to be used. Go to section 1.6 to
change this.
Figure 18 – XP Hardware tab.
Figure 19 – XP Device Manager
Figure 20 – XP Ports group expanded.
 Loading...