30 of 44
User Manual for the GSC400 Programmer and PC Interface
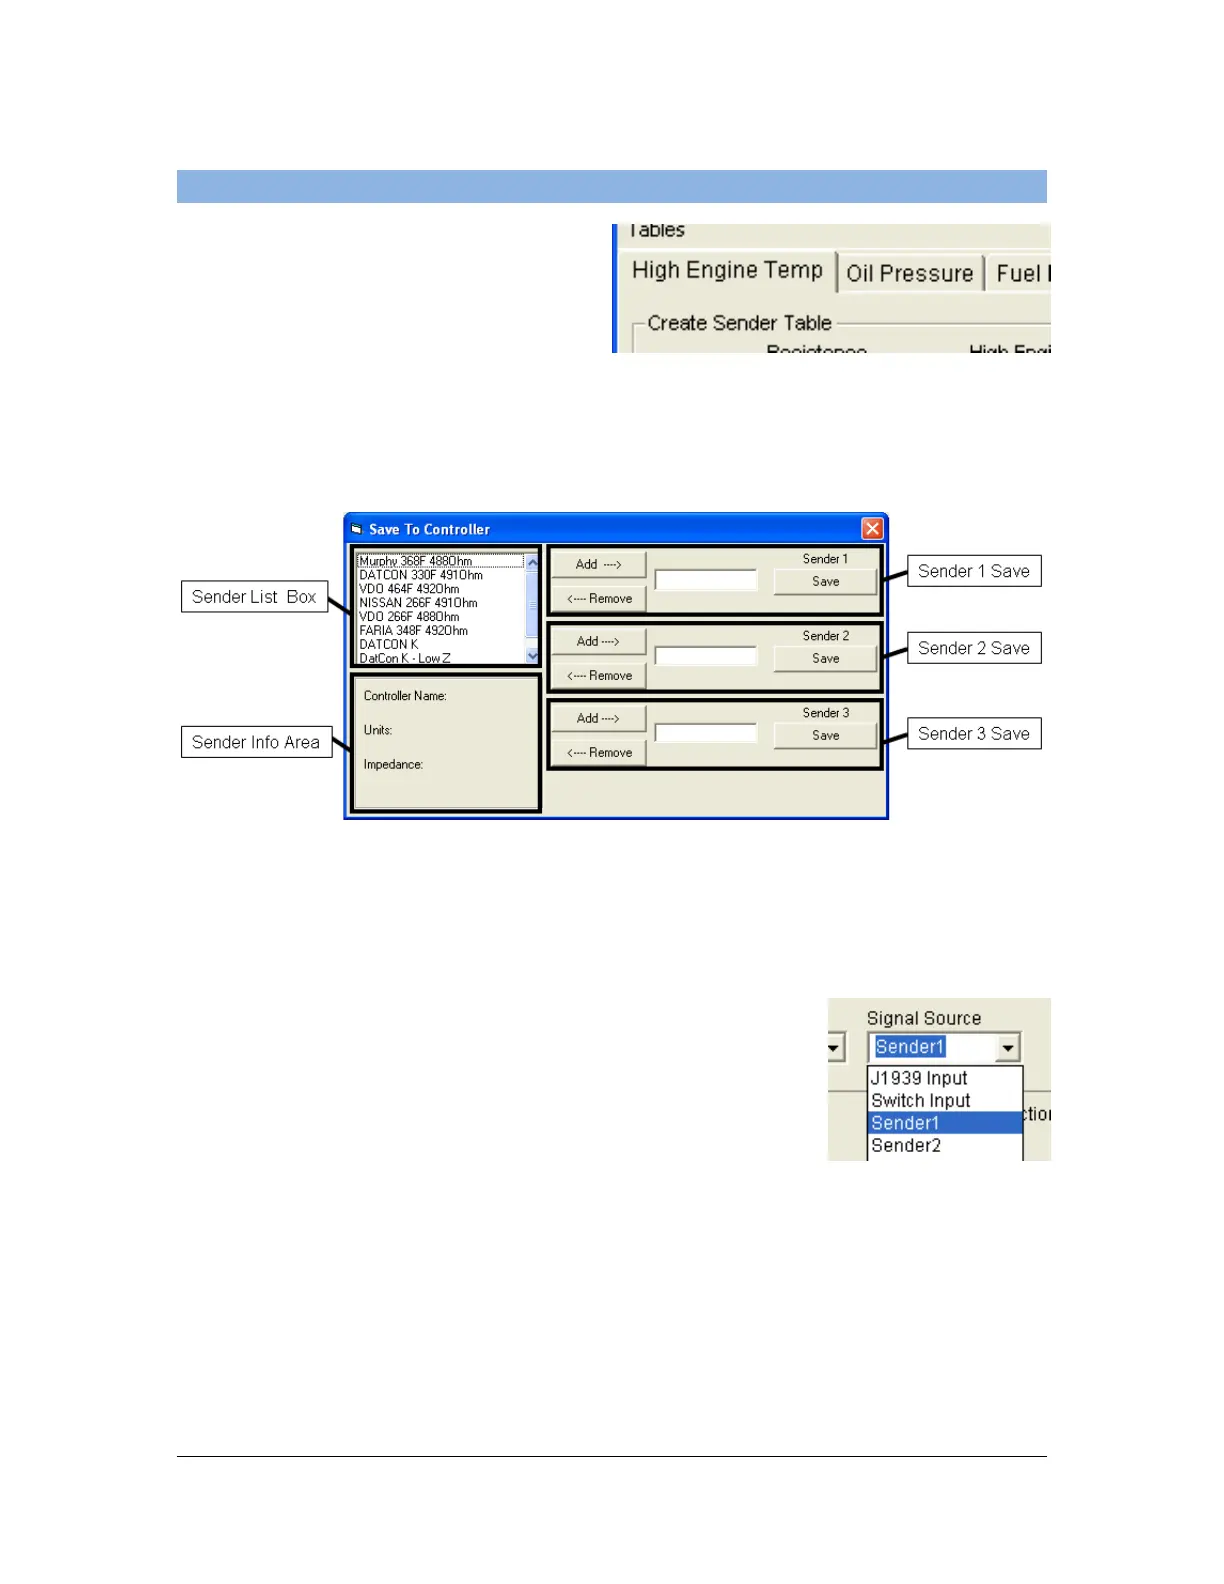
3.4.2 Storing Sender Tables
1. Open up the Utility and click on
the sender type tab. In Figure
39 the High Engine Temp tab is
selected.
Figure 39 – Analog Type Tab in Utility
2. Click the “Save Tables To Controller” button in the lower right hand corner
of the Utility. A new window will open up as shown in Figure 40.
Figure 40 – “Save To Controller” Window
3. Select a sender from the list by clicking on it and click the Add button of
the corresponding sender slot you want it stored to. The controller allows
up to three senders to be loaded for each analog input type (i.e. 3 slots).
Sender 1 would correspond to Sender 1 in the
Signal Source dropdown list in the Analog Inputs
Settings Tab (shown in the screenshot to the right).
In the controller front panel menu, Sender 1 would
correspond to the first sender after the J1939
Input and Switch Input options. Note the
sender’s name is displayed in the
controller’s front panel menu (not Sender 1,
Sender 2, or Sender 3 as in the PC Interface).
4. Click Save for the tables you are loading to the controller. You have to
click save for each table and wait until that table is stored before moving
on to the next table.
Figure 41 – Signal
Source Selection
 Loading...