13
Proteus operation manual
BASIC OPERATION
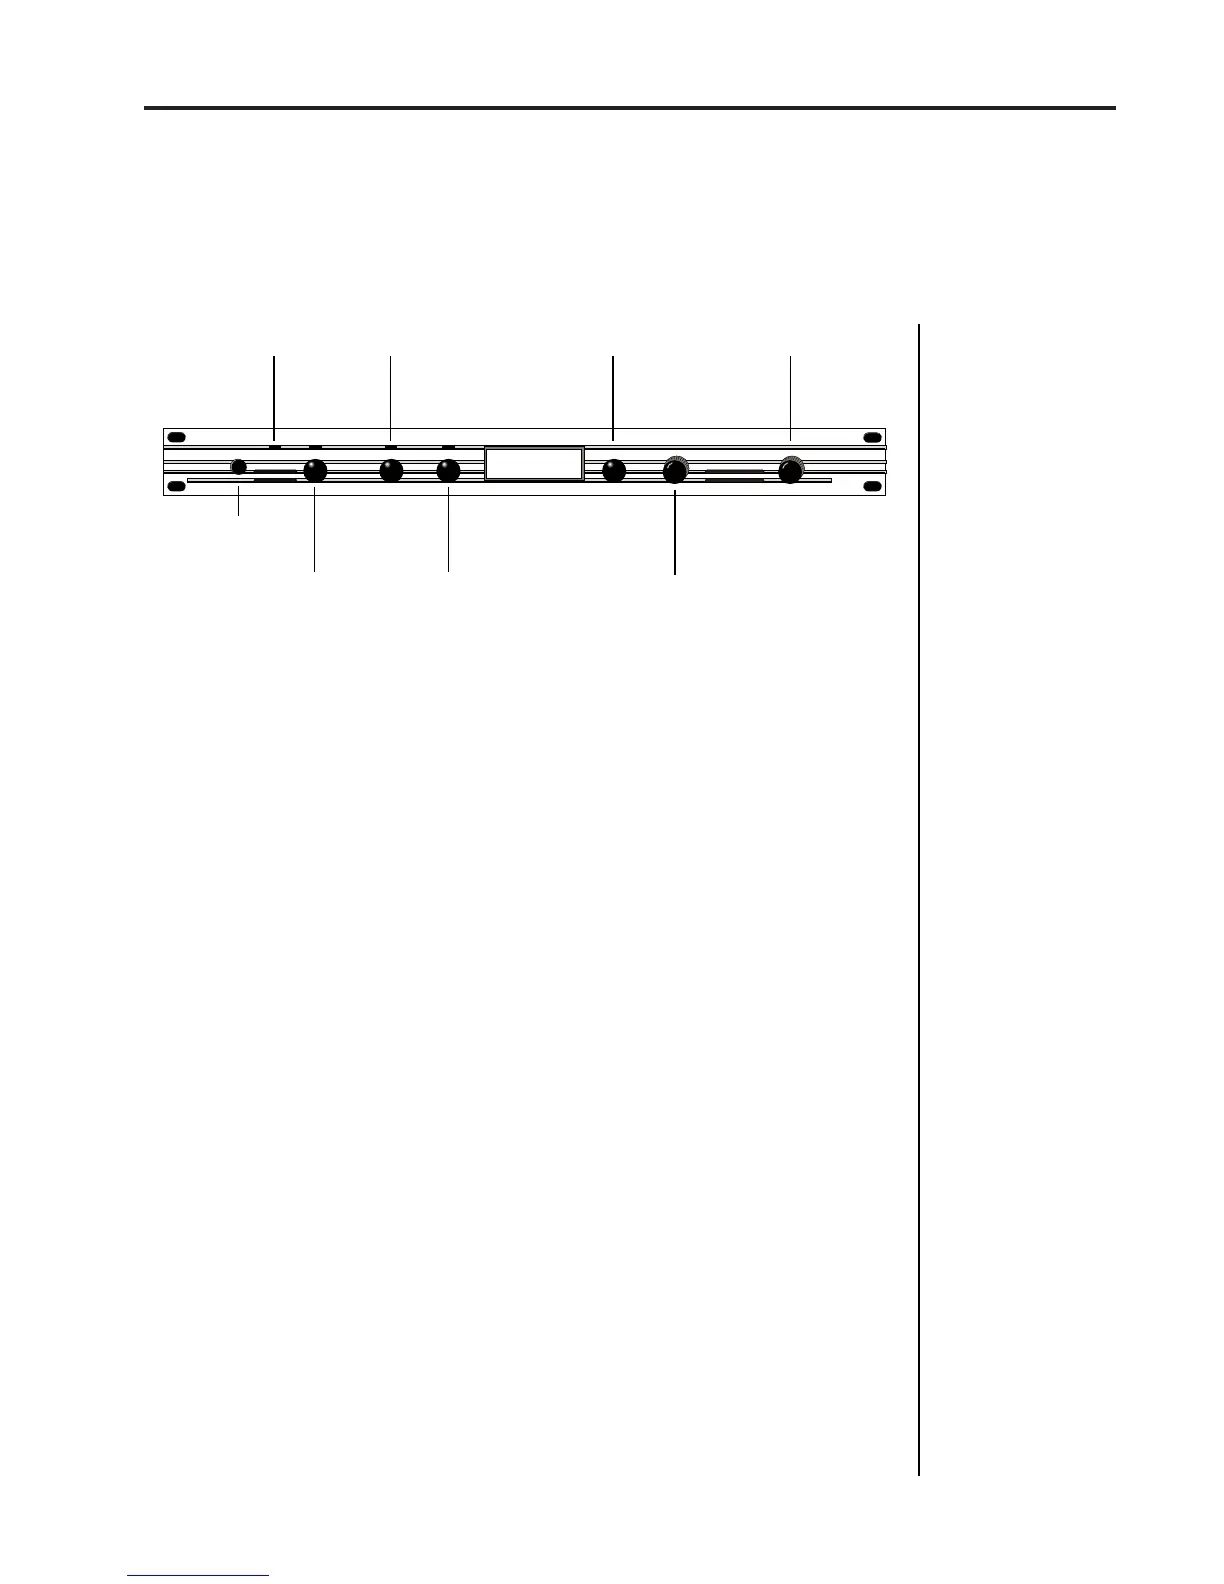
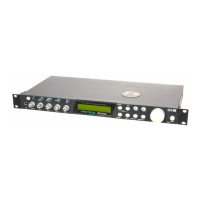
Main Controls
MAIN CONTROLS
■
Power Switch
- Switches AC power to the Proteus ON and OFF.
■
MIDI Activity LED
- Indicates that MIDI data is being received.
■
Master Menu Select Button
- The Master menu contains parameters
that affect the entire machine, not just certain presets. An illuminated LED
above the button indicates that you are in the Master menu.
■
Edit Menu Select Button
- The Edit menu is used when you want to
change parameters of a preset. An illuminated LED above the button
indicates that you are in the Edit menu.
■
Enter Button
- The Enter button is used to initiate a particular operation
within the Proteus. The red LED above the enter button flashes to let you
know that the Proteus is waiting for your response.
■
Cursor Control
- This button moves the cursor to the next parameter
on the display. (The cursor is a little flashing line underneath one of the
parameters in the display.) Press the cursor control repeatedly until the
cursor is underneath the desired parameter. The cursor can also be moved
bidirectionally using the data entry control while the cursor select button
is being held down (i.e. Press and hold the cursor button and turn the data
entry knob).
■
Data Entry Control
- The data entry control is a stepped, variable
control which is used to change parameter values. The control increments
or decrements the current value one unit with each click.
■
Volume Control
- This is the master volume control for all audio
outputs. Note: For maximum dynamic range, set this control at full level.
CURSOR
CONTROL
ENTER
BUTTON
POWER
MASTER EDIT DATA VOLUME
C01 Vol127 Pan+0
000 Preset Name
POWER
SWITCH
MASTER MENU
SELECT
EDIT MENU
SELECT
DATA ENTRY
CONTROL
VOLUME
CONTROL
DISPLAY
MIDI
ACTIVITY
CURSORENTER