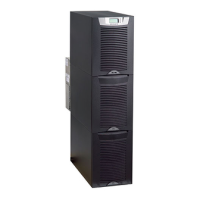
Eaton 9355 UPS (10/15 kVA) User’s Guide 164201594—Rev H0 95
NOTE Before proceeding ensure that there are no active alarms or notices.
2. Set the system to internal Bypass mode:
• Using the
OPERATION
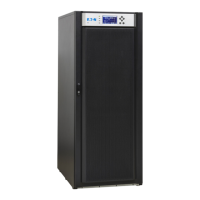
Eaton 9355 UPS (20/30 kVA) Installation and Operation Manual S 164201626 Rev C
74
Display Functions
As the default or after 15 minutes of inactivity, the LCD displays the selectable
startup s creen. The default is the Eaton logo and can be changed to the Mimic screen
in the User Settings menu.
The back lit LCD automatically dims after a long period of inac tiv ity. Press a ny button
to restore the screen.
Use the two middle buttons (
and ) to scroll through the menu structure. Press the
button to enter a submenu. Press the button to select a n option. Press the
ESC
button to cancel or return to the previous menu.
The following table shows the basic menu struc ture.
Table 6. Menu Map for Display Functions
Main Menu Submenu Display Information or Menu Function
UPS Status
UPS off / System normal / UPS supporting load / UPS on battery / UPS on bypass / Active alarm
list / Battery status
For parallel systems: System normal / Battery floating UPS in Parallel mode / Parallel Unit
Number x / Units on CAN Bus / Units on load
Event Log Displays up to 127 events and alarms
Measurements
Parallel System
(parallel UPSs only)
Voltage [by unit] / Voltage [Parallel total] / Output Voltage: L-N / Output Voltage L-L / Output
Current / Output Frequency / Output Power
Output L-N and L-L / Current / Frequency / Power (kW/kVA/pf)
Battery Voltage / Current / Runtime
Input L-N and L-L / Current / Frequency
Bypass L-N and L-L / Frequency
Control
Go to Bypass Mode Transfers the UPS to internal Bypass mode
When this command is active, the option changes to Go to Normal Mode.
Start Battery Test Initiates a battery test
Display Test Four different selectable tests for the front panel functions: the LEDs cycle through, the alarm
beep sounds, the backlight turns off and on, and the pixels scroll through to test the LCD.
Settings
User Settings See Table 7 for detail.
Service Settings This screen is password-protected.
Identification UPS Type / Part Number / Serial Number / F irmware / Display / CAN Bridge
Turn UPS ON/OFF ON and OFF Options
button on the front panel display, scroll to the Control menu option and press the
OPERATION
Eaton 9355 UPS (20/30 kVA) Installation and Operation Manual S 164201626 Rev C
74
Display Functions
As the default or after 15 minutes of inactivity, the LCD displays the selectable
startup s creen. The default is the Eaton logo and can be changed to the Mimic screen
in the User Settings menu.
The back lit LCD automatically dims after a long period of inac tiv ity. Press a ny button
to restore the screen.
Use the two middle buttons (
and ) to scroll through the menu structure. Press the
button to enter a submenu. Press the button to select a n option. Press the
ESC
button to cancel or return to the previous menu.
The following table shows the basic menu struc ture.
Table 6. Menu Map for Display Functions
Main Menu Submenu Display Information or Menu Function
UPS Status
UPS off / System normal / UPS supporting load / UPS on battery / UPS on bypass / Active alarm
list / Battery status
For parallel systems: System normal / Battery floating UPS in Parallel mode / Parallel Unit
Number x / Units on CAN Bus / Units on load
Event Log Displays up to 127 events and alarms
Measurements
Parallel System
(parallel UPSs only)
Voltage [by unit] / Voltage [Parallel total] / Output Voltage: L-N / Output Voltage L-L / Output
Current / Output Frequency / Output Power
Output L-N and L-L / Current / Frequency / Power (kW/kVA/pf)
Battery Voltage / Current / Runtime
Input L-N and L-L / Current / Frequency
Bypass L-N and L-L / Frequency
Control
Go to Bypass Mode Transfers the UPS to internal Bypass mode
When this command is active, the option changes to Go to Normal Mode.
Start Battery Test Initiates a battery test
Display Test Four different selectable tests for the front panel functions: the LEDs cycle through, the alarm
beep sounds, the backlight turns off and on, and the pixels scroll through to test the LCD.
Settings
User Settings See Table 7 for detail.
Service Settings This screen is password-protected.
Identification UPS Type / Part Number / Serial Number / F irmware / Display / CAN Bridge
Turn UPS ON/OFF ON and OFF Options
button.
• Press the
OPERATION
Eaton 9355 UPS (20/30 kVA) Installation and Operation Manual S 164201626 Rev C
74
Display Functions
As the default or after 15 minutes of inactivity, the LCD displays the selectable
startup s creen. The default is the Eaton logo and can be changed to the Mimic screen
in the User Settings menu.
The back lit LCD automatically dims after a long period of inac tiv ity. Press a ny button
to restore the screen.
Use the two middle buttons (
and ) to scroll through the menu structure. Press the
button to enter a submenu. Press the button to select a n option. Press the
ESC
button to cancel or return to the previous menu.
The following table shows the basic menu struc ture.
Table 6. Menu Map for Display Functions
Main Menu Submenu Display Information or Menu Function
UPS Status
UPS off / System normal / UPS supporting load / UPS on battery / UPS on bypass / Active alarm
list / Battery status
For parallel systems: System normal / Battery floating UPS in Parallel mode / Parallel Unit
Number x / Units on CAN Bus / Units on load
Event Log Displays up to 127 events and alarms
Measurements
Parallel System
(parallel UPSs only)
Voltage [by unit] / Voltage [Parallel total] / Output Voltage: L-N / Output Voltage L-L / Output
Current / Output Frequency / Output Power
Output L-N and L-L / Current / Frequency / Power (kW/kVA/pf)
Battery Voltage / Current / Runtime
Input L-N and L-L / Current / Frequency
Bypass L-N and L-L / Frequency
Control
Go to Bypass Mode Transfers the UPS to internal Bypass mode
When this command is active, the option changes to Go to Normal Mode.
Start Battery Test Initiates a battery test
Display Test Four different selectable tests for the front panel functions: the LEDs cycle through, the alarm
beep sounds, the backlight turns off and on, and the pixels scroll through to test the LCD.
Settings
User Settings See Table 7 for detail.
Service Settings This screen is password-protected.
Identification UPS Type / Part Number / Serial Number / F irmware / Display / CAN Bridge
Turn UPS ON/OFF ON and OFF Options
button to select the Go to Bypass Mode option.
The
OPERATION
Eaton 9355 UPS (20/30 kVA) Installation and Operation Manual S 164201626 Rev C
79
Internal Bypass Startup
To start the UPS when the load is powered by the internal bypass:
1. Remove the UPS front door (see page 10).
2. Verify that the maintenance bypass switch is in the SERVICE position (see
Figure 55 on page 85).
3. Switch on utility power where the UPS is c onnected.
4. Switch the UPS input circuit breaker to the ON position.
5. If the optiona l UPS output circuit breaker is installed, switch the breaker to the
ON position.
6. Wait for the front panel LCD to illuminate.
The
indicator flashes.
7. Switch the UPS battery circuit breaker to the ON position.
The
indicator stops flashing.
The UPS starts and transfers to Bypass mode. This may take up to 1 minute.
The
indicator flashes while transfering to bypass then goes out with the
illuminating to indicate the UPS is operating in B ypass mode. The load is now
powered by utility power.
The display indicates On Manual/Maintenance Bypass.
8. To switch to Normal mode from internal Bypass mode, rotate the maintenance
bypass switch to the UPS position.
The
indicator illuminates to indicate the UPS is operating in UPS mode. The
load is now powered by UPS.
9. Replac e the UPS front door.
UPS Maintenance Bypass Startup
To start the UPS in maintenance bypass:
1. Remove the UPS front door (see page 10).
2. Verify that the maintenance bypass switch is in the BYPASS position (see
Figure 55 on page 85).
3. Replac e the UPS front door.
4. Switch on utility power where the UPS is c onnected.
The load is now powered by utility power.
5. To transfer the load to the UPS, see “Using the UPS Maintenance Bypass
Switch”onpage85.
indicator illuminates and the
OPERATION
Eaton 9355 UPS (20/30 kVA) Installation and Operation Manual S 164201626 Rev C
77
UPS Startup
WARNING
Only qualified service personnel (such as a licensed electrician) should perform the UPS installation and
initial startup. Risk of electrical shock.
Verify that UPS installation has been carried out correctly and the UPS ground has
been connected.
Select one of the following s tartup options:
Startup Option Section
Normal mode “Normal Mode Startup” on page 77
Battery mode “Starting the UPS on Battery“ on page 78
Bypass mode “Internal Bypass Startup” on page 79
UPS maintenance bypass “UPS Maintenance Bypass Startup” on page 79
Normal Mode Startup
To start up the UPS when the load is de-energized:
1. Remove the UPS front door (see page 10).
2. Verify that the rotary maintenance bypass switch is in the UPS position (see
Figure 55 on page 85).
3. Switch on utility power where the UPS is c onnected.
4. Switch the UPS input circuit breaker to the ON position.
5. If the optiona l UPS output circuit breaker is installed, switch the breaker to the
ON position.
6. Wait for the front panel LCD to illuminate.
The
indicator flashes.
7. Switch the battery circuit breaker to the ON position.
The
indicator stops flashing.
8. Press any button on the front panel display to activate the menu options.
9. Press the
button on the front panel display a nd then press the button to
select the TURN UPS ON/OFF menu.
10. Select the TURN UPS ON option. Press and hold the
button for three
seconds, until the UPS stops beeping.
The UPS precharges for a few minutes and then the
indicator illuminates.
The UPS is now powering the load.
If the
indicator is flashing, check the UPS status from the front panel to view
the active alarms. Correct the alarms and restart if necessary.
11. Replace the UPS front door.
indicator extinguishes, indicating the UPS system is
operating in Bypass mode.
3. Turn the Maintenance Bypass rotary switch on the back of the UPS to the SERVICE position.
Verify the load is transferred by viewing the output meters screen.
The Normal LED
Eaton 9355 UPS (20/30 kVA) Installation and Operation Manual S 164201626 Rev C
73
Chapter 10 Operation
This chapter contains information on how to use the Eaton 9355 UPS, inc luding front
panel operation, UPS startup and shutdown, and configuring the UPS for Ex tended
Battery Cabinets (EBCs).
Control Panel Functions
The UPS has a four-button graphical LCD with backlight. It provides useful information
about the UPS itself, load status, events, measurements, and settings (see
Figure 53).
Power On Indicator (green)
On Battery Indicator (yellow)
Bypass Indicator (yellow)
Alarm Indicator (red)
Control Buttons
for the LCD Menu Options
Figure 53. Eaton 9355 UPS Control Panel
The following table shows the indicator status and description:
Indicator Status Description
Green
On The UPS is operating normally.
Flashing S The UPS is starting up or is shut down and waiting for power to return.
S A new information message is active.
S Bypass is not available.
Off The UPS is turned off and will not turn on automatically.
Yellow
On The UPS is in Battery mode.
Yellow
On The UPS is in Bypass mode.
Red
On The UPS has an active alarm.
Flashing There is a new UPS alarm condition. See “Troubleshooting” on page 93 for additional information.
Changing the Language
Press and hold the first button on the left for approximately five seconds to select the
language menu. This action is possible from any LCD menu screen.
will be flashing.
The UPS is now bypassed, with the load powered by utility power.
4. Command the UPS off.
Press the
OPERATION
Eaton 9355 UPS (20/30 kVA) Installation and Operation Manual S 164201626 Rev C
74
Display Functions
As the default or after 15 minutes of inactivity, the LCD displays the selectable
startup s creen. The default is the Eaton logo and can be changed to the Mimic screen
in the User Settings menu.
The back lit LCD automatically dims after a long period of inac tiv ity. Press a ny button
to restore the screen.
Use the two middle buttons (
and ) to scroll through the menu structure. Press the
button to enter a submenu. Press the button to select a n option. Press the
ESC
button to cancel or return to the previous menu.
The following table shows the basic menu struc ture.
Table 6. Menu Map for Display Functions
Main Menu Submenu Display Information or Menu Function
UPS Status
UPS off / System normal / UPS supporting load / UPS on battery / UPS on bypass / Active alarm
list / Battery status
For parallel systems: System normal / Battery floating UPS in Parallel mode / Parallel Unit
Number x / Units on CAN Bus / Units on load
Event Log Displays up to 127 events and alarms
Measurements
Parallel System
(parallel UPSs only)
Voltage [by unit] / Voltage [Parallel total] / Output Voltage: L-N / Output Voltage L-L / Output
Current / Output Frequency / Output Power
Output L-N and L-L / Current / Frequency / Power (kW/kVA/pf)
Battery Voltage / Current / Runtime
Input L-N and L-L / Current / Frequency
Bypass L-N and L-L / Frequency
Control
Go to Bypass Mode Transfers the UPS to internal Bypass mode
When this command is active, the option changes to Go to Normal Mode.
Start Battery Test Initiates a battery test
Display Test Four different selectable tests for the front panel functions: the LEDs cycle through, the alarm
beep sounds, the backlight turns off and on, and the pixels scroll through to test the LCD.
Settings
User Settings See Table 7 for detail.
Service Settings This screen is password-protected.
Identification UPS Type / Part Number / Serial Number / F irmware / Display / CAN Bridge
Turn UPS ON/OFF ON and OFF Options
button on the front display, scroll to the UPS On/Off menu. Press the
OPERATION
Eaton 9355 UPS (20/30 kVA) Installation and Operation Manual S 164201626 Rev C
74
Display Functions
As the default or after 15 minutes of inactivity, the LCD displays the selectable
startup s creen. The default is the Eaton logo and can be changed to the Mimic screen
in the User Settings menu.
The back lit LCD automatically dims after a long period of inac tiv ity. Press a ny button
to restore the screen.
Use the two middle buttons (
and ) to scroll through the menu structure. Press the
button to enter a submenu. Press the button to select a n option. Press the
ESC
button to cancel or return to the previous menu.
The following table shows the basic menu struc ture.
Table 6. Menu Map for Display Functions
Main Menu Submenu Display Information or Menu Function
UPS Status
UPS off / System normal / UPS supporting load / UPS on battery / UPS on bypass / Active alarm
list / Battery status
For parallel systems: System normal / Battery floating UPS in Parallel mode / Parallel Unit
Number x / Units on CAN Bus / Units on load
Event Log Displays up to 127 events and alarms
Measurements
Parallel System
(parallel UPSs only)
Voltage [by unit] / Voltage [Parallel total] / Output Voltage: L-N / Output Voltage L-L / Output
Current / Output Frequency / Output Power
Output L-N and L-L / Current / Frequency / Power (kW/kVA/pf)
Battery Voltage / Current / Runtime
Input L-N and L-L / Current / Frequency
Bypass L-N and L-L / Frequency
Control
Go to Bypass Mode Transfers the UPS to internal Bypass mode
When this command is active, the option changes to Go to Normal Mode.
Start Battery Test Initiates a battery test
Display Test Four different selectable tests for the front panel functions: the LEDs cycle through, the alarm
beep sounds, the backlight turns off and on, and the pixels scroll through to test the LCD.
Settings
User Settings See Table 7 for detail.
Service Settings This screen is password-protected.
Identification UPS Type / Part Number / Serial Number / F irmware / Display / CAN Bridge
Turn UPS ON/OFF ON and OFF Options
button to turn the
UPS off.
Rear fan is running signifying load is being supplied utility power on bypass.
5. Switch all of the UPS battery circuit breakers to the Off position.
6. Turn the Maintenance Bypass rotary switch on the back of the UPS to the BYPASS position.
77..44..11..22 TTrraannssffeerr tthhee llooaadd ffrroomm mmaaiinntteennaannccee bbyyppaassss ttoo tthhee UUPPSS
1. Turn the maintenance bypass switch on the back of the UPS to the SERVICE position (see Figure 73).
2. Switch all of the UPS battery circuit breakers to the ON position.
3. Wait 1.5 to 2 minutes for the internal startup process to complete.
Wait until the bypass indicator illuminates and the two front fans are operating before proceeding to the
next step.
Verify the output voltage is present on the meters screen.
4. Turn the maintenance bypass switch on the back of the UPS to the UPS position to return to Normal
mode.
When the green UPS normal indicator illuminates, the UPS is powering the load.
Verify the load is transferred to the UPS by viewing the output meters screen.
5. Reinstall any ConnectUPS Web/SNMP or PXGX cards, secure with retained hardware and connect cables.
77..55 OOppeerraattiinngg tthhee WWaallll--MMoouunntteedd BByyppaassss CCaabbiinneett
To transfer the load from the UPS to maintenance bypass:
1. Transfer the UPS to Bypass mode:
• Press any button on the front panel display to activate the menu options.
• Using the
OPERATION
Eaton 9355 UPS (10/15 kVA) User's Guide S 164201594 Rev D
82
The following table shows the indicator status and description.
Indicator Status Description
Green
On The UPS is operating normally.
Flashing S The UPS is starting up or is shut down and waiting for power to return.
S A new information message is active.
S Bypass is not available.
Off The UPS is turned off and will not turn on automatically.
Yellow
On The UPS is in Battery mode.
Yellow
On The UPS is in Bypass mode.
Red
On The UPS has an active alarm.
Flashing There is a new UPS alarm condition. See “Troubleshooting” on page 105 for
additional information.
Changing the Language
Press and hold the first button on the left for a pproximately five s econds
to selec t the language menu. This action is possible from any LCD menu
screen.
Display Functions
As the default or after 15 minutes of inactivity, the LCD displays the
selectable s tartup screen. The default is the Eaton logo and can be
changed to the Mimic sc reen in the User Settings menu.
The bac klit LCD automatically dims after a long period of inac tivity. Press
any button to restore the screen.
Use the two middle buttons (
and ) to scroll through the menu
structure. Press the
button to enter a submenu. Press the button
to select an option. Press the
ESC
button to cancel or return to the
previous menu.
button on the front panel display, scroll to the Control menu option and press the
OPERATION
Eaton 9355 UPS (10/15 kVA) User's Guide S 164201594 Rev D
82
The following table shows the indicator status and description.
Indicator Status Description
Green
On The UPS is operating normally.
Flashing S The UPS is starting up or is shut down and waiting for power to return.
S A new information message is active.
S Bypass is not available.
Off The UPS is turned off and will not turn on automatically.
Yellow
On The UPS is in Battery mode.
Yellow
On The UPS is in Bypass mode.
Red
On The UPS has an active alarm.
Flashing There is a new UPS alarm condition. See “Troubleshooting” on page 105 for
additional information.
Changing the Language
Press and hold the first button on the left for a pproximately five s econds
to selec t the language menu. This action is possible from any LCD menu
screen.
Display Functions
As the default or after 15 minutes of inactivity, the LCD displays the
selectable s tartup screen. The default is the Eaton logo and can be
changed to the Mimic sc reen in the User Settings menu.
The bac klit LCD automatically dims after a long period of inac tivity. Press
any button to restore the screen.
Use the two middle buttons (
and ) to scroll through the menu
structure. Press the
button to enter a submenu. Press the button
to select an option. Press the
ESC
button to cancel or return to the
previous menu.
button.
• Press the
CORD KIT INSTRUCTIONS
Eaton BladeUPS Cord Kit Instructions S 164201721 Rev 2 Draft 13-APR-2010
5
Removing the Existing Power Cords
To remove the existing power cords:
1. If the UPS and internal batteries are already installed, continue to
Step 2. If the UPS and internal batteries are not installed, continue
to Step 15.
2. You MUST shut down the UPS before replacing the cord assembly.
Continue to Step 3 to shut down a standalone UPS.
For parallel shutdown procedures, refer to the Eaton BladeUPS
(12 kVA) User's Guide and then continue to Step 11.
3. Switch the load connector circuit breaker to the OFF (O) position
(see Figure 2).
NOTE The load connector breaker controls the load connector only, not the output power.
4. Press any button on the front panel display to activate the menu
options. Select TURN UPS ON/OFF, TURN UPS OFF, and press the
button.
5. Confirm the selection. Press and hold the
button for three
seconds, until the UPS stops beeping.
The output relays open, the UPS transfers to Standby mode, and
the
indicator turns off.
6. Switch the UPS battery circuit breaker to the OFF (O) position.
7. If optional EBMs are installed, switch all EBM battery circuit
breakers to the OFF (O) position.
Disconnect the EBM cable from the UPS extended battery
connector.
8. Switch the UPS input circuit breaker to the OFF (O) position.
9. Switch off utility power where the UPS is connected.
10. Unplug the power cords.
button to select the Go to Bypass Mode option.
UPS Operating Instructions

 Loading...