INSTALLATION
EATON BladeUPS
®
(12 kVA) User's Guide S 164201649 Rev 4www.eaton.com/powerquality
27
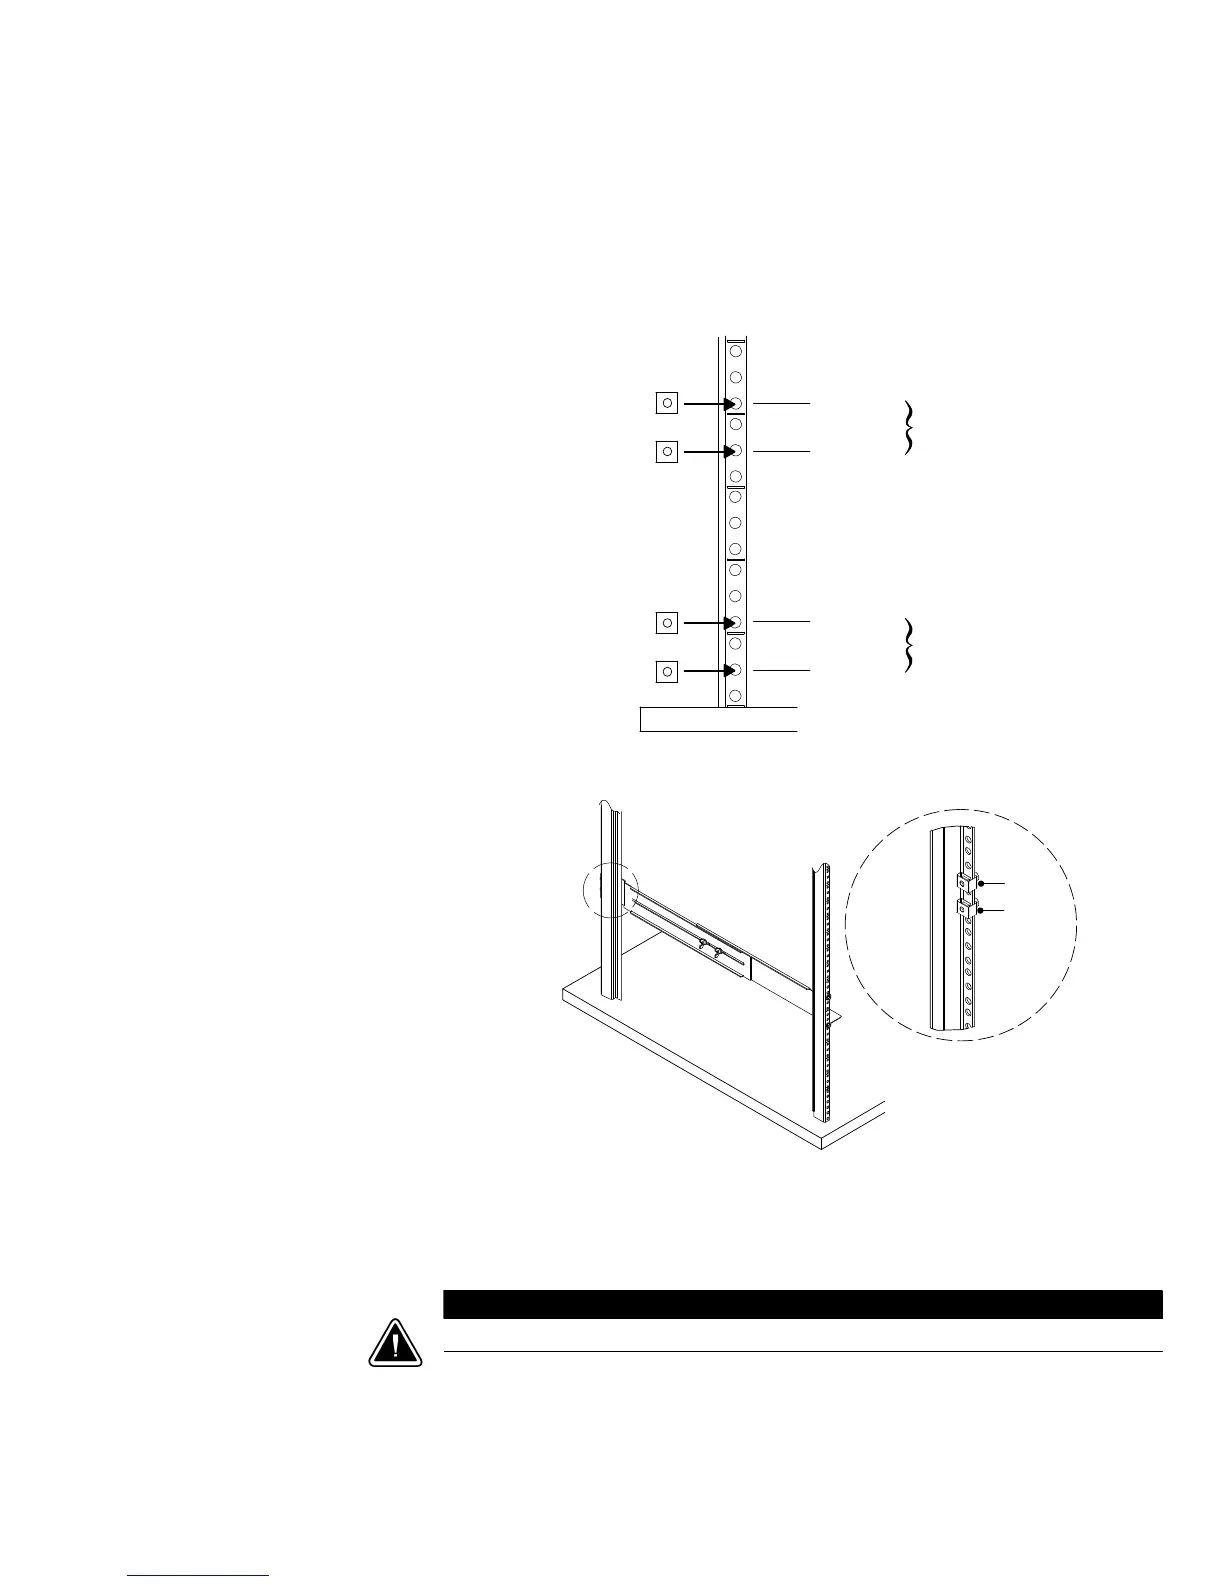
4. Using two clip nuts and two hex-head screws, attach the rail to the rear of the
rack (see Figure 12 and Figure 13).
The bottom rail uses positions 2 and 4 for the rear hex-head screws. If you are
installing additional rails, place the next rail 7 holes above the last installed screw.
Position 2
Position 4
Position 11
Position 13
First Rail
Second Rail
Figure 12. Rear Rail Screw Positions for the EBM
Clip Nuts
Figure 13. Securing the Rear Rail
5. Repeat Steps 3 and 4 for the other rail.
6. Tighten the assembly wing nuts on both rail assemblies.
C A U T I O N
The EBM is heavy (see page 99). Moving the EBM requires a minimum of two people.
7. Place the EBM on a flat, stable surface with the front of the EBM facing toward
you.
8. If the mounting brackets are not already installed, align the two mounting
brackets with the screw holes on the side of the EBM and secure with the
supplied 6-32 flat-head screws (see Figure 14).

 Loading...