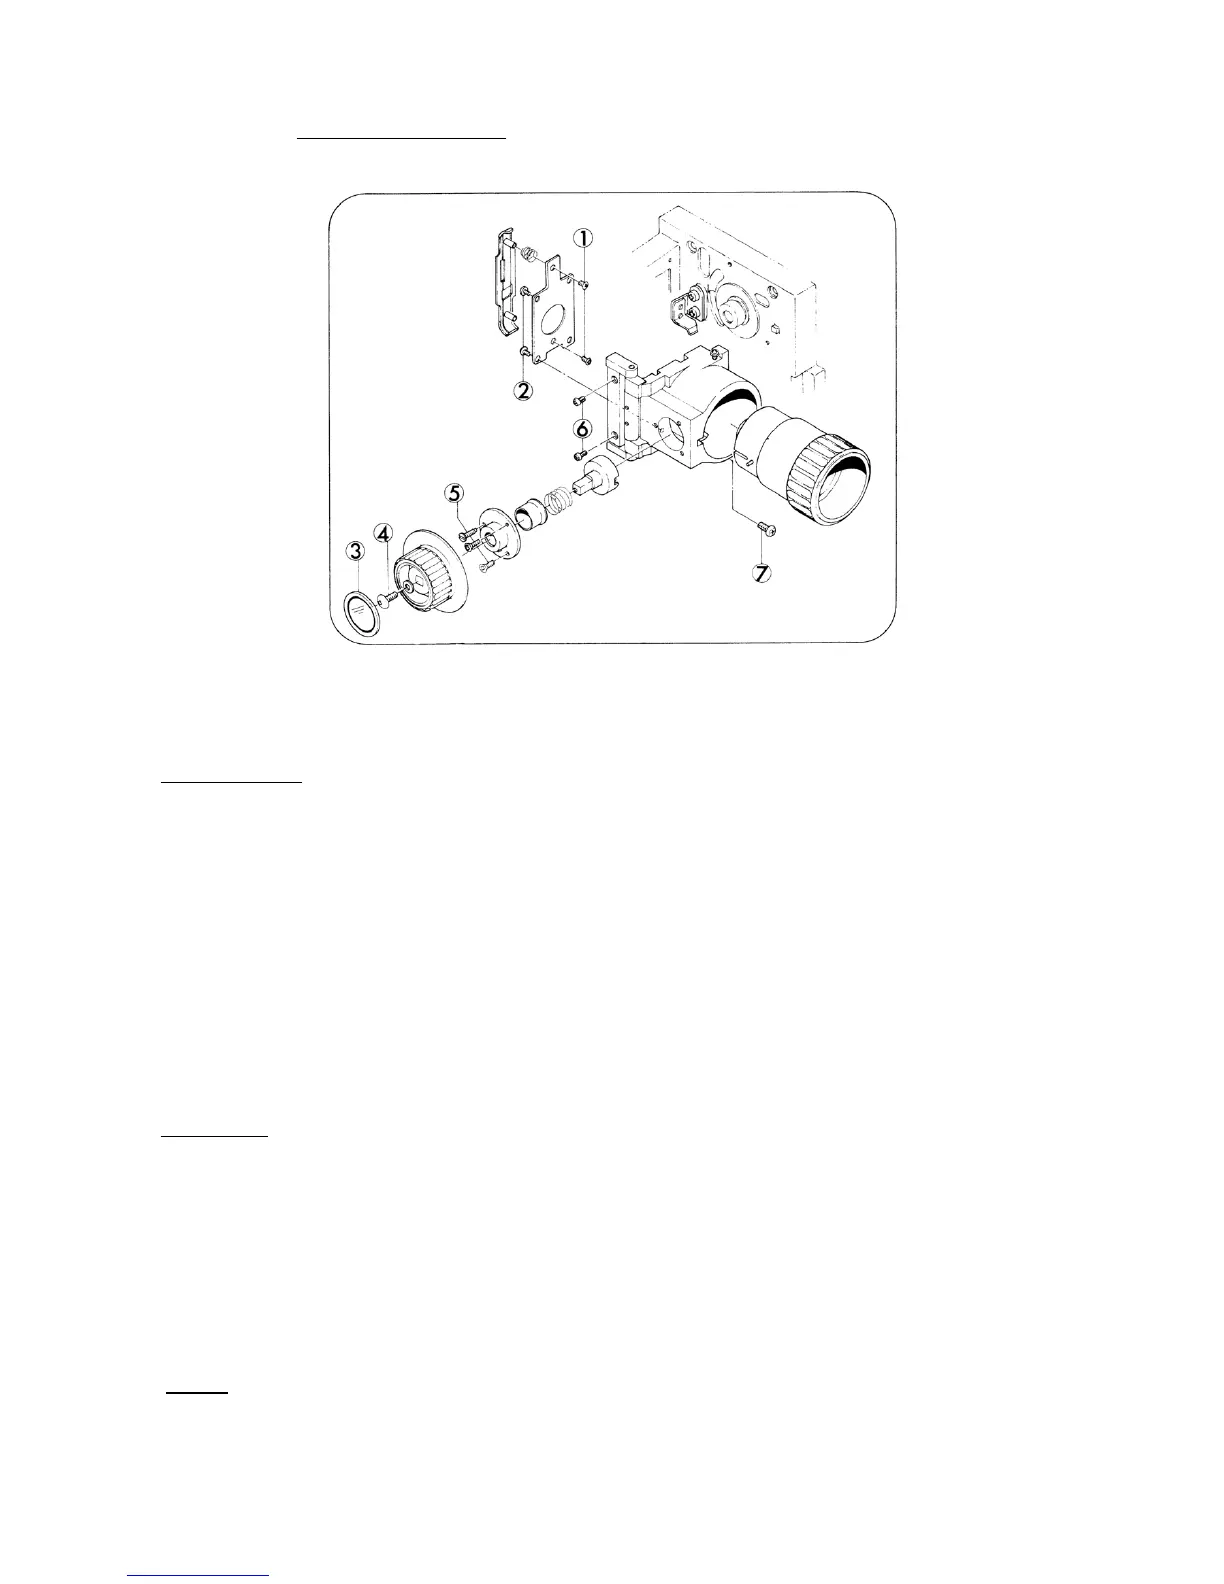
3. LENS HOLDER (Fig. 7)
Fig. 7
DISASSEMBLY
1. Turn Focusing knob fully clockwise and pullout Projection lens.
2. Take out attaching screws (Fig.7-1,x2) and remove Pressure plate assy and Pressure plate
spring.
3. Take out attaching screws (Fig.7-2,x4) and remove Pressure plate holder.
4. Strip off Focusing plate (Fig.7-3).
5. Take out Lamp socket holder screw (Fig.7-4) and remove Focusing knob.
6. Take out attaching screws (Fig.7-5,x2) and Focusing guide pin, then remove Focusing cam
mount, Tube, Focusing spring and Focusing cam.
7. Take out attaching screws (Fig.7-6,x2) and remove Lens holder assy.
ASSEMBLY
1. As to the assembling, follow the reverse way of the above steps.
2. Lubricate Focusing cam with permalub H3002 grease.
3. Lens holder assy should not only smoothly move back and forth but also be certainly locked by
Click spring.
4. To align the optical axis, first pass the focusing test film and either tighten or loosen attaching
screw (Fig.7-7) to obtain evenness in focusing. Then, secure the screw with screw-tight.
NOTE: Attach Focusing cam mount as the stopper (Protuberance) of Focusing cam mount towards
lower side.
- 7 -