27
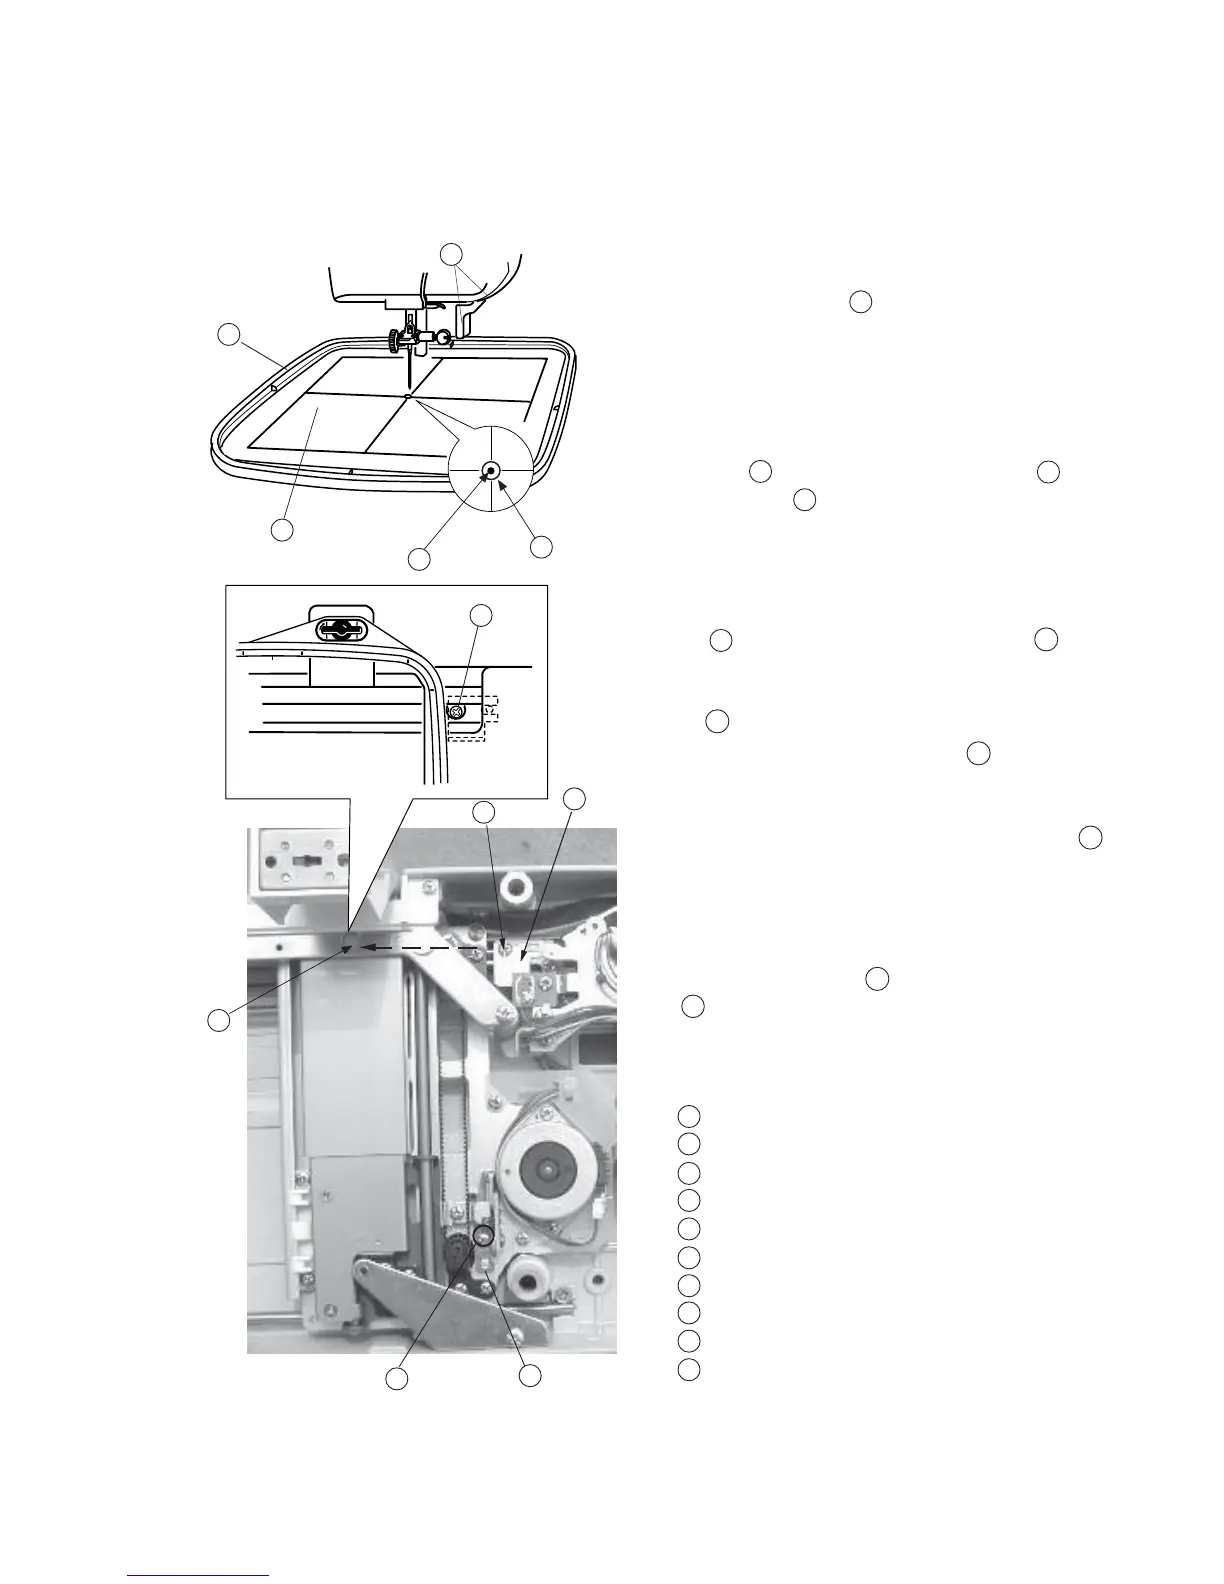
Adjusting X and Y Sensors (Instant Adjustment)
To adjust X and Y sensor (without removing the base unit):
1 Remove the base cover.
2 Remove the presser foot holder and attach the
Embroidery foop (A) .
3Turn the Power “ON” and select the Embroidery
Mode, then press pattern No.1.
4Turn the handwheel by hand to check that the
Needle drops into the Starting position on
the Template .
5Turn the Power “OFF”.
6 If the needle position shifts in Y direction, loosen Screw
(A) and move the Y sensor fixing plate to
adjust the needle drop position.
7If the needle position shifts in X direction, loosen Screw
“B” through the sheet cover fixing plate hole and
adjust the X shield plate possition .
8Turn the Power “ON” and select pattern No.1 on the
Embroidery Mode, then check the Start position .
9 Return the carriage to the home position and turn the
Power “OFF”.
10. Remove the Template and the Embroidery hoop
, then reattach the base cover.
Embroidery hoop (A)
Template
Marks
Needle
Start position
Screw (B)
X-shield plate
Sheet cover fixing hole
Screw (A)
Y-Sensor fixing plate
10
8
6
7
3
2
1
4
5
6
9
1
5
4
2
9
10
6
7
5
2
1
1
2
3
4
5
6
7
8
9
10