31
ČEŠTINA HRVATSKI ΕΛΛΗΝΙΚΑ ENGLISH
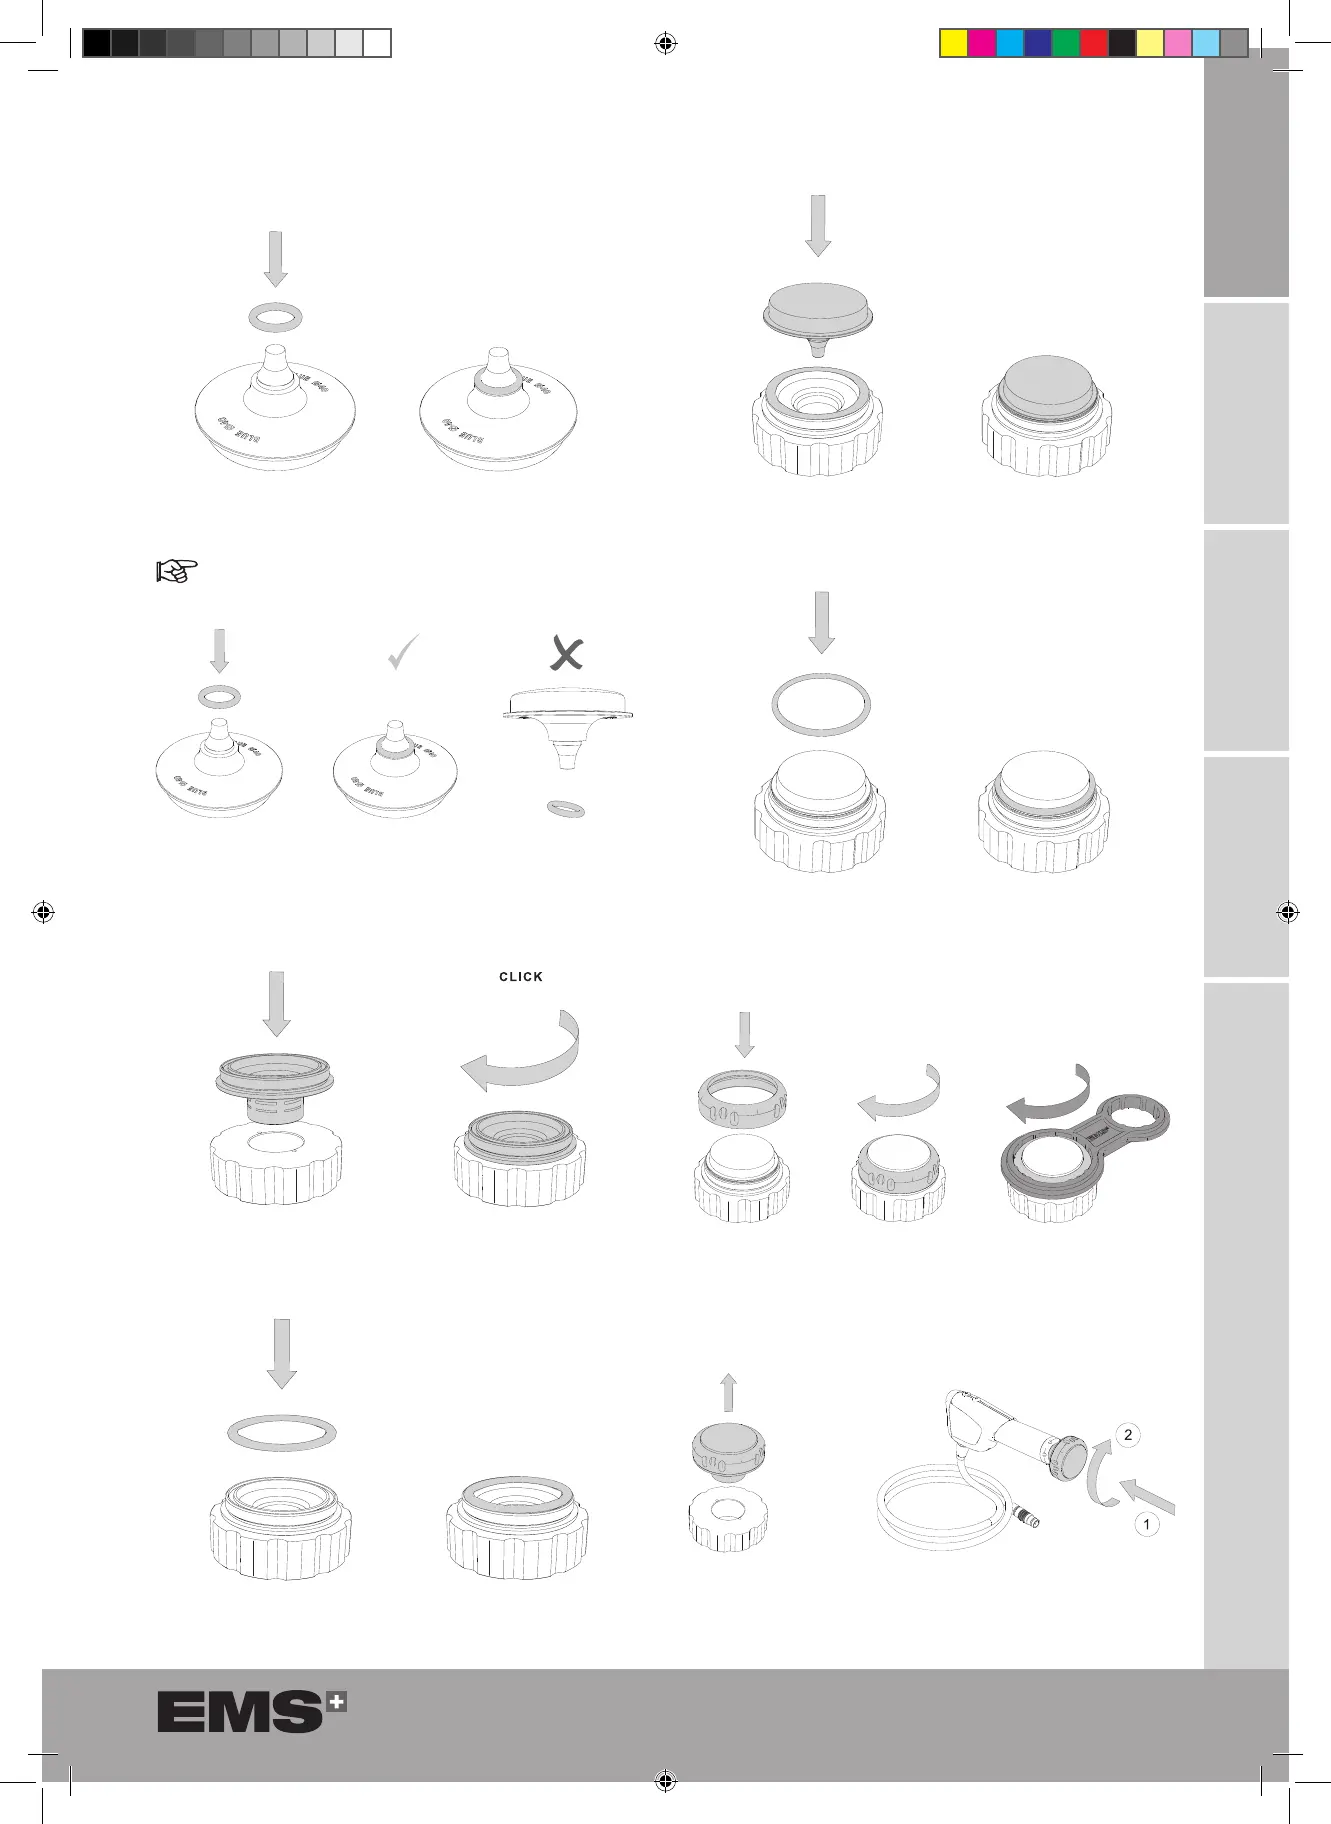
9. To assemble the O-rings , place the O-ring on the
groove of the applicator.
Figure 77
Ensure the O-ring is correctly positioned.
Figure 78
10. Place the applicator on the support. Make sure that the
applicator is positioned on the metal positioning pins.
Figure 79
11. Place the O-ring on the groove of the nose.
Figure 80
12. Place the applicator on the nose.
Figure 81
13. Place the O-ring on the applicator.
Figure 82
14. Tighten the nut manually and nish tightening it with
the dedicated wrench.
Figure 83
15. Remove the applicator from the support and screw it
onto the handpiece.
Figure 84
00_FB-656_10_rev_A_IFU_Dolorclast RSW.indb 3100_FB-656_10_rev_A_IFU_Dolorclast RSW.indb 31 25/03/2021 17:0725/03/2021 17:07