qTOWER iris Operation
21
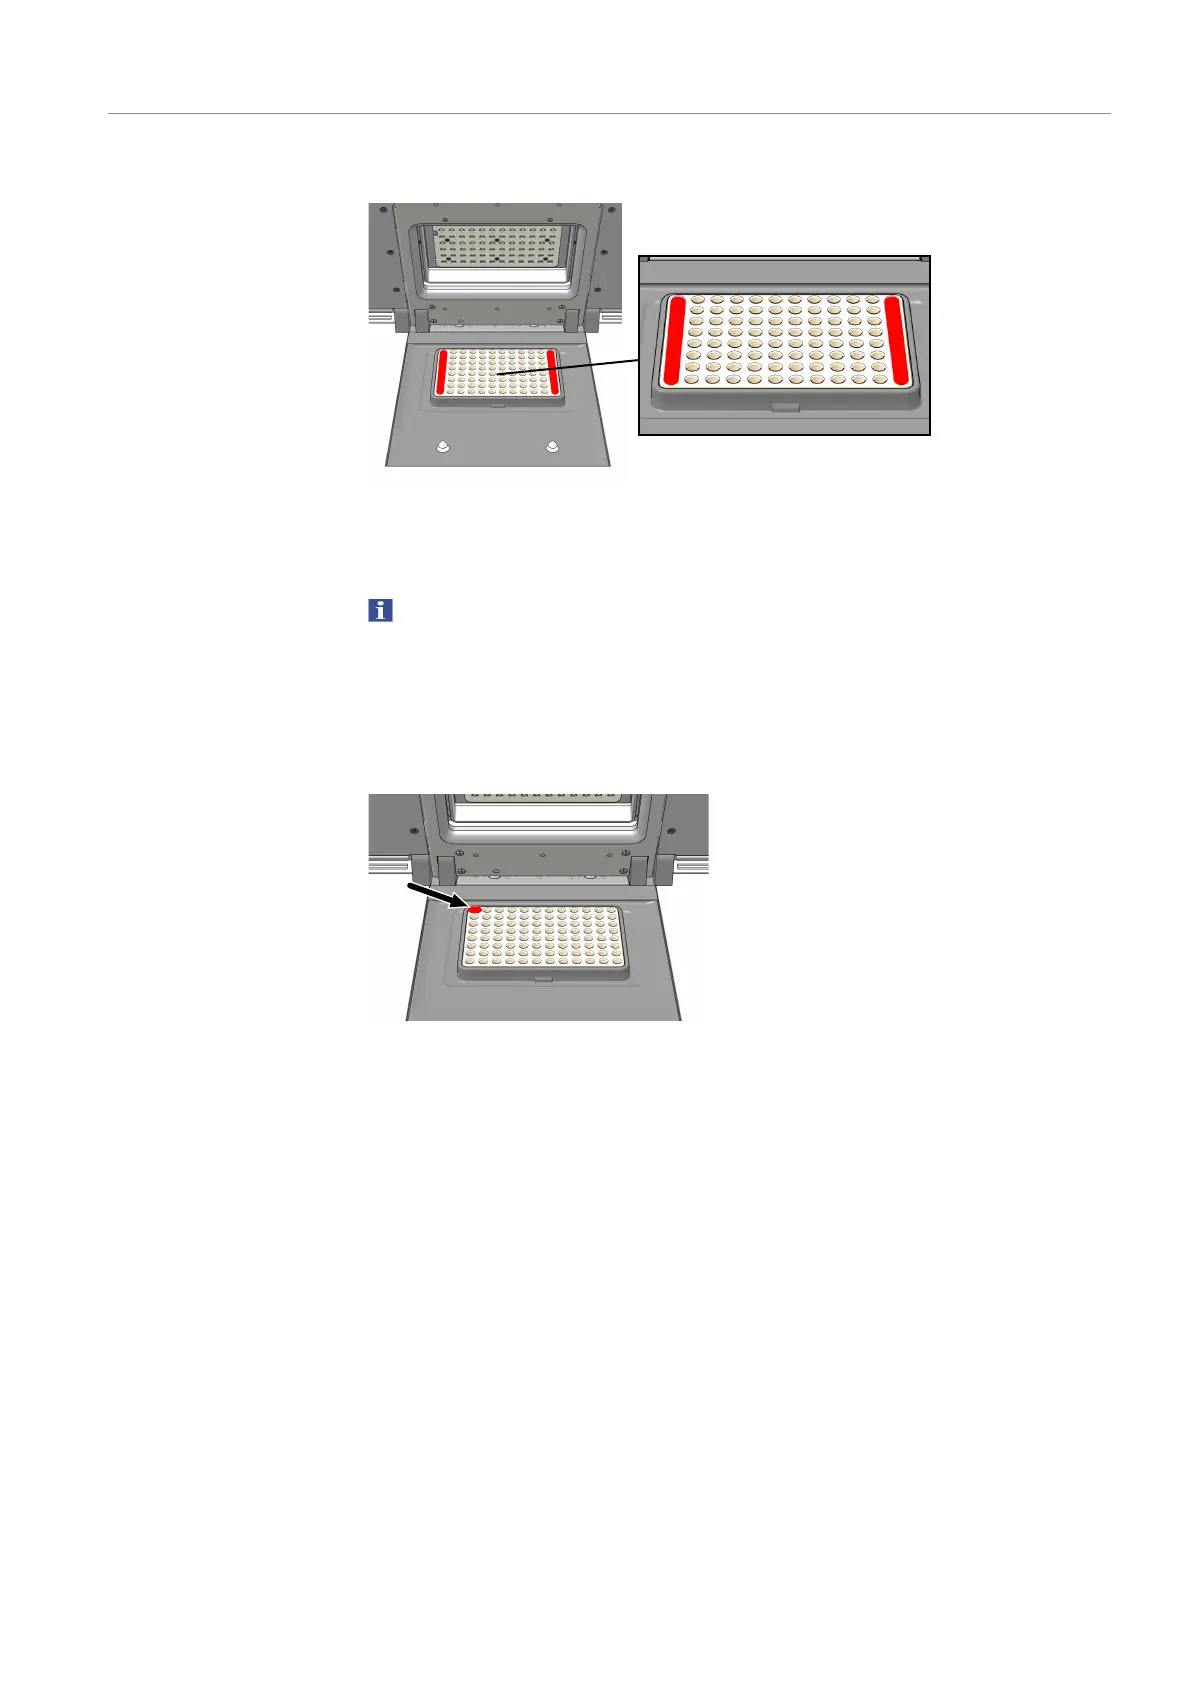
¡ When using few well strips, place one strip on each side of the sample block.
Fig.9 Positions of additional 8-well strips when measuring with few samples
Start a real-time PCR analysis as follows:
} Pipette the PCR samples into the sample vessels. Close the sample vessels.
NOTICE!Micro titer plates must be sealed with optically transparent adhesive foil
(sealing foil). The optical transparency of the foils affects the fluorescence signal di-
rectly. For this reason, only use clear adhesive foil such as that provided for real-time
PCR. 0.2mL individual tubes and 8-well strips must be sealed with suitable correspond-
ing optical lids.
} Prepare a real-time PCR project with complete information on the PCR run, floures-
cence measurement and sample layout of the PCR plate.
Fig.10 Position A1 in the sample block
} Open the lid. To do so, press in the red handle on the front until the lock clicks open.
Fold back the upper part of the device.
} Place the samples. Observe the information on placing samples when measuring few
samples when doing this. When using PCR plates, place these on the thermal block
so that well A1 is on the left-hand side (arrow in the illustration below). This posi-
tion corresponds to the well allocation in the software.
} Close the lid. To do this, fold the lid forward and press it down with the handle until
the lock engages with a click.
} Start the PCR run in the software.
ü The PCR run begins and analysis starts.
 Loading...