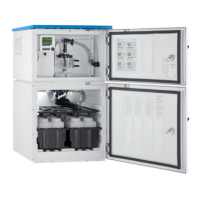
Liquistation CSF34 Electrical connection
Endress+Hauser 39
6.5.3 Relays
Module 2R Module 4R
52 Module
41
43
42
Relay 1
41
43
42
Relay 2
53 Wiring
diagram
54 Module
41
43
42
Relay 3
41
43
42
Relay 4
41
43
42
Relay 1
41
43
42
Relay 2
55 Wiring
diagram
A maximum of 4 relay outputs are supported.
6.6 Connecting the supply voltage
6.6.1 Laying the cable
‣
Lay the cables so that they are protected behind the rear panel of the device.
• Cable glands (up to 8 depending on the version) are available for the cable entry.
• The cable length from the foundation to the terminal connection is approx.
1.7 m (5.6 ft).
6.6.2 Cable types
• Power supply: e.g. NYY-J; 3-wire; min. 2.5 mm
2
• Analog, signal and transmission cables: e.g. LiYY 10 x 0.34 mm
2
The terminal connection is protected under an additional cover in the top rear section of
the device.
‣
Therefore remove the rear panel of the device to connect the power supply before
commissioning.
The terminal cross-section must be at least 2.5 mm
2
for devices with 24V power supply.
With 24V power supply, a current of up to 10A can flow. For this reason pay attention to
the voltage drop on the supply line. The voltage at the device terminals must be within the
specified range (→ 42) .
6.6.3 Removing the rear panel of the dosing compartment
1. Open the dosing compartment door.

 Loading...