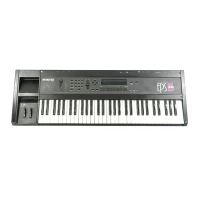
EPS-J6 PLUS Test Procedure
EPS-16
PLUS
TEST PROCEDURE
The
following procedure will ensure the thorough testing
of
the EPS-16 PLUS and
also
will aid
in
troubleshooting
the
unit
To
do the following tests you will need a
M1DI
cable, a
Dual
Footswitch
(model
SW-5),
and
a Control Voltage Pedal (model CVP-l). The EPS-16 PLUS should be
connected to a sound system in stereo.
If
it
is
not
known
whether the KeypadlDisplay board is good, it can cause confusion
in
tracking
down the problem.
If
you
do
not have known-good correlation modules and suspect a
Keypad/Display problem, you should test this module
fIrst (see Self-test Mode p. 10).
1.
Power
Up
(see
Section 1
of
the
EPS-J6
PLUS
Musician's Manual for more information)
a.
Tmn
unit
on.
All
the LEDs above the Instrument-Track buttons should light
and
the display
should read
ENSONIQ
EPS-16
PLUS, then PLEASE INSERT DISK.
b.
Insen
O.S.
disk.
The
display should
read
LOADING
SYSlEM.
The
EPS-l6
PLUS
(Keyboard unit only)
will
then display TUNING KBD - HANDS OFF.
When
the keyboard·
is tuned, all LEOs should go out.
2.
Load
in
Sounds (see Section 1
of
the
EPS-16
PLUS Musician's Manual for
more
information) .
a. Eject
the
O.S. disk. Insert the Test disk.
b.
Load
bank IN-OUT BURN from the
test
disk (press Load, Instrument, Ente,..Yes).
The display will say LOADING <filename> and the top yellow LED (redlorange
on
the
Rack)
will blink while loading.
c.
The
file
is
done loading when the display shows FILE LOADED and the top yellow LED
(redlorange on the Rack) stays on. The following sounds
will
be loaded into the
Instruments-Trackl through 6:
Instrument
1
Instrument 2
Instrument 3
Instrument 4
Instrument 5
Instrument 6
PIANO 241
PRESSURE
6-0UTlEST
20 VOX
lEST
SAMPLEINST
3 BUS TEST
3.
Keyboard Test (EPS-16 PLUS
Keyboard
Only)
a. Select PRESSURE (lnstrument-Track2).
b.
Playa
chromatic scale across the entire keyboard. Press each key down only until normal
key travel ends.
Do
not press into pressure zone. Verify that no pressure
effect
occurs.
c.
Press the key into the pressure zone
and
verify that pressure causes a pitch
bend.
d.
Using PRESSURE play all six
"c"
keys and verify that the pitch rises 1 octave smoothly
when the key is pressed down hard.
* Failure indicates a Keyboard problem.
4.
Disk Check
a. Select PRESSURE (lnstrument-Track2). Save PRESSURE back to the disk. Press
Command, and double-click
on
the
Instrument
button. The display shows
SA
VB
INSTRUMENT, press Enter-Yes.
b.
The display will show NAME= PRESSURE. Press down arrow
to
change
the
name
to
ORES SURE.
c.
Press Ente,.. Yes.
The
display will say
DELElE
OlD
VERSION? (except
the
fIrst time
you save this sound). Press
Ente,.. Yes
to
save ORESSURE (DISK
COMMAND
COMPLETE
will
appear briefly when fInished).
d.
Eject the test disk
and
then press Load. Verify that the display shows DISK DRIVE
NOT
READY.
EPS-J6
PLUS Service Manual
page
17

 Loading...