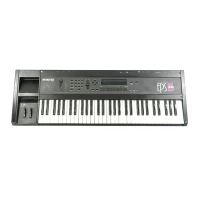
EPS-16
PLUS Burn-in
Test
Program
BURN·IN
TEST PROGRAM
To
run the Bum-in Test Program, you
must
have
the following items:
-
One
EPS-16 PLUS Burn-in
Test
Disk
-
One
MIDI
Cable
-
One
1/4"
Mono to 1/4"
Mono
cable
-
One
1/4"
Stereo to 1/4" Stereo cable
The
Bum-in
Test Program is
used
at
ENSONIQ
to
exercise the system hardware
of
a complete unit.
There
are two test operations that the program
can
perform:
1)
A continuous (bum-in) test
of
all
components, and
2) a keypad integrity test.
The
continuous operations test
the
Dynamic
RAM,
Disk
Drive Read
and
Write,
MIDI
InIOut,
Keyboard,
Sustain Footswitch,
Aux
Footswitch.
Disk
Drive
Index
Pulse,
ESP
RAM,
ESP
GPR
Registers, and
E.SP
Instruction Registers. The
Disk
Drive
Read
and
Write tests are
run
approximately every ten minutes
and
take about five minutes
to
run. Failures
of
components can
be
automatically detected
in
all operations.
BURN·IN
TEST
1.
Plug MIDI
Loop
Cable into MIDI In and MIDI Out jacks. Plug
the
Mono to
Mono
cable into
the
Audio Out/Left and
PedaZ-CV
jacks.
Plug
the Stereo to Stereo cable into the Headphones
and
Ft.
Sw.
jacks.
2.
Power
up the unit and insert the BURN-IN
TEST
DISK
VER.
X.x.
making
certain
that the
disk
is
not
write-protected (i.e.,
the
window
must
be closed).
3.
Once
the
disk has been loaded, the display will read:
DISK
TEST
COUNT
XXX.
If
no
buttons
are
pressed the Bum-in Test cycle will begin automatically after twenty seconds.
NOTE:
The
''Disk
Test Counter" is
used
to automatically monitor
test
disk usage
and
to
indicate
when
a test disk becomes· unreliable.
The
"counter"is increased by
one
every time a
DISK
WRITE
test
is done. After about two weeks
of
continuous
Bum-in
Testing,
the
"counter" will reach its
limit,
and
the disk
will
not boot the
system
properly. Instead,
the
display will read:
DISK
NO
LONGER
USABLE.
Contact
ENSONIQ
Customer Service
fora
replacement disk.
4.
Press
Enter-Yes.
The
display will read: DO
BUTTON
TEST?
NOTE:
If
you wish. press Cancel-No
to
by-pass the Button
and
Display
tests
and
immediately
begin the Bum-in Test cycle.
The
display will read:
OK-HIT
ENTER
TO
START.
Go
to Step 9
to
start
the Bmo-in Test cycle.
S.
Press Ente,.Yes. All the special segments
on
the
left·side
of
the
display will
light
and the
display will.read:
LEFT
SIDE
ON-HIT
ENTER.
6.
Press
Ente,.
Yes.
All
the
special segments
on
the
right
side
of
the display
will
light
and the
display
will
read:
RIGHT
SIDE
ON-HIT
EN1ER.
7 • Press Enter-Yes.
All
the
LEDs
will light
and
the
display will read: LEDS
ALL
ON-IDT
ENTER.
S.
Press
Enter-Yes.
The
display will read.:
PRESS
EVERY
BU1TON.
Press all
the
control
panel
buttons
in
any order.
All
the
LEDs
will
flash as each button is pressed
(don't
forget
to
press the leight Instrument-Track buttons).
Once
all the buttons are pressed, the
display
will read:
OK-HIT
ENTER
TO
START.
9.
Press
Ente,.Yes to
start
the Burn-in Test cycle.
As
the
Bum-in
Test
runs, the
display
will
indicate which
of
the tests
is
cmrently active.
If
the Dynamic
Ram
is being tested,
for
example.
the display
will
read. TESTING DYNAMIC
RAM.
EPS-16
PLUS Service Manual
page 21

 Loading...