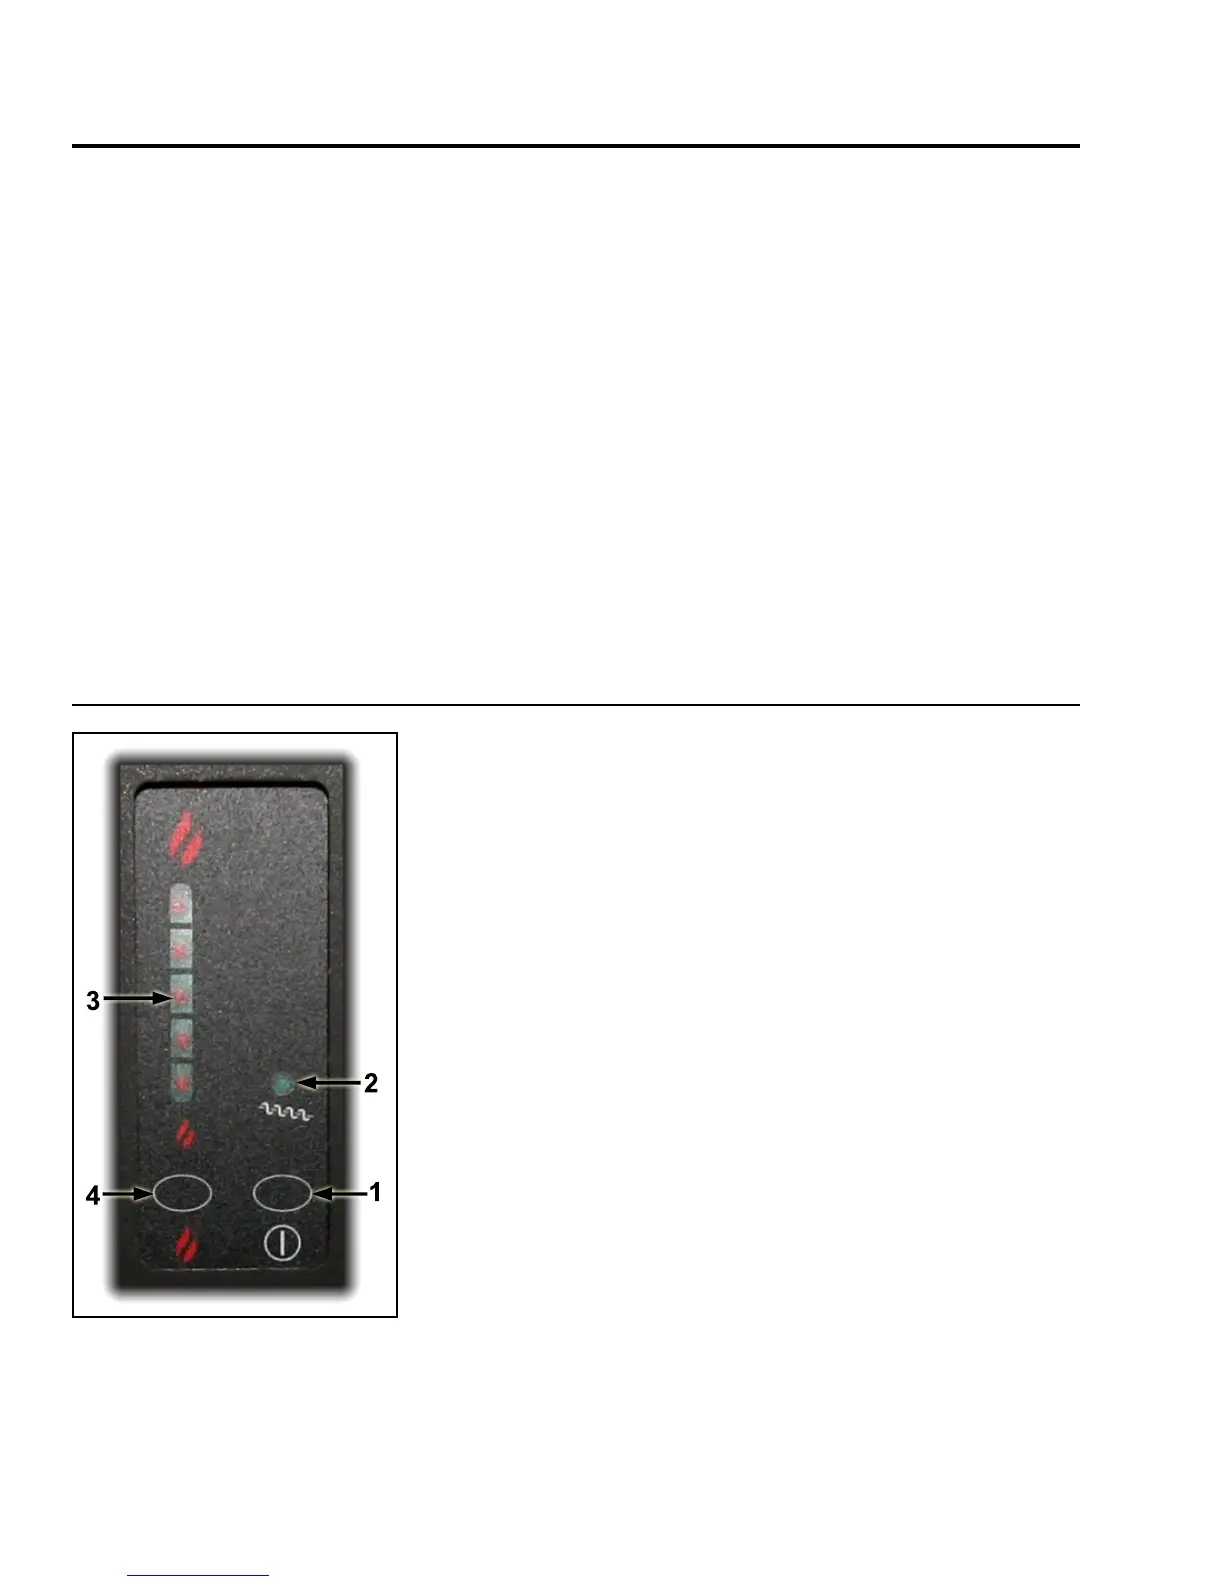
1. ON/OFF BUTTON: Used to turn the unit ON and OFF.
2. AUGER PULSE LIGHT: This light will flash in conjunction with
the auger.
3. HEAT OUTPUT INDICATOR: Shows the present heat output
setting.
4. HEAT LEVEL ADJUSTMENT: When pressed, will change the
heat setting of the unit from low to high. The fan runs up and
down with the heat setting.
Notes:
• The convection blower speed will vary automatically with the feed
rate.
• Due to varying fuel qualities this pellet stove may not operate on
lower Heat Level settings. If your unit goes out when on a low
setting move the heat level up to a higher setting.
• The lowest and highest heat levels on this pellet stove are used
for adjusting and accommodating for different pellet sizes and the
varying energy produced by the fuels. The size of the pellets will
change the volume of fuel being fed.
• The unit should be run at a setting where the least amount of
cleaning of the burn pot is needed.
Figure 9: Daughter Circuit Board
Control Panel - Generation I.
ConTrol Board FunCTions - daugHTer generaTion i:
Stove Controls
14
• The auger trim button only affects the feed rate and not the combustion airflow. Therefore this will
increase or decrease the air to fuel ratio.
• You can increase or decrease all feed rates by two increments or steps. Each feed rate change will
increase or decrease the feed rate by approximately 5% for all settings 1 through 5.
Increasing the feed rate
a) To increase the feed rate, push the auger trim button and the up button at the same time.
b) The heat indicator light will flash at the current setting (e.g. if you are set on #3, that light will
flash).
c) Then push the auger trim up button again, the #4 light will flash. Then the light will return to #3.
d) If you push the auger trim again, together with the up button, the #5 light will flash, then return to
#3.
e) If you have your heat indicator light set on #5 and you increase the feed rate, then only the #5 light
will flash. The feed rates will increase.
Decreasing the feed rate
To decrease the feed rates, follow the above procedure a to c but use the down button.
If you have your heat indicator light set on #1 and decrease the feed rate, then only the #1 light will
flash. The feed rates will decrease.