24 Displaying and Adjusting the Image
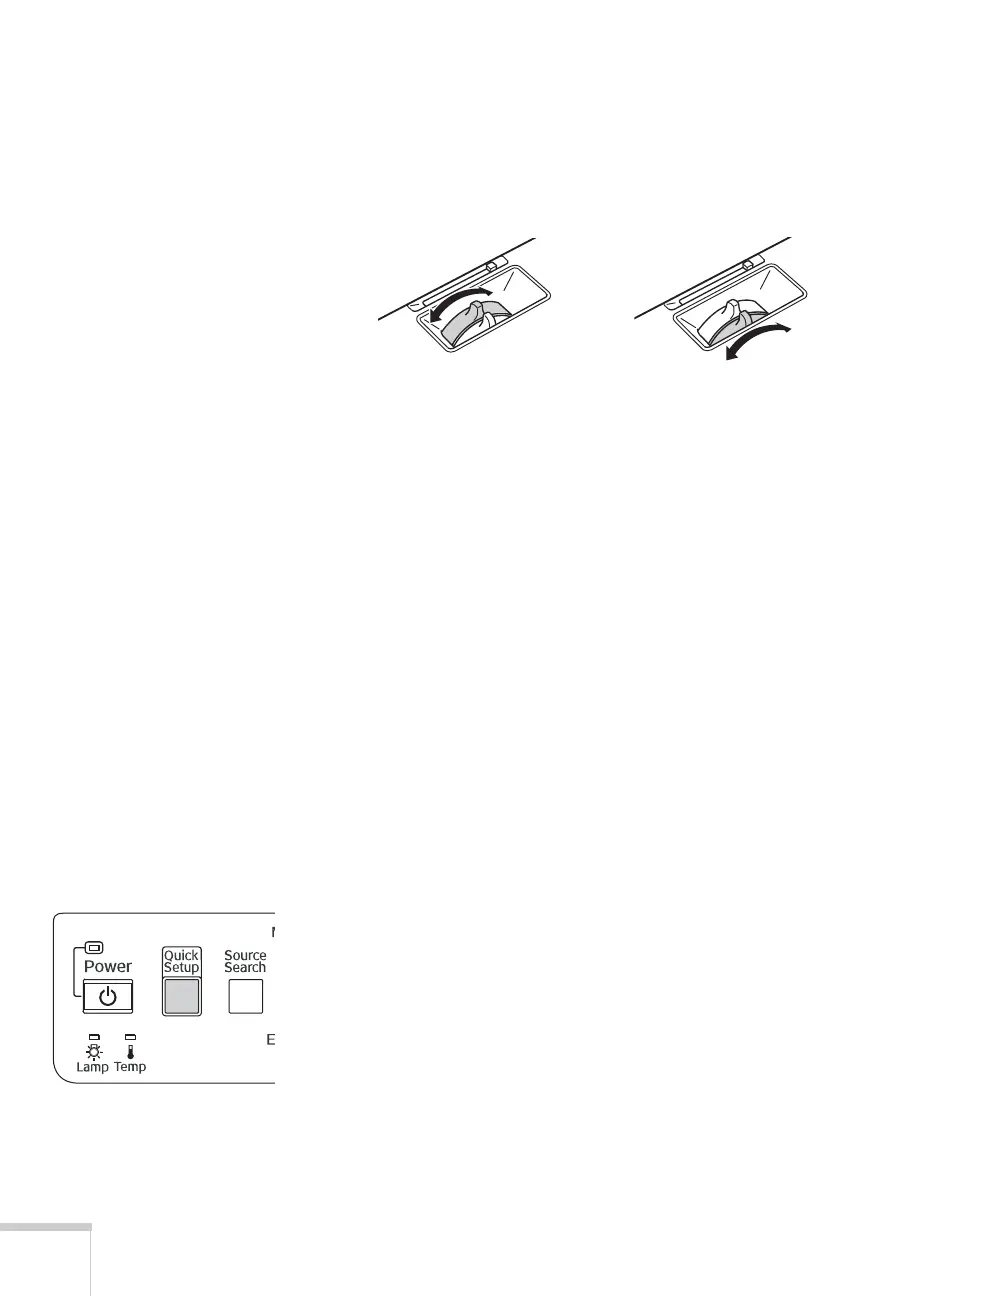
Focusing and Zooming the Image
Turn the focus ring on the projector to sharpen the image.
Turn the zoom ring on the projector to reduce or enlarge the image.
If the image still isn’t large enough, you may need to move the
projector farther away from the screen. You can also use the
E-Zoom
buttons on the remote control to zoom in on a portion of the image.
See page 32 for instructions.
Adjusting the Image Shape
You can maintain a square or rectangular image by placing the
projector directly in front of the screen and keeping it level. This also
produces the best picture quality. If the projector is tilted up or placed
at an angle, you’ll need to correct the image shape by using one of the
functions described below.
Automatic Image Adjustment
Use the projector’s Quick Setup feature to set up quickly for a
presentation. This function automatically corrects the shape and
position of the image to fit on a screen with a 4:3 aspect ratio. It can
correct image distortion when the projector is placed up to a 45° angle
to the screen (vertically) and 20° (horizontally).
1. Press the
Quick Setup button on the projector’s control panel.
Focus Zoom