1-22 Setting Up the Printer
4. Use the following tables to set the DIP switches. Numbers
starting with 1 are in the first set, and numbers starting with 2
are in the seond.
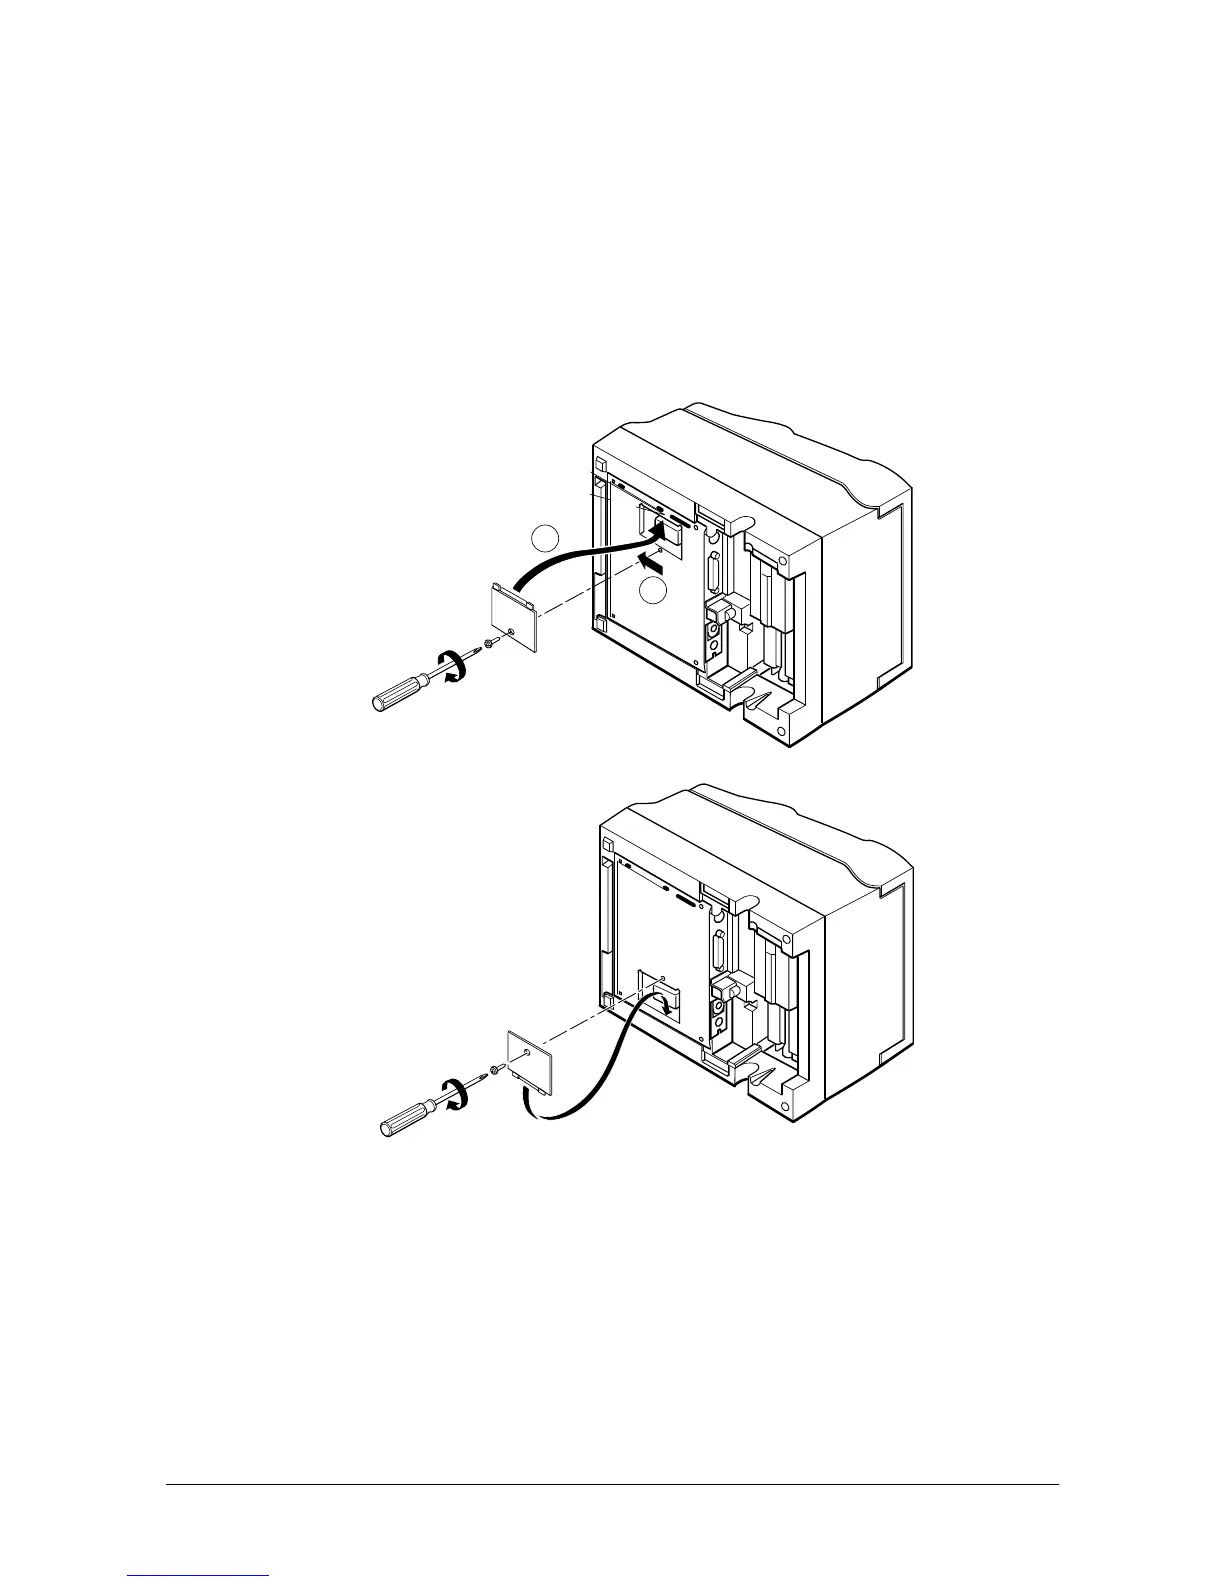
5. Replace the DIP switch cover and secure it with the screw. For
the TM-U950, insert the DIP switch cover upward and slide it
to the left as shown below.
DSW DSW2
1
2
TM-U950
TM-U950P