Setting Up the Printer 1-27
3. Find the corresponding adjustment position number from the
table below.
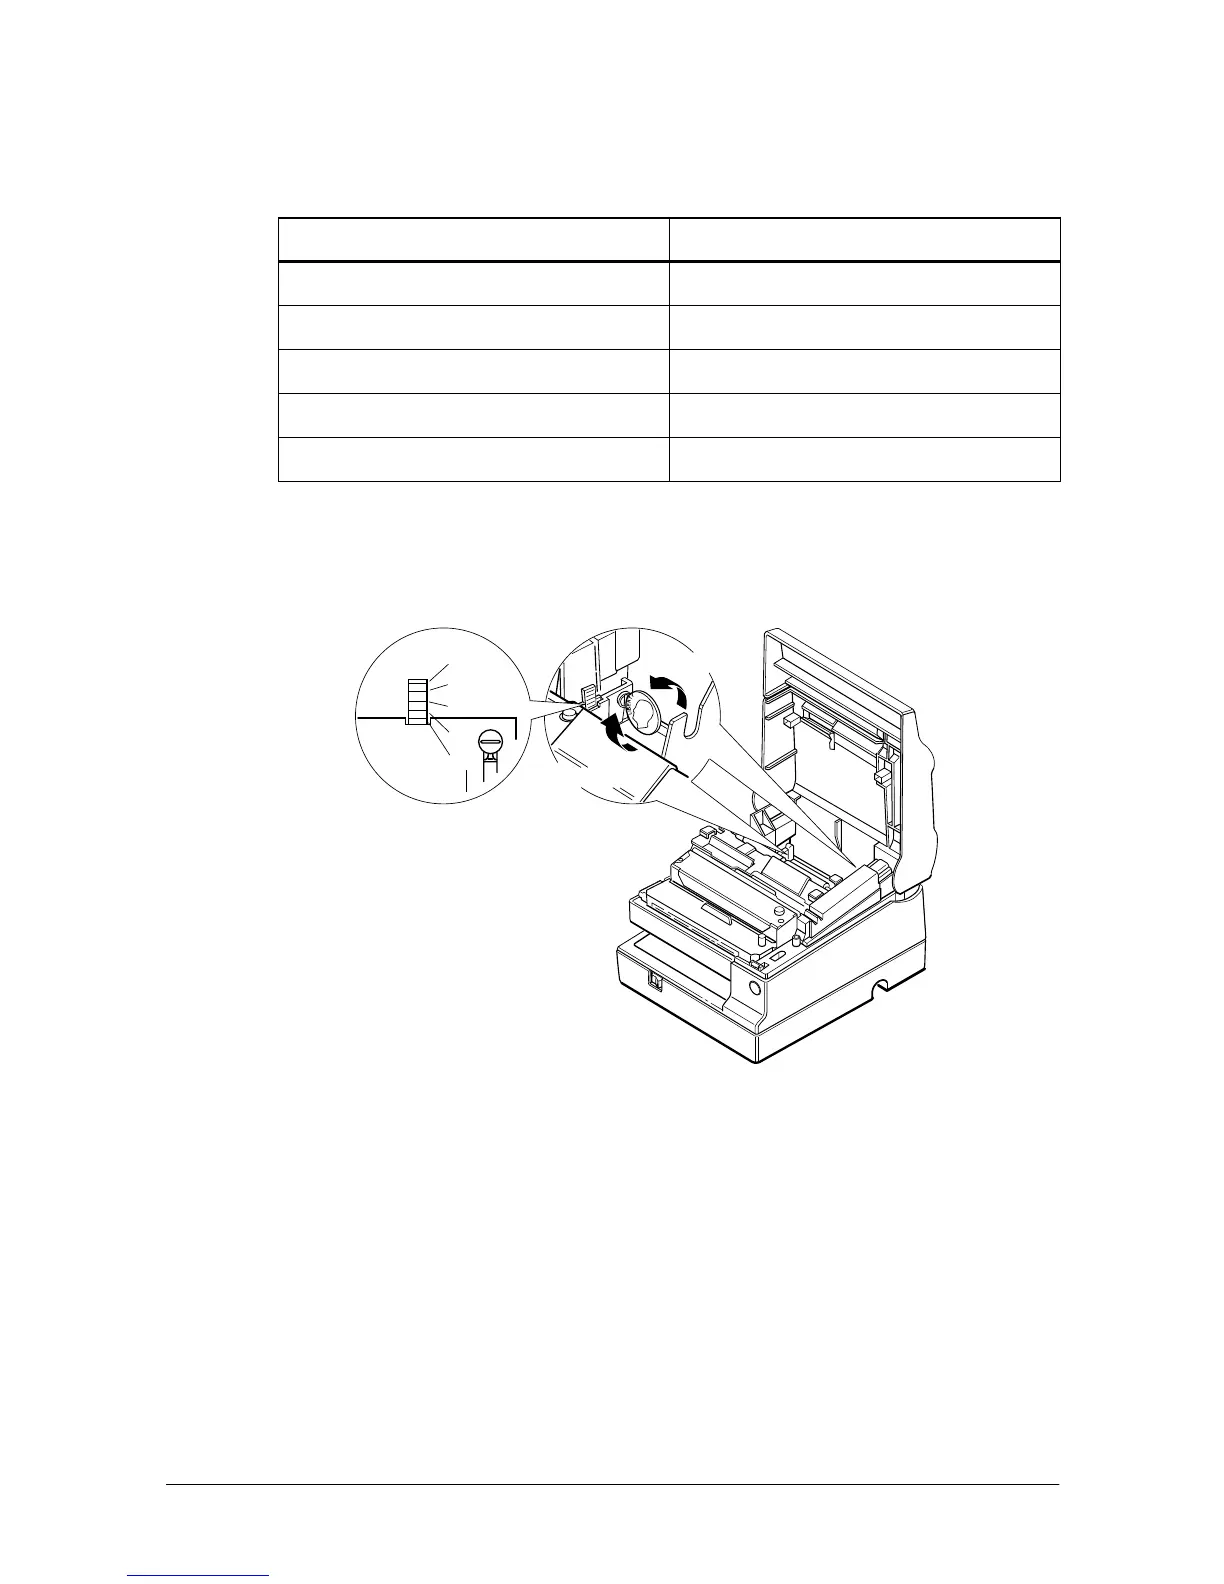
4. Locate the adjusting screw and the positioning plate shown in
the illustration below.
5. Loosen the adjusting screw with a coin or a screwdriver. Move
the positioning plate to the appropriate position and then
tighten the adjusting screw, as shown below. Position 1 leaves
the least paper on the roll, and position 5 leaves the most.
6. Be sure that the detecting lever moves freely after you finish the
adjustment.
7. Re-install the paper roll, as described earlier in this chapter.
Distance A Adjustment position number
10 mm (0.39 inch) #1
8 mm (0.32 inch) #2
6 mm (0.24 inch) #3
4 mm (0.16 inch) #4
2 mm (0.08 inch) #5
#5
#4
#3
#2
#1
Loosen
Secure