2-6 Using the Printer
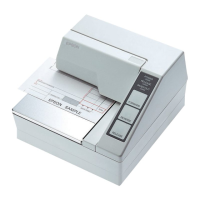
2. Turn the check over so that it is
face down
with the MICR
characters on the right-hand side, as shown in the illustration
below. The MICR characters must be next to the right edge of
the paper inlet.
3. Insert the check straight into the paper inlet, using the right
edge of the paper inlet as a guide.
4. Insert the check as far as it will go. The printer will detect the
check and start drawing it in.
5. When the printer starts drawing it in, let go of the check
immediately. The
SLIP
light quits blinking but stays on.
6. When printing and MICR reading are finished, the printer
ejects the check and the
SLIP
light starts blinking again.
7. Remove the check by pulling it straight up; do not pull it at an
angle. The
SLIP
light goes off.
See Chapter 3 to find out how to clean the MICR mechanism,
and see Chapter 4 for further details on using the MICR reader.
MICR characters must be on the underside
of this edge of the check
①
②
 Loading...
