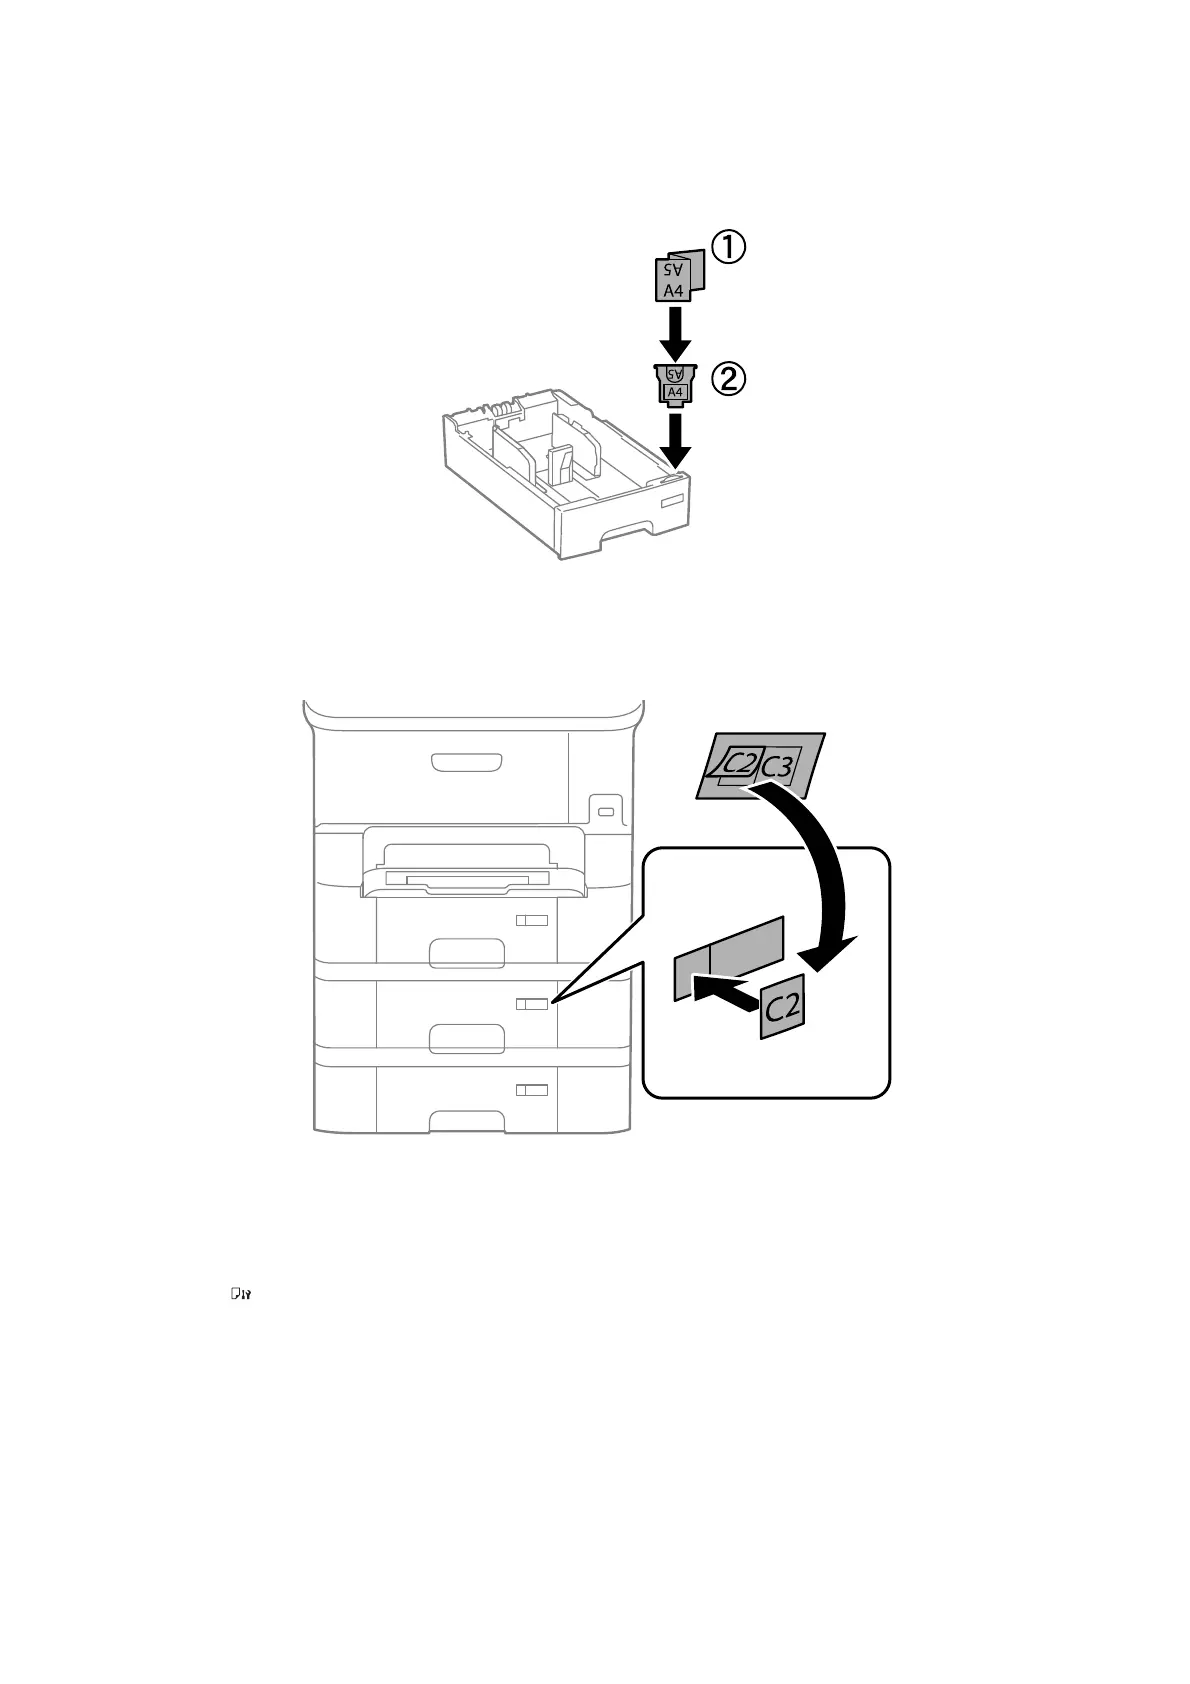
10. Insert a label showing the size of the paper to be loaded in the cassette into the holder.
11.
Insert the paper cassette and then attach the output tray.
12. Place the sticker indicating the cassette number.
13. Reconnect the power cord and any other cables, and then plug in the printer.
14. Turn on the printer by pressing the
P
button.
15. Press the
button, and check that the optional cassette unit that you installed is displayed on the Paper
Setup screen.
Note:
When uninstalling the optional paper cassette unit, turn o the printer, unplug the power cord, disconnect any cables,
and then perform the installation procedure in reverse.
Proceed with the printer driver settings.
Related Information
& “Optional Paper Cassette Unit Code” on page 127
User's Guide
Appendix
131
 Loading...