Aligning the Print Head - Control Panel
1. Load A4-size plain paper in the printer.
2. Enter Menu from the home screen.
3.
Select Maintenance > Head Alignment.
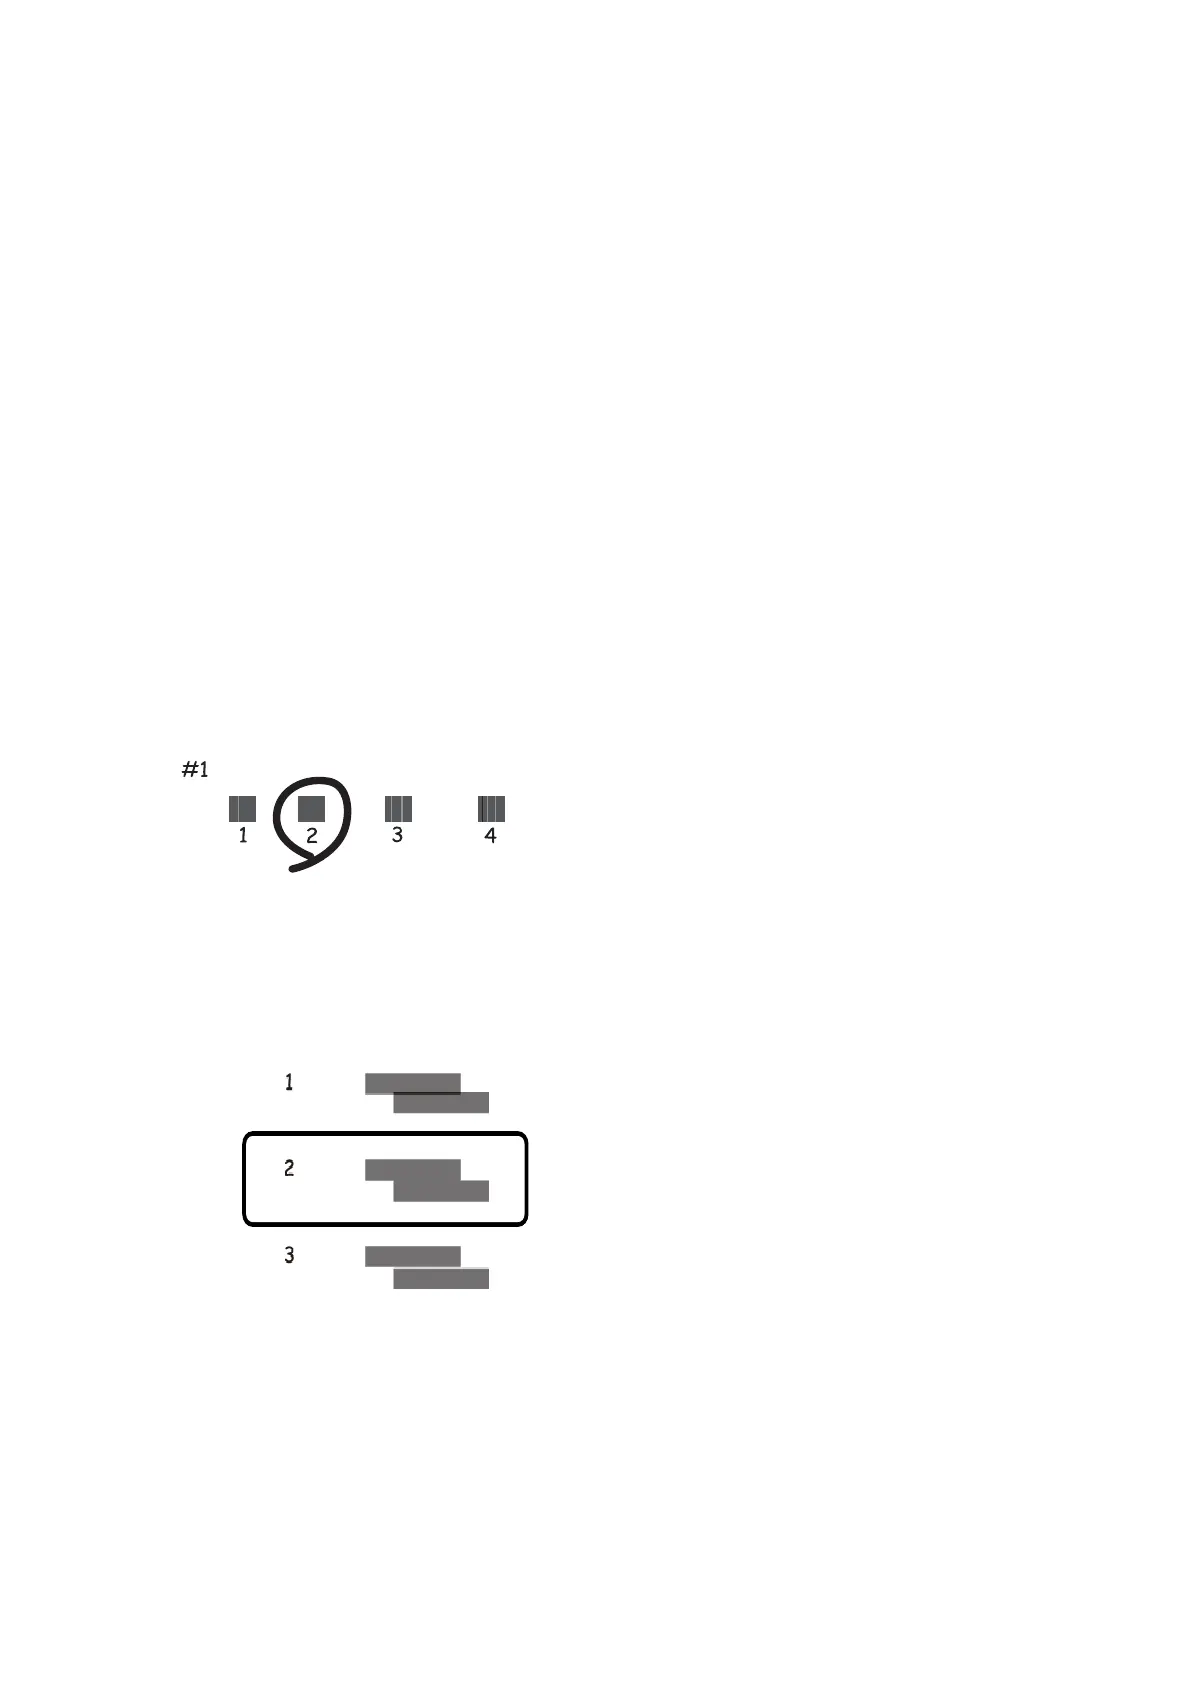
4. Select Verti cal Alignment or Horizontal Alignment, and then follow the on-screen instructions to print an
alignment pattern.
❏ Vertical Alignment: Select this if your printouts look blurry or vertical ruled lines appear misaligned.
❏ Horizontal Alignment: Select this if you see horizontal banding at regular intervals.
Note:
e test pattern may vary by model.
5.
Follow the on-screen instructions to align the print head.
❏ Vertical Alignment: Find and enter the number for the most solid pattern in each group.
❏ Horizontal Alignment: Find and enter the number for the least separated and overlapping pattern.
Aligning the Print Head - Windows
1. Load A4-size plain paper in the printer.
2. Access the printer driver window.
3. Click Print Head Alignment on the Maintenance tab.
User's Guide
Improving Print Quality
70