47 / 70
8 • Installation
80114-770_V23802
2021-01
2. Attach the APC 3 pressure reducer with sensor to the argon gas tank. Fit the con-
nector of the reducer into the 580 CGA outlet connection of the tank. The "O" ring
of the connector goes directly into the outlet. Secure the connection by manually
turning the collar of the connector (1) clockwise until tight. The reducer should be
attached firmly enough to the cylinder so that it doesn't move.
3. Run the pressure line and cable of the pressure reduce with sensor through the
hole (3) of the VIO Cart to the APC 3.
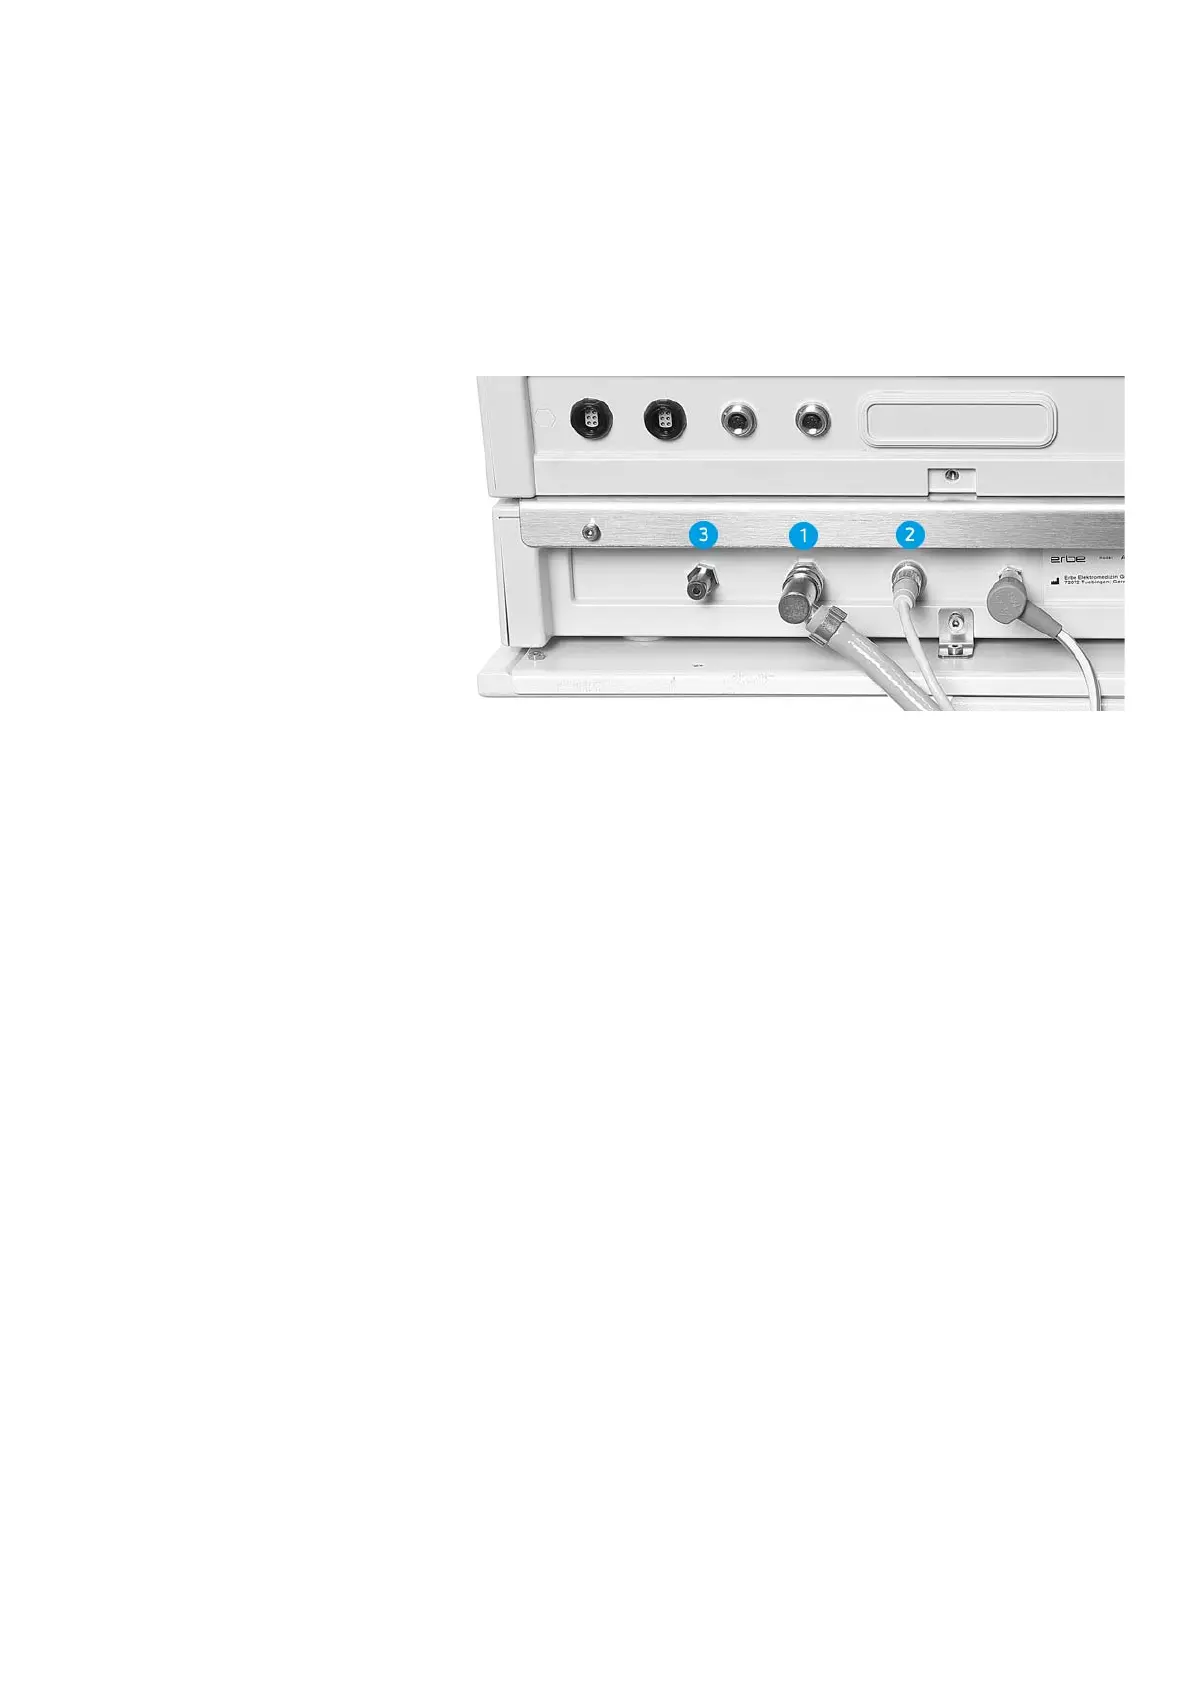
5. Connect the pressure line and
sensor cable of the APC 3
pressure reducer with
sensor to the APC 3
Fig. 8-10
1. Attach the pressure line of the APC 3 pressure reducer with sensor to the argon
connector (1) of the APC 3. Push the pressure line fitting (quick-fit/release cou-
pling) straight onto the argon connector until it snaps into place. Also, connect the
pressure sensor cable of the reducer to the pressure sensor terminal (2) of the
APC unit. Align the connector of the pressure line with the stripe to pressure sen-
sor terminal as pictured. The three pin prong fits directly into the pressure sensor
terminal and then is secured by turning the collar ring clockwise.
2. Slowly open the valve of the argon gas cylinder [See Fig. 7-9 (2)] by turning it
counter clockwise. Open fully. Argon gas should flow into the tubing. A brief hiss-
ing sound may be heard. If a hissing sounds last any longer then 2 seconds, there
is a leak. Check and tighten all connections prior to proceeding. A pressure read-
ing on the gauge should be from 1,800 to 2,200 psi for a full tank of argon gas.
Close the door of the VIO Cart.
6. Disconnect the argon gas
cylinder
1. Close the cylinder valve by turning it clockwise. Initially it may be fairly tight.
2. Detach the pressure line and cable of the APC 3 pressure reducer with sensor
from the APC 3. To remove the pressure line, pull the collar of the fitting (quick-fit
release coupling) back and disconnect it from the argon connector. Disconnect the
cable of the pressure sensor by turning the collar ring counter clockwise and pull-
ing the three pin prong straight out of the pressure sensor terminal.
3. Remove residual argon gas from the pressure line by using the purge pin [See Fig.
7-10 (3)]. Push the connector of the line onto the pin. A hissing noise will be
heard as the gas from the line escapes. This must be done until no further hissing
sound is heard or the pressure gauge reads zero.
4. Disconnect the APC 3 pressure reducer with sensor from the argon gas tank. By
hand, turn the connector fitting of the reducer counter clockwise until the reducer
disengages from the cylinder. Note: A local gas dealer should be able to refill your
argon gas cylinder(s).
 Loading...