17
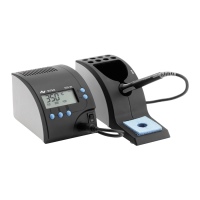
Starting operation
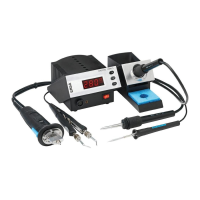
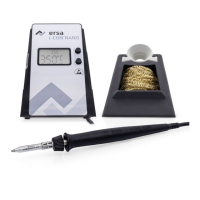
4.4 Instructions for desoldering using
Chip tool
• Using a small brush, wet the clean and grease-
free soldering joints of the components to be
desoldered with flux.
• Take the Chip tool from the soldering iron
holder.
• Before soldering, lightly wipe the desolder
-
ing inserts on the damp sponge so that they
again have a metallic shine. This will prevent
oxidized solder or burnt flux residue from con
-
taminating the soldering joint. Lightly wet with
new solder in order to achieve a good heat
transfer between the desoldering inserts and
the component pins.
4.
4.4 Выпаивание с помощью
термопинцета
• Места выпаивания должны быть очищены
от грязи и жира и смочены флюсом с
помощью кисточки или флюс-фломастера.
• Для конкретного типа насадок
термопинцета установите требуемую
температуру.
• Перед выпаиванием оботрите насадки
термопинцета о влажную губку с тем,
чтобы насадки приобрели металлический
блеск, что предотвращает загрязнение
места пайки окислившимися остатками
припоя и прогоревшего флюса. Очистку
следует производить каждый раз перед
выпаиванием, чтобы обеспечить хороший
тепловой контакт между насадками и
выводами выпаиваемого компонента.
Примечание:
Чтобы насадки не стали инертными
после очистки, их следует немедленно
смочить припоем. Выпаивание инертными
насадками требует больше времени.
• Поднесите раскрытый термопинцет
к выпаиваемому прибору и создайте
надежный тепловой контакт в области
выпаивания приложением легкого усилия
сжатия термопинцета.
• После того, как припой оплавится, выньте
компонент из печатной платы и положите
его на термостойкую прокладку.
Note:
In order to prevent the desoldering inserts from
becoming passive after the cleaning process,
they must be wetted by immediate desoldering
or by again tin-coating them with solder wire.
Passive desoldering inserts result in longer
desoldering times.
• Place the open desoldering Chip tool on the
component to be desoldered and close them
slightly in order to establish sufficient thermal
contact with the soldering joints.
• After melting the solder, remove the compo-
nent from the printed-circuit board and place
it on a heat-resistant pad. Wipe small compo-
nents on the sponge.
Ввод в эксплуатацию