160
5.4 Assembly Of Torch Front End
Reverse order of disassembly. •
Apply a thin coat of silicone grease to O-rings before assembling mating parts. This facilitates easy •
future assembly and disassembly for service.
Hand-tighten threaded parts. •
Installing the electrode requires only moderate hand tightening. Electrode holder should always be •
made tighter than the electrode.
NOTE:
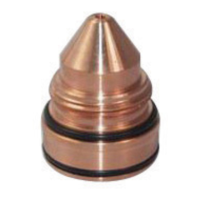
When assembling, place the nozzle inside the nozzle retaining cup and thread the retainer/nozzle com-
bination on the torch body. This will help align the nozzle with the assembly. The shield cup and shield
cup retainer should be installed only after installing the nozzle retaining cup and nozzle. Otherwise the
parts will not seat properly and leaks may occur.
Shield Cup Retainer
Diuser
Shield
Cup
Nozzle Retaining
Cup
Nozzle
Electrode
Torch
body
SECTION 5 MAINTENANCE
CAUTION
Over tightened Parts Will Be Dicult To Disassemble And May Dam-
age Torch. Do not over tighten parts during reassembly. Threaded
parts are designed to work properly when hand tightened, approxi-
mately 40 to 60 inch/pounds.