Chapter 7 Setup
> 7.2 Basic Setup
ETERNUS DX60/DX80/DX90 Disk storage system User Guide
142
Copyright 2010 FUJITSU LIMITED
P3AM-3042-07ENZ0
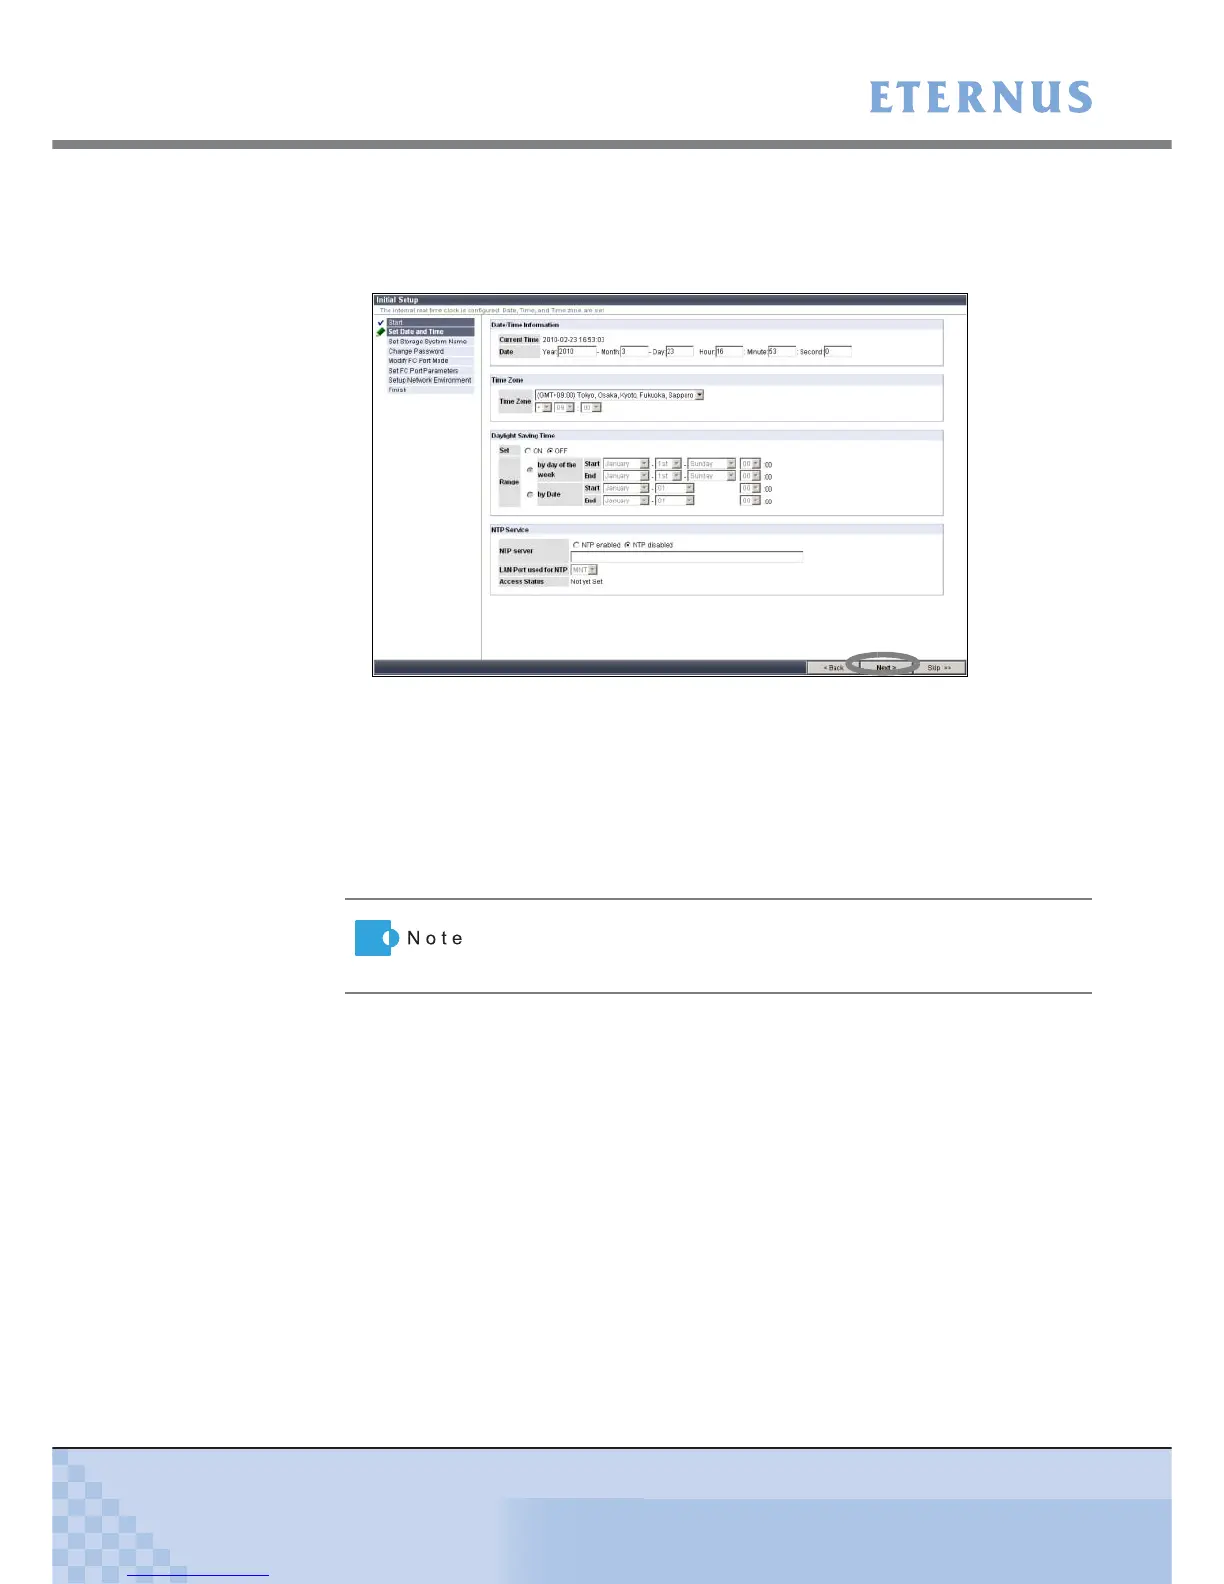
2 Set date and time.
Set the date and time of the internal clock of the ETERNUS DX60/DX80/DX90.
2-1 Set the necessary parameters, and click the [Next >] button.
Figure 7.3 [Set Date and Time] screen
A confirmation screen appears.
2-2 Click the [OK] button.
The date and time setting is set, and the [Set Storage System Name] screen appears.
3 Set the machine name.
Set the name of ETERNUS DX60/DX80/DX90.
The information that is set here is used for network management by
SNMP. The device name is displayed in the logon screen and
operation screen of GUI.