This document is considered an uncontrolled copy when printed. Always ensure that you print and use a current version.
Copyright 2023 ExRobotics B.V.
9.4. Opening the Hull
ExR-2’s hull is composed of a skeleton and cladding panels that are attached to each other and to
the skeleton with button screws. The hull contains most user-serviceable parts. To access these
parts, you need to remove one or more panels. This must be done in a safe, dry area.
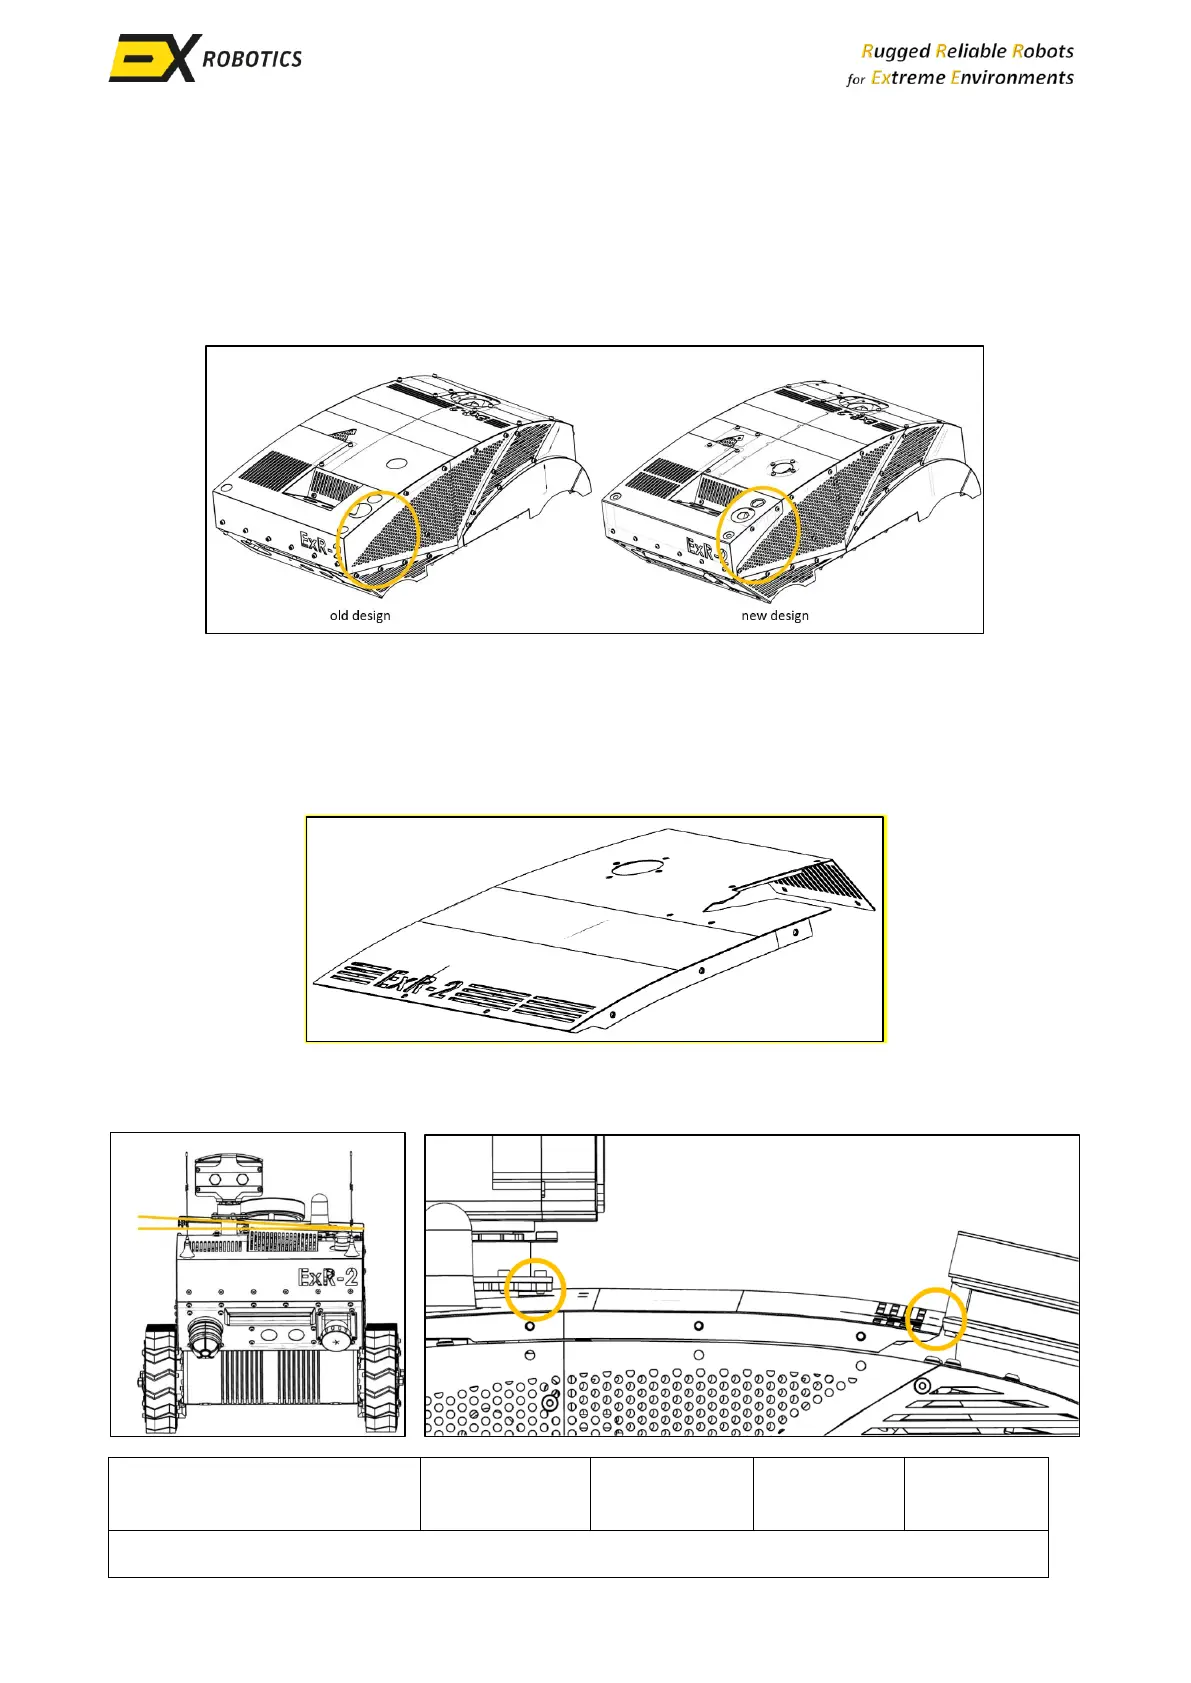
The following images show the individual panels and the screws that need to be removed. This
image shows how you can identify which version of the cladding you have.
The new design simplifies access for some servicing tasks, e.g. you only need to remove the side
panel to replace a SIM card. For the old design you need to remove the top and rear panels.
9.4.1. Location of the Screws
To remove the top panel, remove the screws from all of the holes shown in this picture.
Then tilt the panel as shown in the picture to the left, and lift it away from the robot manoeuvring it
past the obstructions circled in the picture to the right.