IN1804 Seamless Scaling Switchers • Operation 21
Operation
This section contains information on the front panel operation, on-screen display menu
system, presets, and reset modes of the switchers. Topics in this section include:
• Front Panel Overview
• Powering Up
• Selecting an Input
• Using the On-Screen Menu System
• Front Panel Lockout (Executive Modes)
• Input Presets
• Reset Modes
• RS-232 and IR Signal Insertion
Front Panel Overview
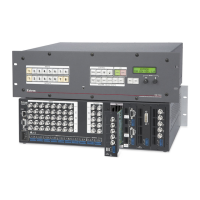
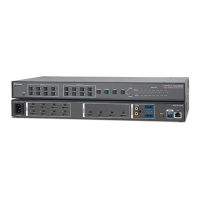
All IN1804 Series models have the same front panels.
IN1804 DO
SIGNAL
MENU
2
4
1
3
ENTER
INPUT 1
HOLD FOR 720p/1080p
INPUT 2
INPUT 3
INPUT 4
STATUS
HDCP IN
HDCP OUT 1A
HDCP OUT 1B
AUTO SW
CONFIG
A
CB D E F
A
Config port
B
Input selection buttons and LEDs
C
Signal LEDs
D
Status LEDs
E
Menu and Enter buttons
F
Navigation buttons
Figure 16. Front Panel Features (IN1804 DO Example)
A
USB configuration port — Connect a host device to the USB mini-B connector for
device configuration, control, file transfer, and firmware upgrades.
B
Input selection buttons and LEDs (1-4) — Press one of these four buttons to select
an input. Each button has a green LED that lights when the input is selected.
C
Signal (input) LEDs — For each input, these green LEDs light when an active video
signal is detected.
D
Status LEDs — These green LEDs light to indicate the state of their corresponding
HDCP and auto-switch settings:
• HDCP IN — Lights if the current input video signal is encrypted.
• HDCP OUT 1A and 1B — Light if the current output video signal is encrypted.
• AUTO SW — Lights if the unit is in an auto-switch mode.
E
Menu and Enter buttons — Press the Menu button to enter or exit the on-screen
menu system. Press the Enter button to select options from the OSD menus.
F
Navigation buttons — Press any of the four buttons to navigate the on-screen menu
system or change values of adjustable features.
16