Room Scheduling System • Room Agent Installation and Configuration 28
Office 365 configuration
When you select Microsoft
®
Office 365™ (see figure 17,
1
on page 21), the Panel
Configuration window displays the settings necessary to configure the panels for
Microsoft Office 365 (see figure 27).
22222222222222
1111111111
1111
3333333333
3333 44444444444444 55555555555555 66666666666666 77777777777777 88888888888888
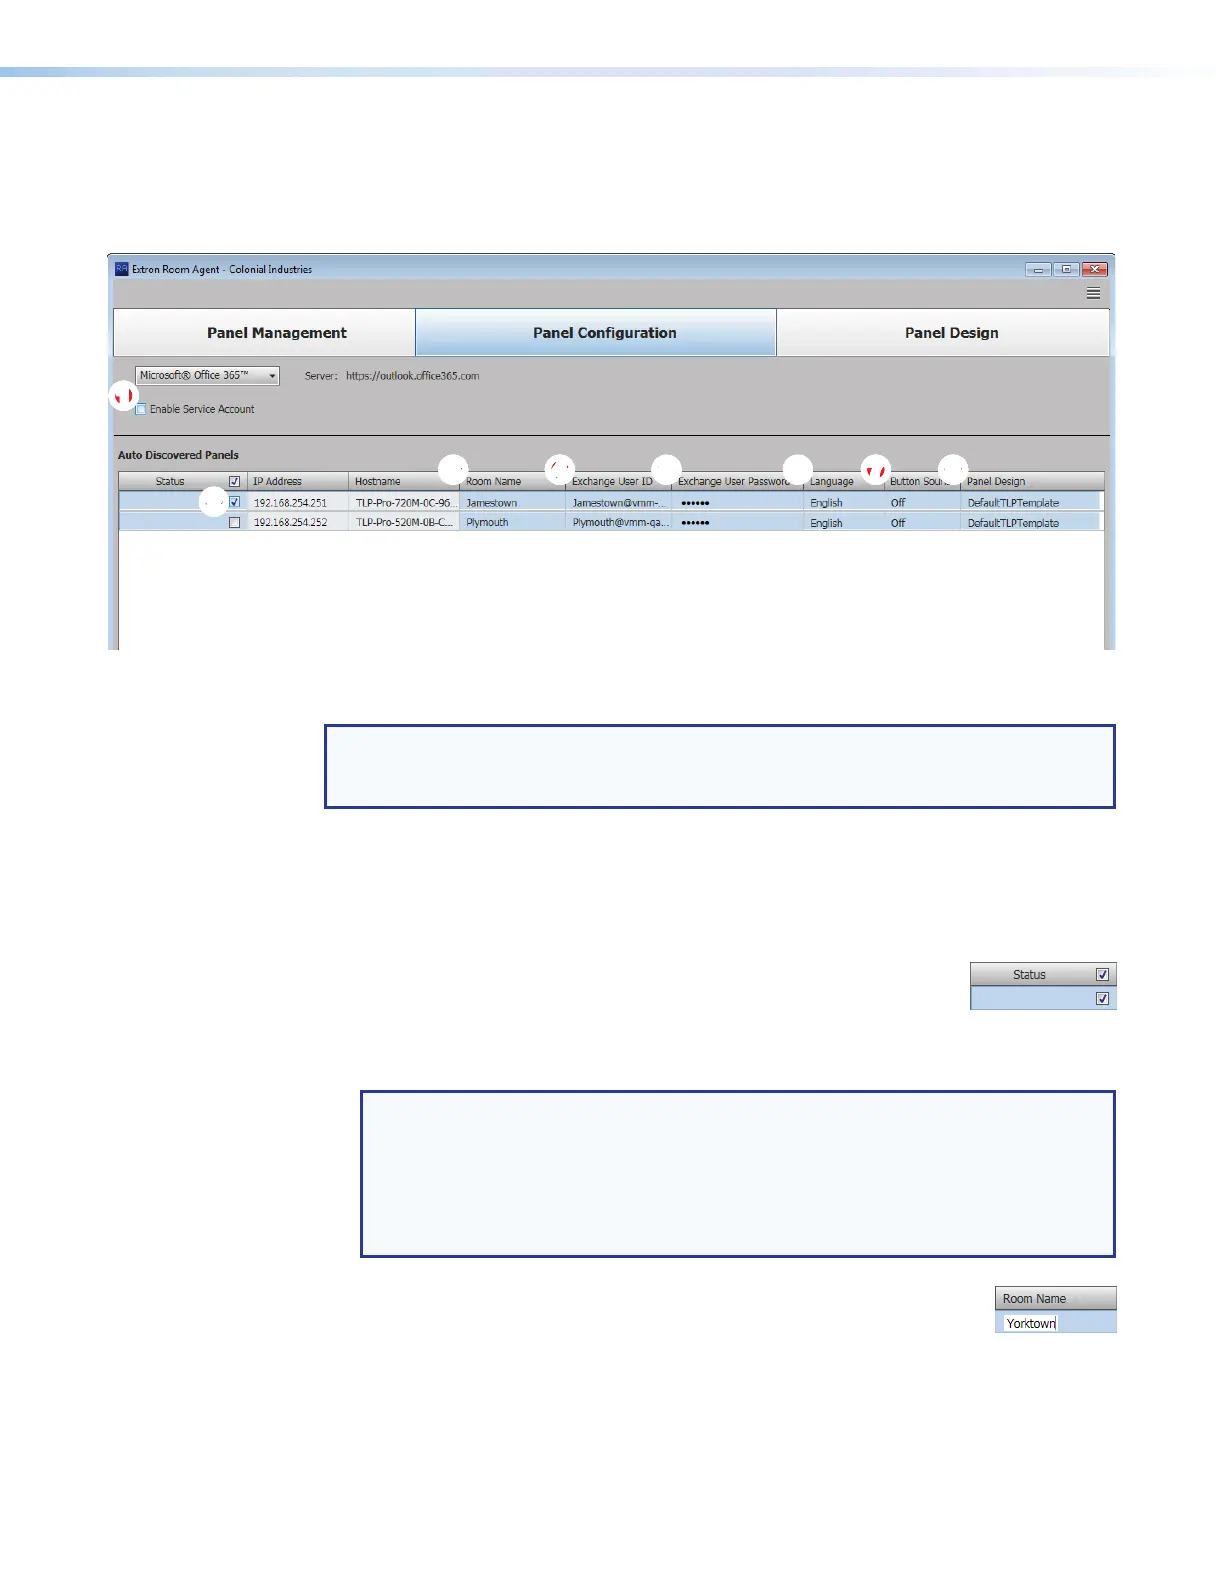
Figure 27. Panel Configuration Window, Office 365 View
NOTE: The Enable Service Account checkbox (see figure 27,
1
) allows one or more
service accounts to be used to configure the panels. See Use service accounts
beginning on page 24 to configure and use service accounts.
Connect to the server
Connection to the panels is made automatically, through the Office 365 server.
Configure panels
Configure the panels for Office 365 as follows:
1. Select (check) one or more Status checkboxes (see figure 27,
2
).
2. For the direct entry settings, Room Name (
3
), Exchange User ID (Exchange credentials,
4
), and Exchange User Password (
5
):
NOTES:
• If service accounts are enabled, the Exchange User ID and Exchange User
Password columns are titled Service Account and Room Resource Account.
• The Exchange User ID requires the User Principal Name (UPN, the name of a
Windows network user in an e-mail address format) for the room resource user
ID. The UPN must have an SMTP e-mail address assigned to it.
a. Click in the desired field.
b. Type the desired value.
c. Type the keyboard <Tab> key to exit the field.