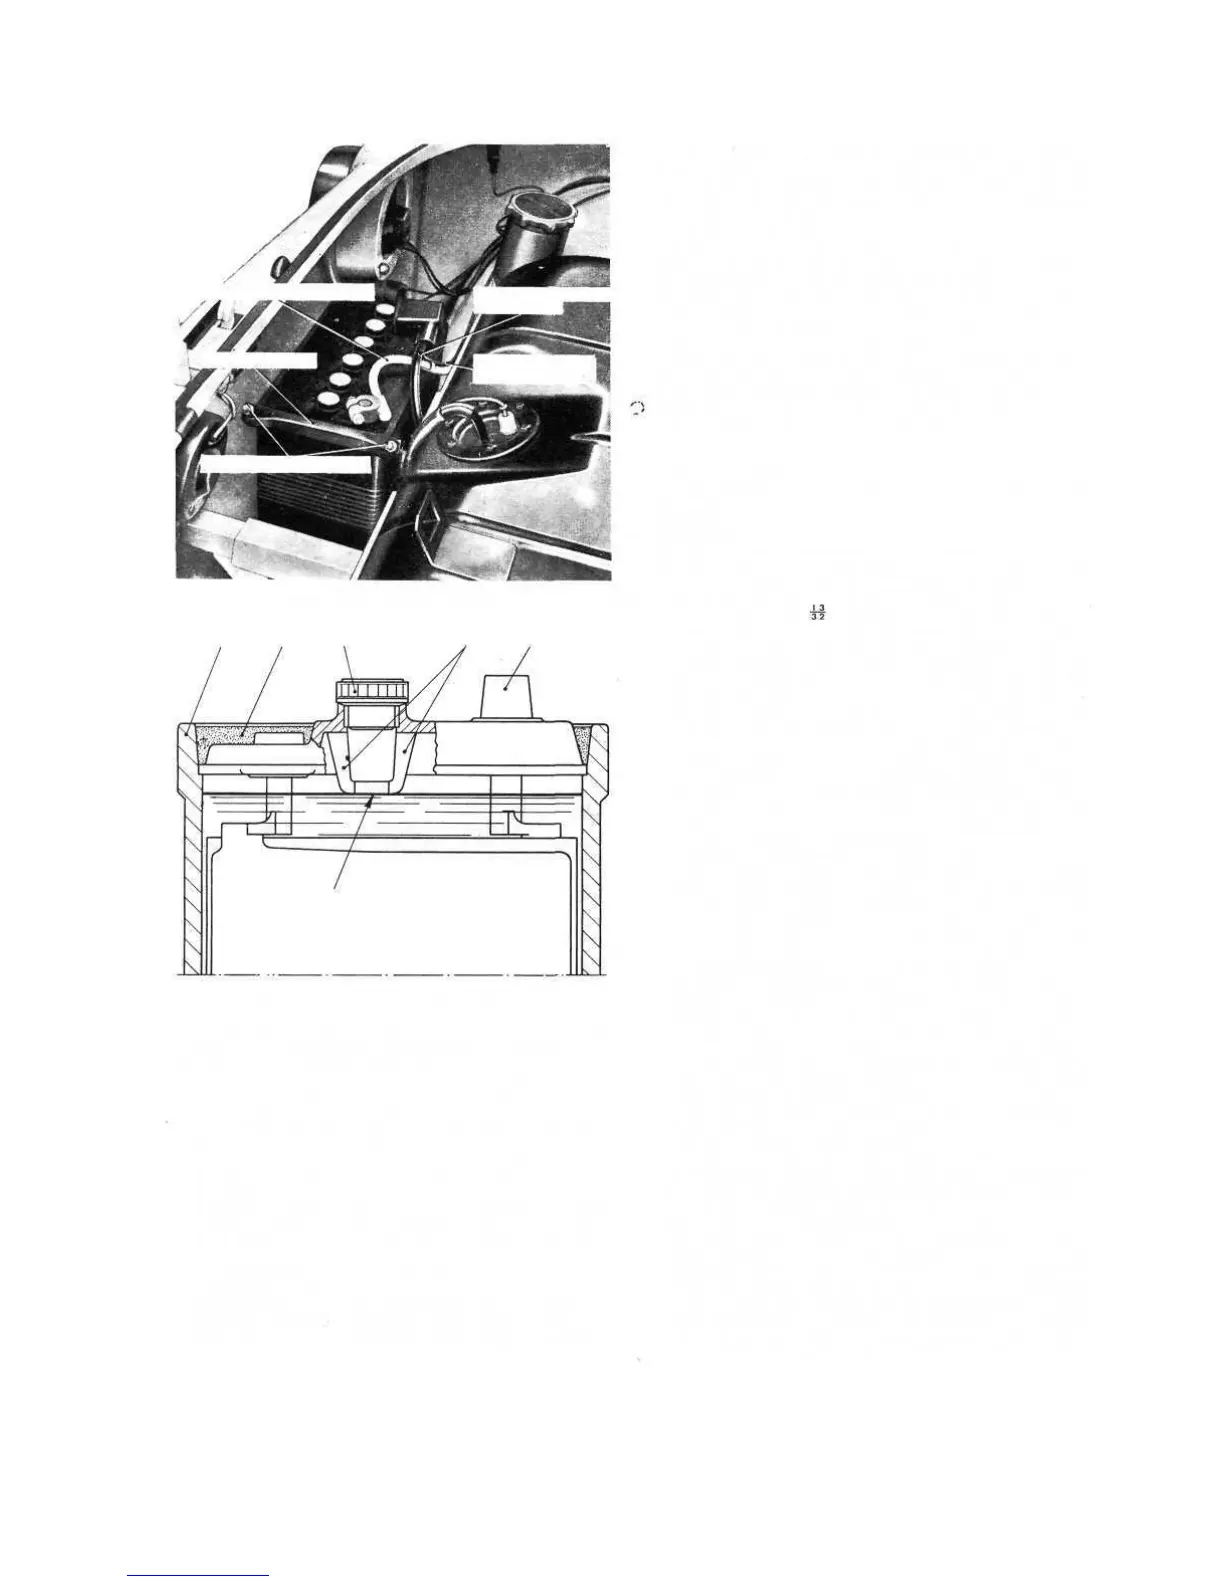
FIG 11:1 Battery location
CLAMP LOCKING NUTS
IGNITION LOCK !
SWITCH CABLE*"?
BATTERY CLAMP
MINUS GROUND CABLE
STARTING MOTOR
PLUS CABLE
6
5
4
3
2
1
FIG 11:2 Cross-section view of battery
Key to Fig 11:2 1 Battery container 2 Sealing compound
3 Cell plug 4 Filler neck with vent slots 5 Terminal post
6 Electrolyte level sight on filler neck
To test the condition of the cells use a hydrometer to
check the specific gravity of the.electrolyte. The readings
obtained should be as follows:
For climates below 27°C or 80°F:
Cell fully charged Specific gravity 1.270 to 1.290
Cell half-discharged Specific gravity 1.1 90 to 1.21 0
Cell discharged Specific gravity 1.11 0 to 1.130
For climates above 27°C or 80°F:
Cell fully charged Specific gravity 1.210 to 1.230
Cell half-discharged Specific gravity 1.130 to 1.150
Cell discharged Specific gravity 1.050 to 1.070
112
These figures are given assuming an electrolyte
temperature of 16°C or 60°F. If the temperature of the
electrolyte exceeds this, add .002 to the readings for each
3°C or 5°F rise in temperature. Subtract .002 if it drops
below 16°C or 60°F.
All six cells should read approximately the same. If one
differs radically from the rest it may be due to an internal
fault or to spillage or leakage of the electrolyte.
If the battery is in a low state of charge take the car for
a long daylight run or connect it to an external battery
charger set at an output of 4 amps until it gases freely.
When putting the battery on a charger, remove the vent
plugs and ensure that no naked lights are in the vicinity.
If the battery is to stand unused for long periods give a
freshening up charge every month. It will deteriorate
rapidly if it is left in a discharged state.
11 :3 The generator
An exploded view of the generator is shown in
FIG 11 :3.
Testing when generator is not charging:
1 Check that drive belt slip is not the cause of the
trouble. Tension should be such that the belt can be
deflected about
inch under a 22 Ib pressure as
shown in FIG 1 :49. To adjust the drive belt tension
remove the three nuts B, FIG 1 :49, on the generator
pulley and this will split the pulley into two parts
between which are placed spacer rings. The tension of
the belt is increased or decreased by either reducing
or increasing the number of spacers. Place the spacer
rings removed from between the pulley halves on the
pulley outer face so that the rings may be reinserted
when fitting a new belt. Tighten the three nuts to a
torque wrench setting of 14.5 Ib ft. Care must be taken
not to over-tighten the belt or excessive loading will
be placed on the generator bearings causing excessive
bearing wear and noisy operation.
2 Check the generator connections. Generator terminal
51 must be connected to the generator regulator
terminal 51 and the generator terminal 67 to the
regulator terminal 67. Switch off all lights and
accessories and disconnect the cables from the
generator terminals 67 and 51. Connect the two
terminals with a short length of wire. Run the engine at
normal idling speed and clip the negative lead of a
0-20 volt moving coil meter to one generator terminal
and the other lead to a good earth on the generator
body. Gradually increase the
engine speed up to about
1000 rev/min. The voltmeter reading should rise
steadily and without signs of fluctuation, but do not let
it reach 20 volts and do not race the engine in an
attempt to increase the reading.
3 If there is no reading check the brush gear. If the
reading is about half to one volt the field winding may
be faulty. If approximately four to five volts the arma-
ture may be faulty.
4 If the generator is in good order leave the temporary
link in position between the terminals and restore the
original connections correctly. Remove the terminal
51 from the regulator and connect the voltmeter
between this lead and a good earth on the car. Run
the engine as before. The reading should be the same
as that measured directly on the generator. No reading