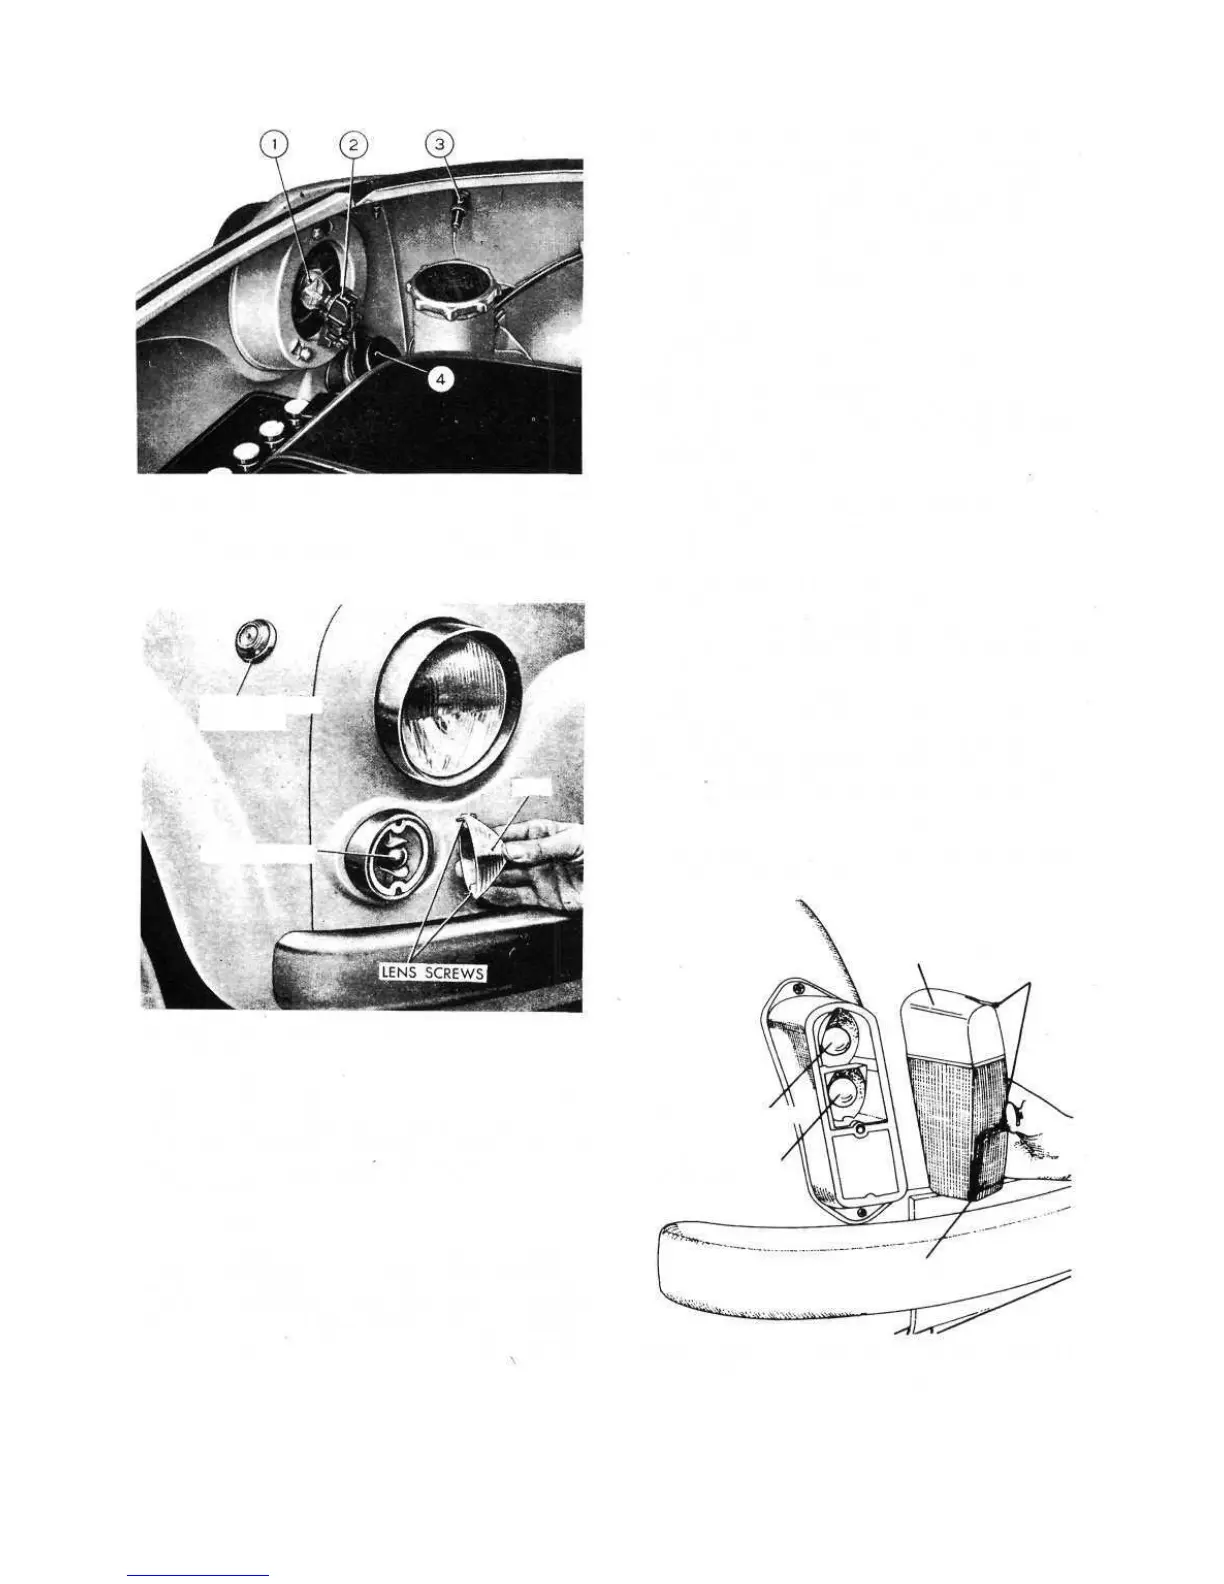
FIG 11:18 Replacement of bulb from inside front
compartment
Key to Fig 11 :18 1 Double-filament bulb 2 Bulbholder
3 Side direction indicator light 4 Bulbholder shield
PARKING LAMP
LENS
SIDE DIRECTION
INDICATOR
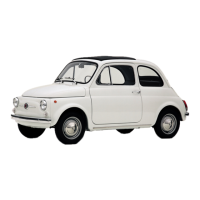
FIG 11 :19 Disassembling front parking and direction
indicator lamp
Replacement of the bulb is achieved from inside the front
compartment by pulling down the upper lug of the
rubber protection cap at the rear of the headlight unit and
freeing the bulb holder. Pull up the bulb holder to
reflector fastener spring and pull out the bulb holder
complete and replace the bulb as necessary.
Beam setting:
Accurate setting is best left to a service station
equipped with the necessary equipment. The main beams
must be set parallel to the road surface or in accordance
with local regulations. Adjustment is made by turning
the top screw 1 as indicated in FIG 11:17 for the
vertical setting and the lower screw 2 for the horizontal
setting.
122
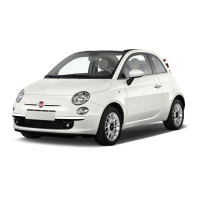
FIG 11 : 20 Disassembling tail parking, stop, direction
indicator lamp and reflector lens
REFLECTOR LENS
PARKING AND
STOP LAMP
INDICATOR LAMP
DIRECTION
LENS
LENS
SCREWS
Lamps light when switched on but gradually fade:
Check the battery as it is incapable of supplying
current for any length of time.
Front parking and direction indicator lamp:
To replace the double filament bulb, release the screws
securing the lens to the lamp casing as shown in FIG
11 :19 and remove the bulb from its bayonet holder. Where
the parking lamp is in the headlamp unit the bulbholder
can be pulled out inside the front compartment.
Rear parking, direction indicator, stop lamps and
reflector lens:
To renew any of the two bulbs remove the two screws
securing the lens to the lamp casing as shown in FIG
11 :20. Bulbs are fixed by bayonet couplings.
Side direction indicator lamps:
To replace the 2.5W bulb slide off the bulb holder
from the rubber socket located as shown in FIG 11 :19.
The bulb is secured by a bayonet coupling.
Number plate lamp:
To replace the bayonet coupled 5W bulb remove the
lens and light cap mounting screws as shown in FIG
11:21.
Lamps give insufficient light:
Test the state of charge of the battery and recharge if it
is necessary from an independent supply. Check the
setting of the lamps. If the bulbs have darkened through
age fit new ones.
Lamps burn out frequently:
If this is accompanied by a need for frequent topping-
up of the battery and high hydrometer readings, check
the charging rate with an ammeter when the car is
running. This should be around 3 to 4 amps. A reading in
excess of this calls for adjustment of the regulator.