indicates a break in the cable from the generator to
regulator. Repeat the test on terminal 67. Finally,
remove the temporary link from the generator. If the
readings are correct, test the regulator as described in
Section 11:5.
Removing generator:
1 Disconnect the leads from the generator.
2 Remove the drive belt as previously described.
3 Release the rear mounting bracket at the side of the
power unit.
4 Remove the air cooling ducting from around the fan
and generator area and lift away the unit.
5 Release the blower from the end of the armature shaft
and finally, the mounting bolts from the air ducting.
Dismantling generator:
1 Release the pulley self-locking nut and slide the pulley
off the armature shaft.
2 Remove the two Woodruff keys on armature shaft.
3 Unscrew the two through bolt nuts and pull out the
bolts.
4 Partially remove the commutator end head to the point
where the brushes are. still seating on the commutator.
Using a piece of hooked wire relieve the load of the
springs on the brushes by arranging the spring ends
on the brush sides. The brushes will be locked in their
holders and cannot be chipped by striking against the
armature shaft during the commutator end head
removal.
5 Gently ease the commutator and fan end heads apart
and, slide out the armature.
Servicing brushes:
Lift the brushes up in the boxes and hold them in that
position by letting each brush spring bear on the side of
its brush. Fit the commutator end bracket over the
commutator end of the armature shaft and release the
brushes by hooking up the springs using a thin screw
driver. Hold back each spring in turn and move the brush
by pulling gently on the flexible connector. If the brush
moves sluggishly remove it and polish the sides using a
smooth file. Before this operation is actually carried out it
is suggested that the brush is marked before removal so
that it is replaced in its original working position.
inch,
The minimum permissible length of a brush is
so renew any that are less than this figure. Test the brush
springs using a spring tension scale. New springs should
have a tension of 1.3 to 1.6 Ib. In service this value could
fall slightly before performance is affected. Always bed in
new brushes by wrapping fine sandpaper round the
commutator, pressing down on the brush and rotating
the commutator under it, or draw the paper too and fro.
If new brushes are fitted always fit genuine Fiat replace-
ments.
Servicing the commutator:
A commutator in good condition should be smooth and
free from pitting or signs of the segments burning. Clean
with a rag moistened in petrol. If necessary, polish using
a fine glasspaper whilst rotating the armature. Never use
emerycloth.
If the commutator is badly worn it may be skimmed
using a centre lathe. Use a high rotational speed and take
F500
113
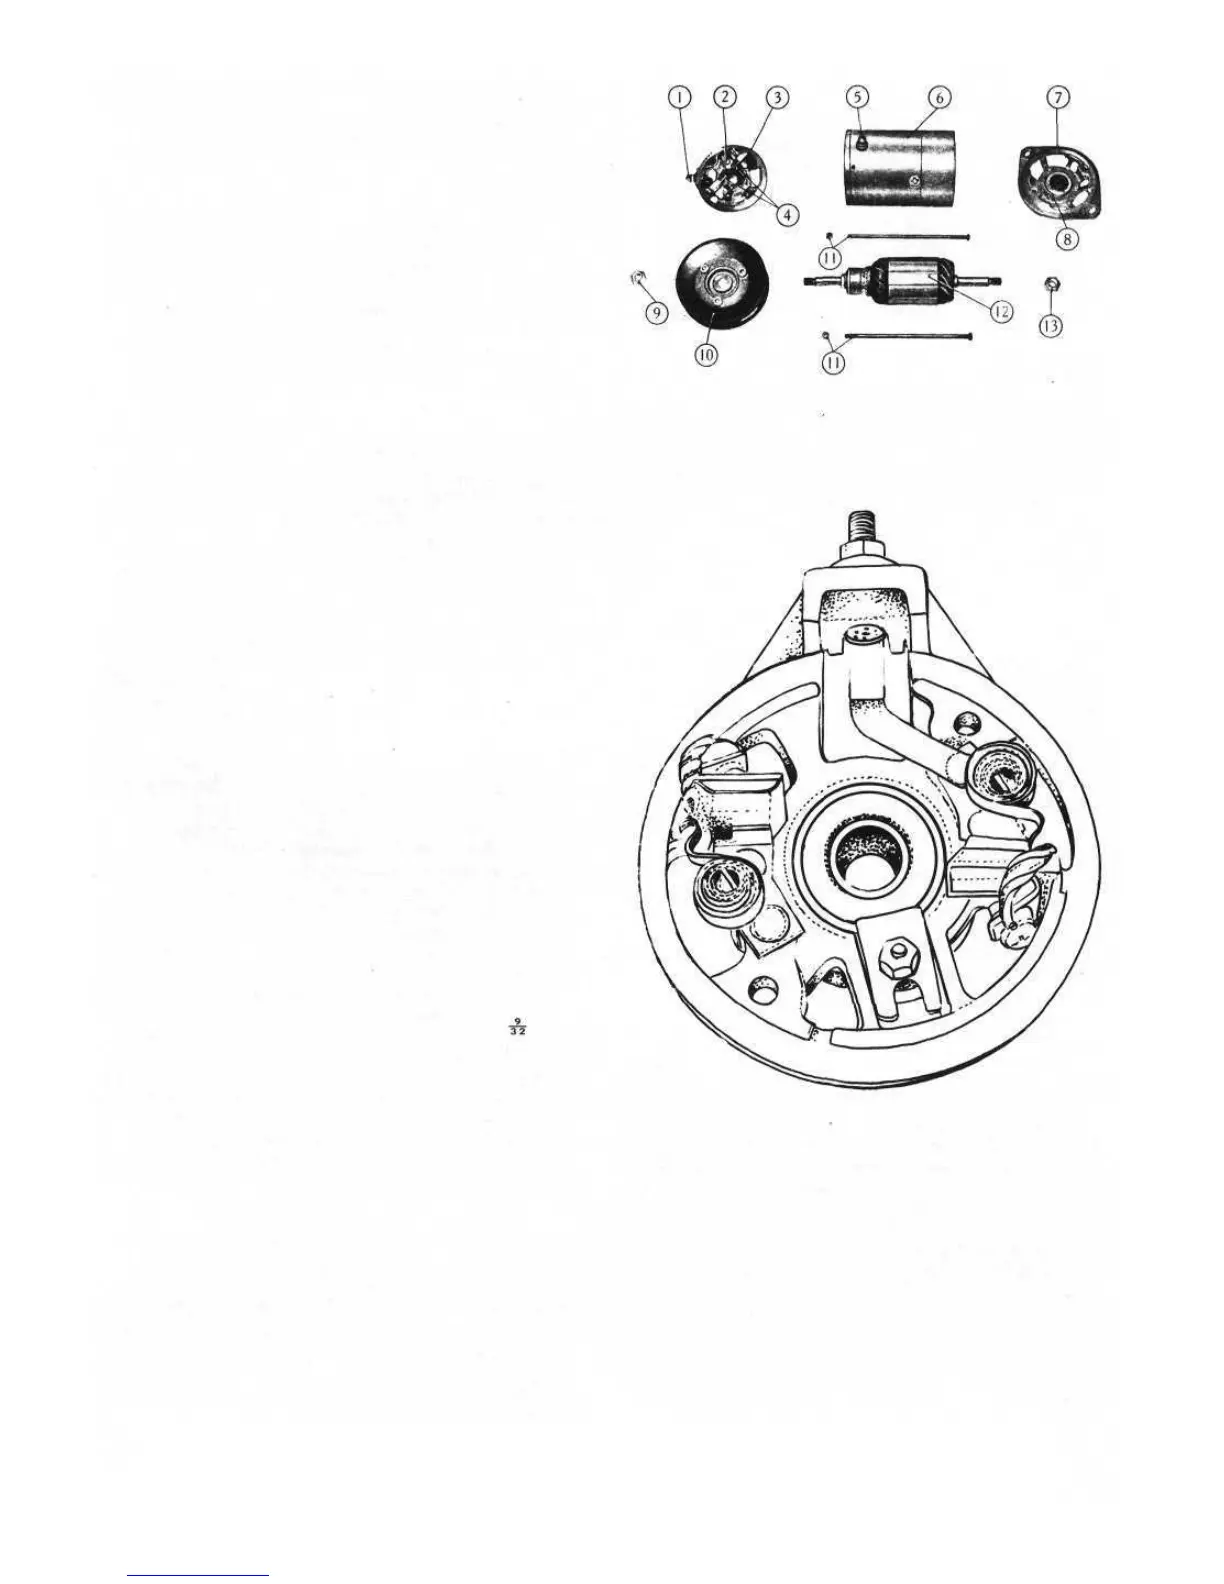
FIG 11 :3 Components of generator
Key to Fig 11 : 3 1 Terminal 51 2 Bearing outer ring
retainment terminal nut 3 Commutator end head 4 Brushes
5 Terminal 67 6 Frame 7 Blower end head
8 Bearing retainer nuts and screws 9 Pulley retainment nut
10 Pulley 11 Head mounting tie rods and nuts
12 Armature 13 Blower retainment nut
FIG 11 :4 Commutator end head of generator DSV
90.12.16.3 S
a light cut using a sharp tool. Remove only enough metal
to clean up the commutator face and then polish with
fine glasspaper. To undercut the insulation between the
segments, it is suggested that a hacksaw blade is ground
on its sides until it is the thickness of the insulation and
carefully work between each pair of segments until the
insulation has been cut to a depth of .0394 inch below the
surface.
A thorough visual inspection may determine the cause
of armature failure. Breaks in armature windings cause
burnt commutator segments. Short-circuited windings
are discoloured by overheating, with badly burnt
commutator segments.