10-74
Chapter 10
Accessories
10.1 Accessories List
• Blinking Kit
• Onboard Charger Kit
• Splashguard Kit
• Cleaning Accessories Kit
10.2 Blinking Kit - 222471
10.2.1 Description
The kit consists of a alarmflashing yel-
low light. Although this light is not con-
sidered mandatory by law, if the user re-
quires it for their particular needs is pos-
sible to equip the machine with this ac-
cessory.
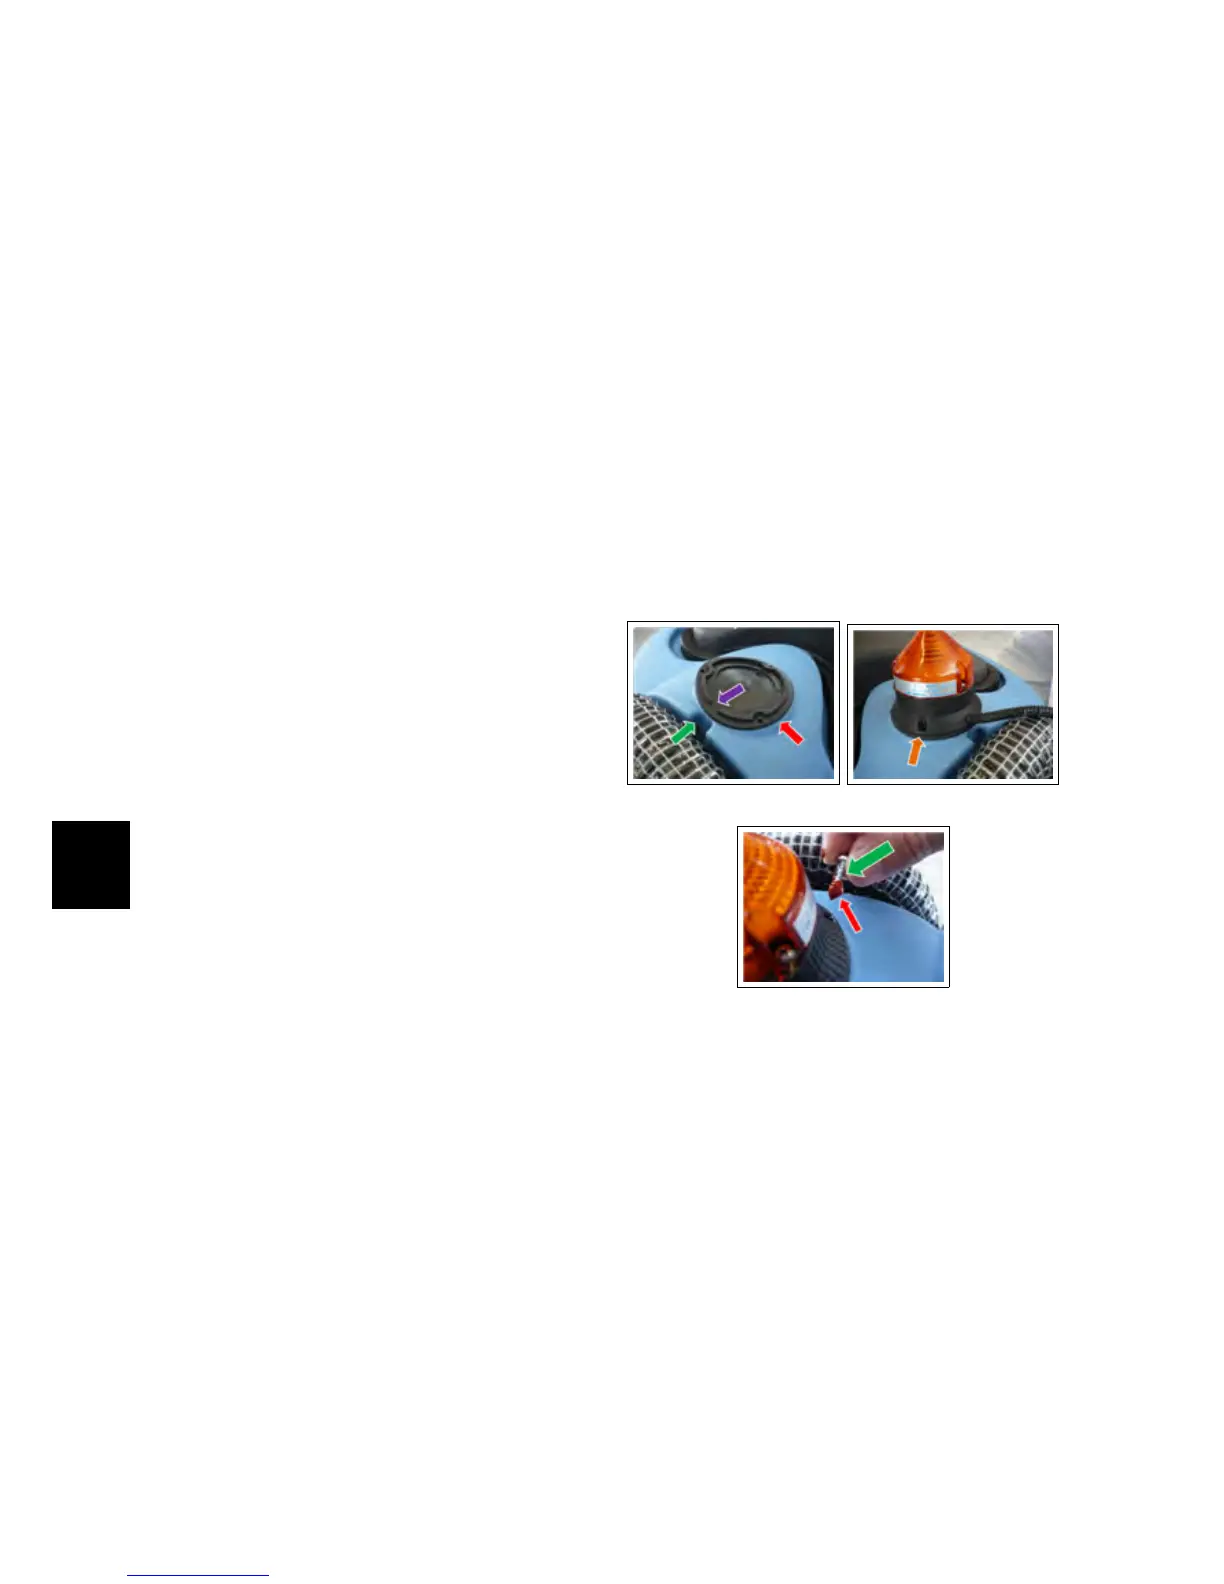
10.2.2 Installing instructions
• Unplug the power cable of the bat-
teries.
• Place the rubber circular base pro-
vided with the kit at the predisposi-
tion on the rear side of the recovery
tank near the entrance of the suc-
tion hose. Make sure the slot in the
rubber base is fixed at the trimmer
guard on the recovery tank.
• Place the blinker on the rubber base
so as shown in the figure so as
to match between rubber base and
body of the blinker the three holes
for the fixing screws crosswise.
• Using a Phillips screwdriver to
tighten the 3 screws supplied with
the kit, taking care to use the sili-
cone paste (red paste) previously ap-
plied on the screws.
10.2.2-116 10.2.2-117
10.2.2-118
• Remove the two screws of the brush
rear support and remove the sup-
port.
• Accompanying the supply cable of
the blinker so that it is placed lat-
erally to the suction hose.
• Accompany the supply cable of the
blinker inside the battery compart-
ment through the slot on the rear of
the solution tank. The entry point is
the same for which the suction hose
passes.
74