4-22
4.3 Drying System
4.3.1 Squeegee
• Put the machine in safe conditions.
• Unplug the Vacuum Hose (see fig. 4.3.3-
26).
• Loose the knobs that block the
Squeegee to the Squeegee Support
(see fig. 4.3.1-18).
• Move the squeegee sideways to re-
lease it from the squeegee support
(see fig. 4.3.1-19).
• Proceed at reverse to refit the part.
• Check the adjustment of the
squeegee support.
4.3.1-17 4.3.1-18
4.3.1-19
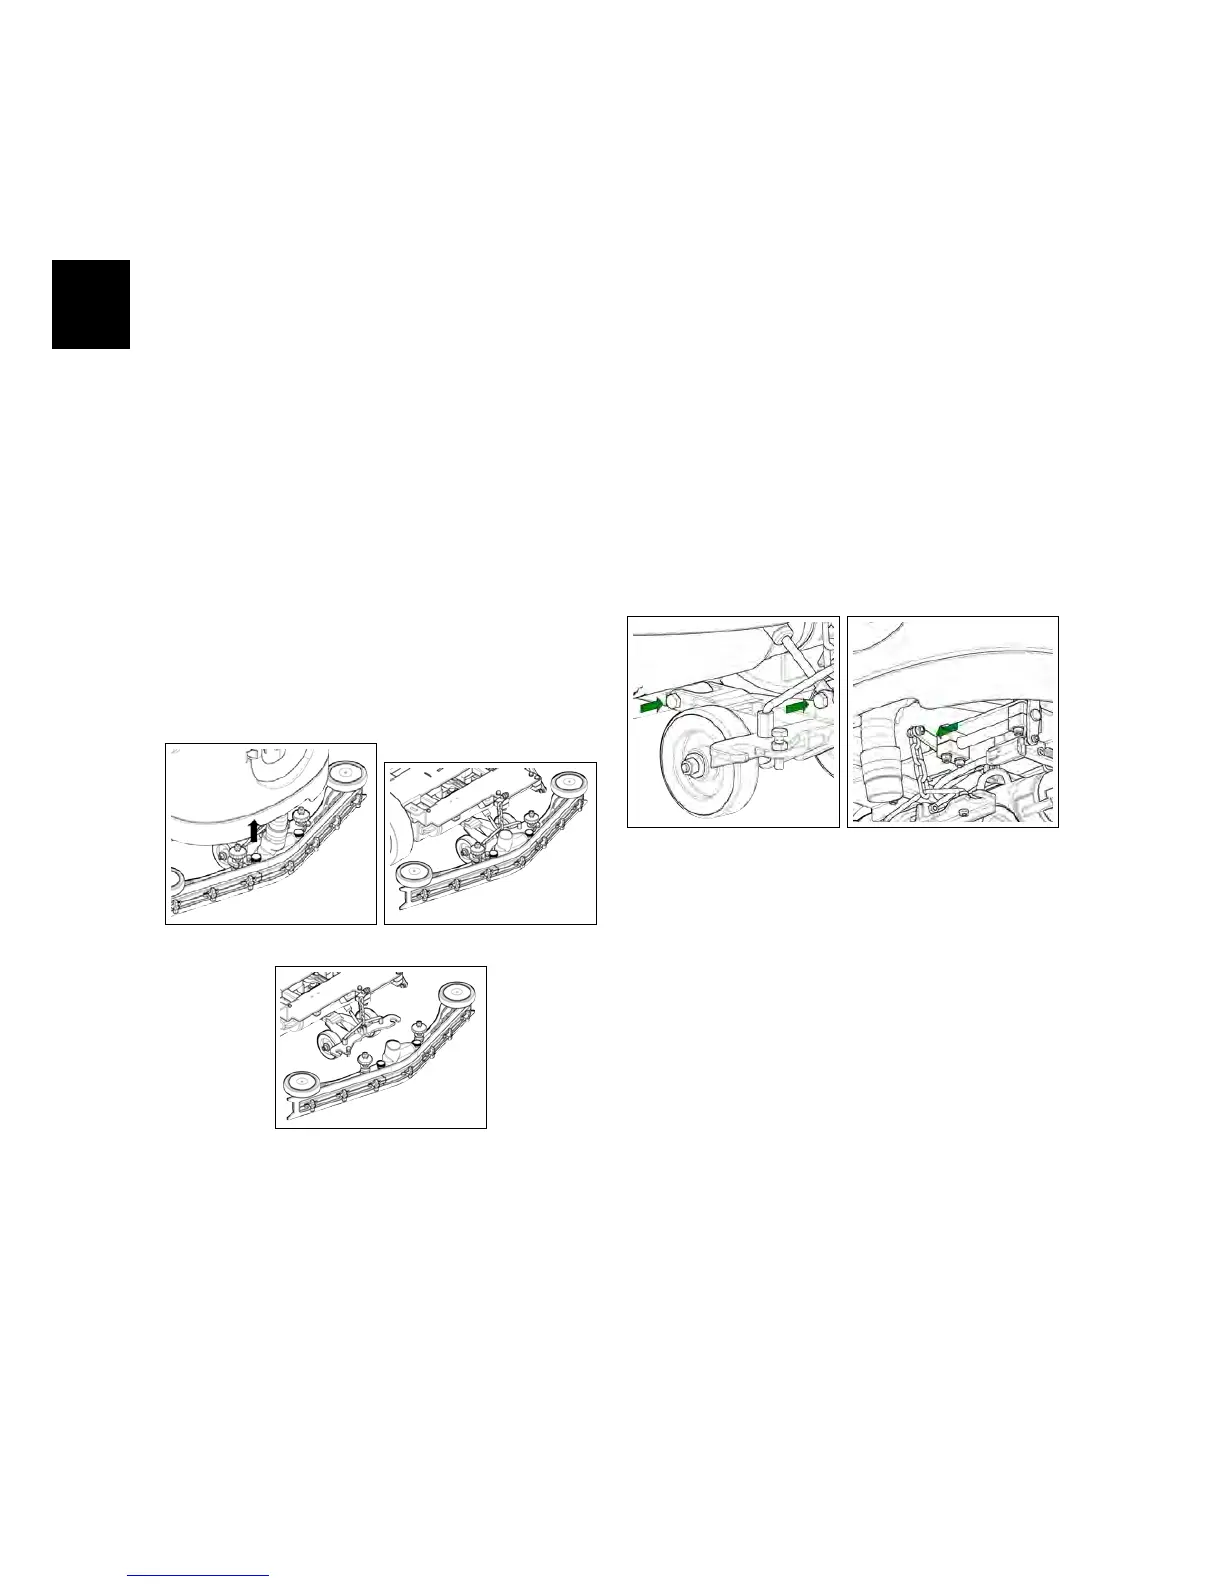
4.3.2 Squeegee Support
Squeegee Coupling
• Put the machine in safe conditions.
• Disassemble the Squeegee from the
Machine.
• Loosen the screw that secures the
squeegee coupling from the lower
side of the squeegee support fulcrum
and remove it (see fig. 4.3.2-20).
• Loosen the screw that secures the
gas spring from squeegee coupling
and remove it (see fig. 4.3.2-20).
• Loosen the screw that secures the
chain to the squeegee rear lifting
lever (see fig. 4.3.2-21).
• Remove the squeegee support.
• Proceed at reverse to refit the part.
4.3.2-20 4.3.2-21
Squeegee Support Fulcrum
• Put the machine in safe conditions.
• Disassemble the squeegee coupling.
• Remove the batteries from the ma-
chine.
• Make sure that both tanks are com-
pletely empty.
• Remove the battery support from the
machine (see fig. 4.5.1-54)
• Loosen the upper fixing screw of the
squeegee support hub fulcrum (see fig.
4.3.2-23).
• Lay the machine on the left side.