4-23
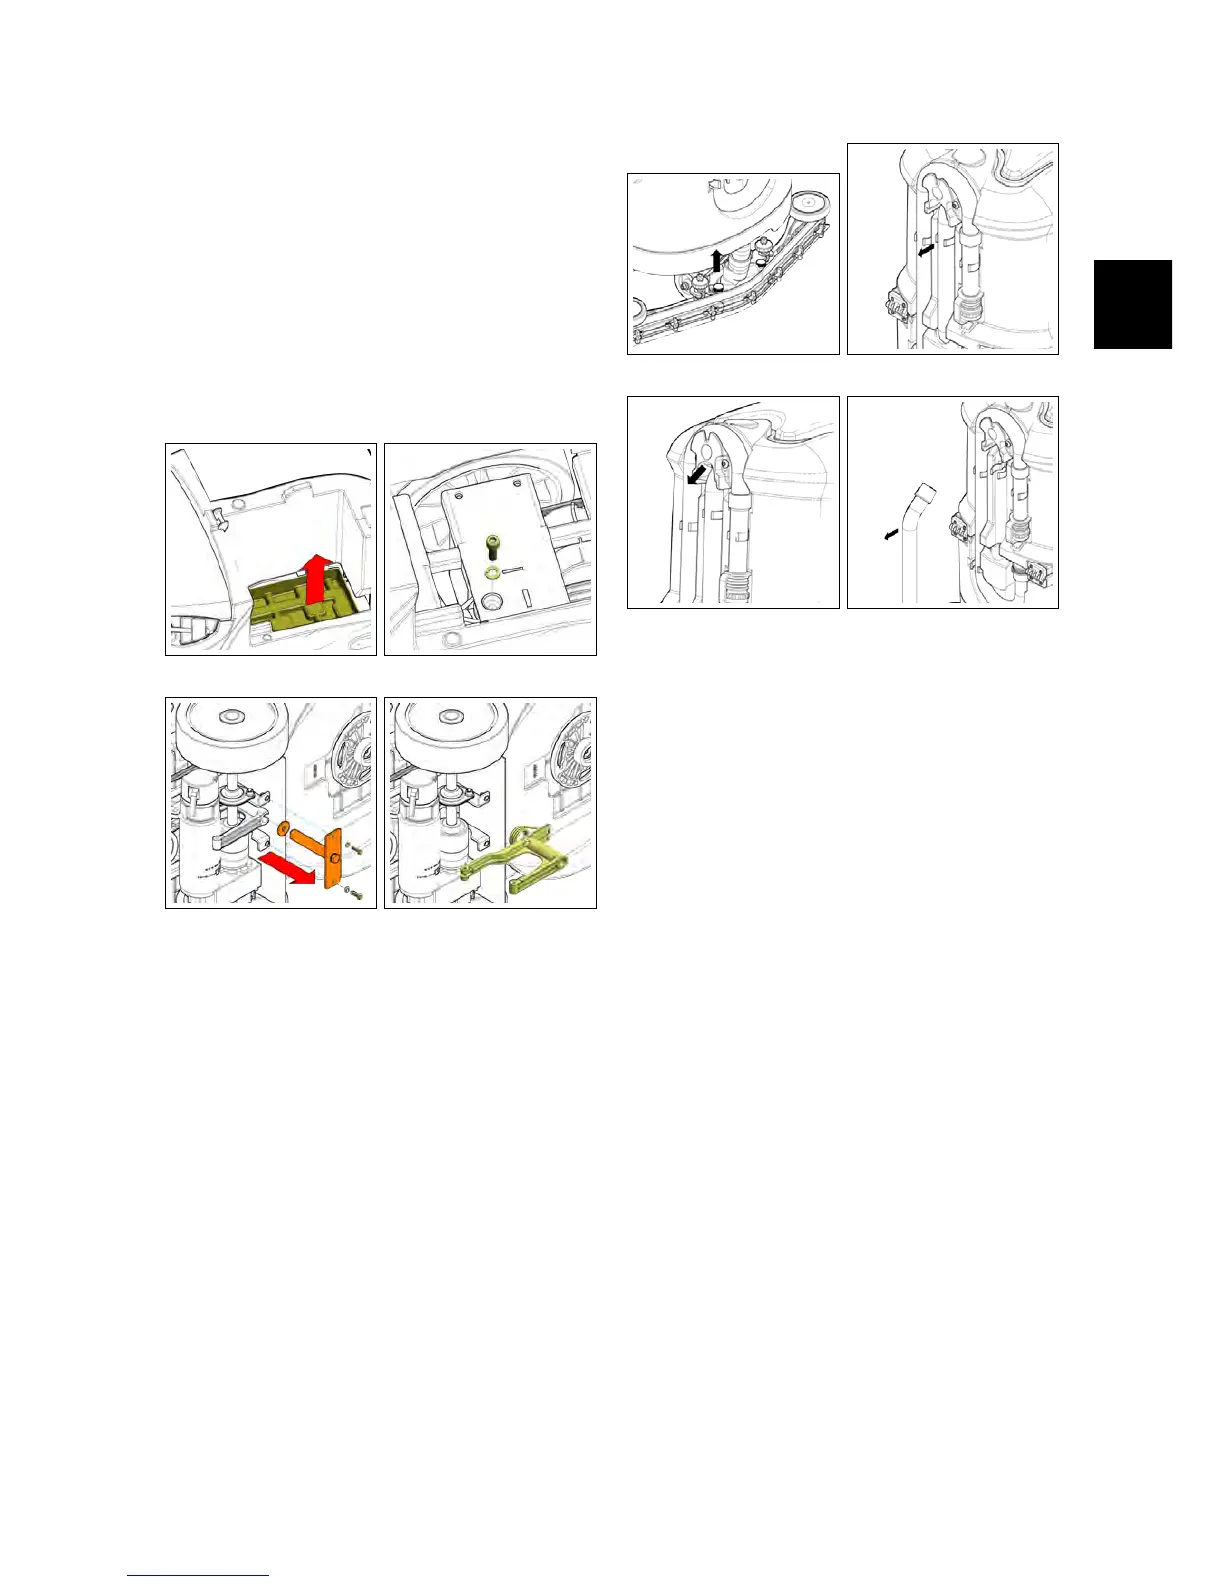
• Remove the screws that secure the
reinforcing plate of the squeegee
support fulcrum and remove it. to-
gether with, it will be also removed
the squeegee support fulcrum hub
(see fig. 4.3.2-24).
• Remove the squeegee support ful-
crum rotating it properly (see fig. 4.3.2-
25).
4.3.2-22 4.3.2-23
4.3.2-24 4.3.2-25
4.3.3 Vacuum Hose
• Put the machine in safe conditions.
• Unplug the Vacuum Hose from the
Squeegee (see fig. 4.3.3-26).
• Uncouple the squeegee from the
plastic clip (see fig. 4.3.3-27).
• Uncouple the Vacuum Hose from the
Recovery tank Inlet (see fig. 4.3.3-28).
• Slip off the hose from its housing (see
fig. 4.3.3-29).
• Proceed at reverse to refit the part.
4.3.3-26 4.3.3-27
4.3.3-28 4.3.3-29
4.3.4 Recovery Tank
• Make sure that the recovery tank is
completely empty.
• Put the machine in safe conditions.
• Remove the recovery tank lid.
• Remove the vacuum hose (see fig. 4.3.4-
30).
• Unplug the charger cable - vacuum
motor - blinking light.
• Cut the clamps that secure the ca-
bles to the solution tank.
• Loosen the screw that fix the safety
cord of the tank (see fig. 4.3.4-31).
• Unscrew the screws holding the
opening hinges to the recovery tank
(see fig. 4.5.1-53).
• Proceed at reverse to refit the part.