10-77
10.4 Splashguard Kit -
222480
10.4.1 Description
Even if the solution output is in the mid-
dle of the brush, on particular not ab-
sorbing kind of floors could be neces-
sary a Splashguard in order to avoid the
dispersing of the solution outside of the
scrubbing path. The Functioning of this
kit is absolutely equal to the other ones
similar to it.
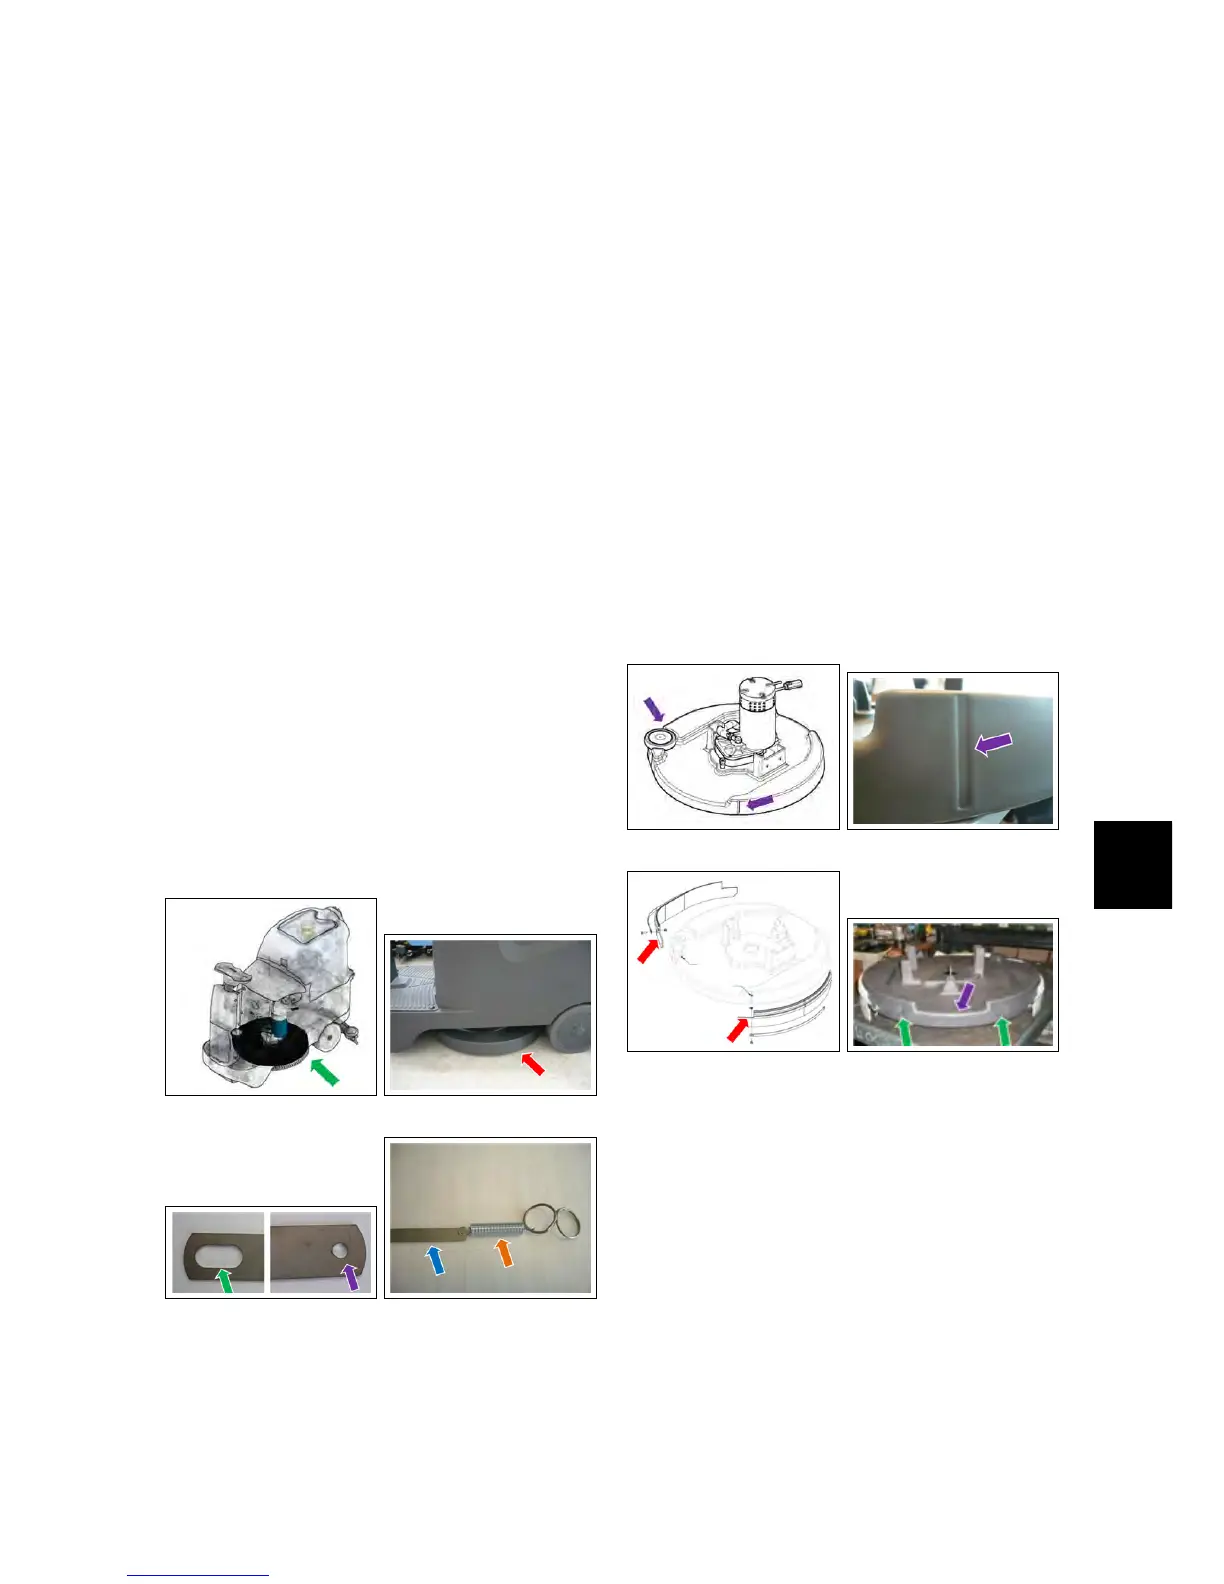
10.4.2 Installing instructions
• Release the brush, switch off the
machine and unplug the batteries.
• Lower the brush deck.
• Mount the splashguard blades sup-
plied with the kit. The spring should
be attached to the side without slot
(traditional hole). The side with the
loop has to be fastened to the deck
first.
10.4.2-125 10.4.2-126
10.4.2-127 10.4.2-128
• Fix the splashguard blades to the
deck. Drill two holes φ 4 matching
the grooves in the front of the deck.
The height of the hole from the bot-
tom side of the base should be 13
mm.
• Fix the blades using the M4 screws
provided with the kit. Tighten the
nut and locknut.
• Determine the position of the re-
maining fixing holes Ø4 starting
from the grooves on the rear side of
the deck.
Consider the drive position as a
reference.
Keep the hole 13 mm height from
the bottom side of the deck.
10.4.2-129 10.4.2-130
10.4.2-131 10.4.2-132
• Make the left side hole 8 cm from the
corresponding rear groove.
• Make the right side hole 10 cm from
the corresponding rear groove.
• Once drilled the fixing holes, attach
the blades and the splashguard rub-
bers by pulling the spring and using
the M4 screws provided with the kit.
Attach nuts and locknuts.