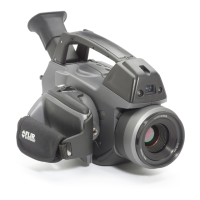
Handling the camera
16
16.1 Charging the camera battery
16.1.1 Charging the battery using the power supply cable
Note
• You must charge the battery for four hours before starting the camera the first time.
After that, you must charge the battery whenever a warning message for low battery
power is displayed on the screen.
• The battery has a battery condition LED indicator. When the green LED glows continu-
ously, the battery is fully charged.
• Charge the battery at room temperature. If you charge the battery when it is inside the
camera, the camera should be turned off. Charging the battery when it is inside the
camera will not result in a fully charged battery.
16.1.1.1 Procedure
Follow this procedure to charge the battery using the power supply cable:
1. Connect the power supply cable plug to the connector on the battery.
2. Connect the power supply wall plug to a mains supply.
3. When the green LED of the battery condition indicator glows continuously, disconnect
the power supply cable.
16.1.1.2 Related topics
• For information about the battery condition LED indicator, see 12.4 Battery condition
LED indicator, page 32.
• For information on how to install and remove the battery, see 16.2.1 Installing the bat-
tery, page 47 and 16.2.2 Removing the battery, page 48.
16.1.2 Charging the battery using the stand-alone battery charger
Note
• You must charge the battery for 4 hours before starting the camera for the first time.
After that, you must charge the battery whenever a warning message for low battery
power is displayed on the screen.
• The battery has a battery condition LED indicator. When the green LED glows continu-
ously, the battery is fully charged.
• Charge the battery at room temperature.
16.1.2.1 Procedure
Follow this procedure to charge the battery using the stand-alone battery charger:
1. Put the battery in the stand-alone battery charger.
2. Connect the power supply cable plug to the connector on the stand-alone battery
charger.
3. Connect the power supply wall plug to a mains supply.
4. When the green LED of the battery condition indicator glows continuously, disconnect
the power supply cable.
16.1.2.2 Related topics
• For information about the battery condition LED indicator, see 12.4 Battery condition
LED indicator, page 32.
• For information on how to install and remove the battery, see 16.2.1 Installing the bat-
tery, page 47 and 16.2.2 Removing the battery, page 48.
#T559157; r. AH/45951/45951; en-US
46