Viewing and Printing Saved Reports
Printing Test Reports
5
5-3
Printing
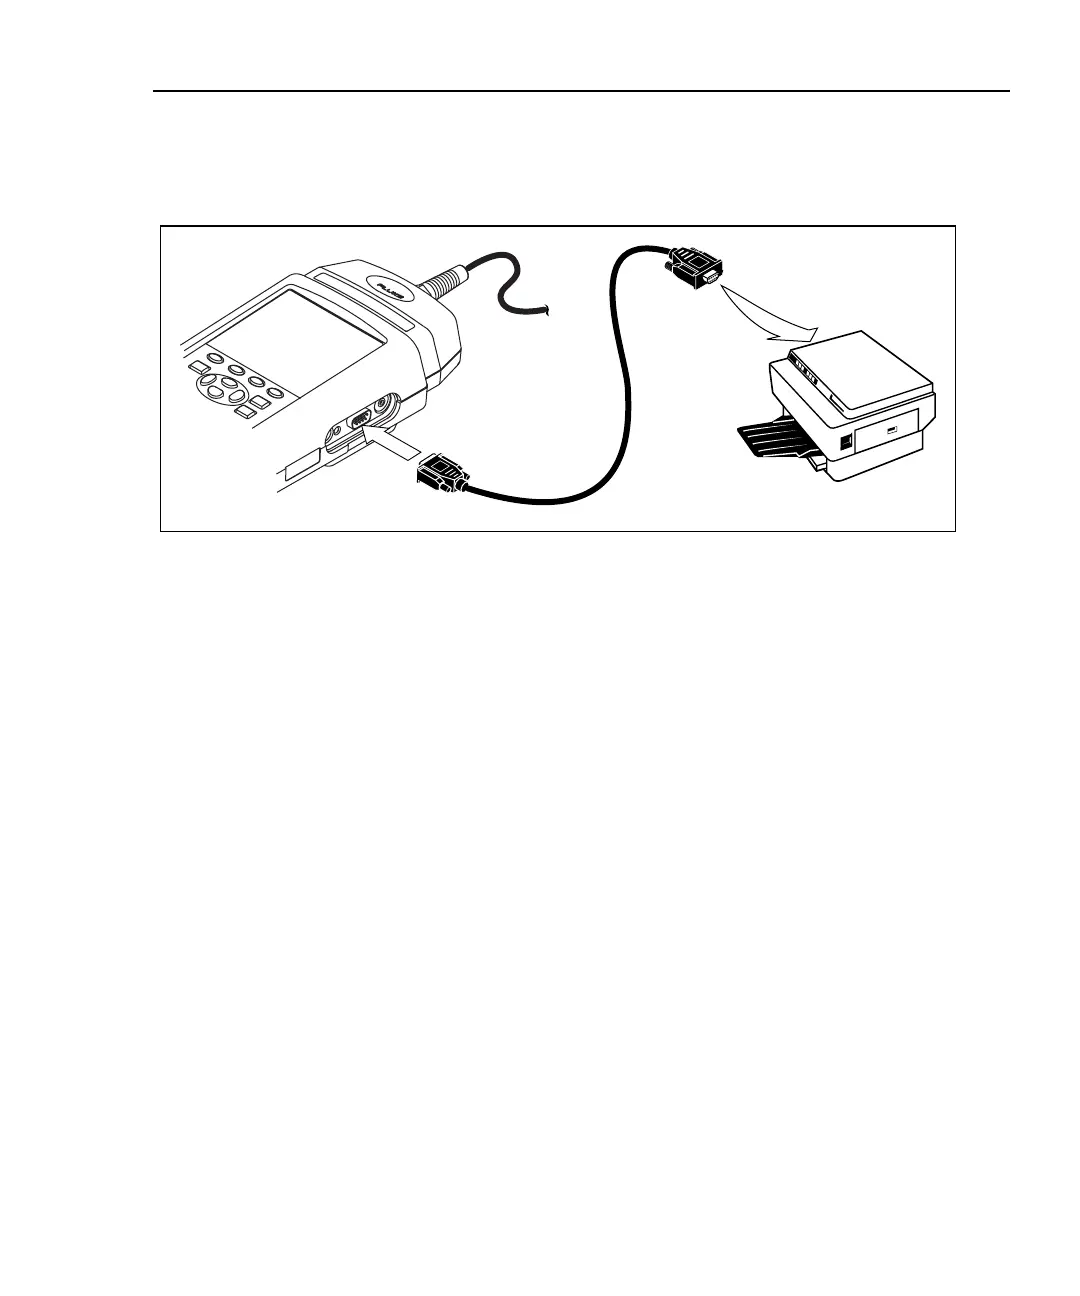
To send a report through the test tool’s serial port directly to a serial printer, refer
to Figure 5-1 and proceed as follows:
Test Tool
oy25f.eps
Figure 5-1. Connections for Printing Test Reports
1. Remove any cables connected to the connectors at the top of the test tool.
2. Configure the test tool’s serial port, as described in the previous section.
3. Use an appropriate cable to connect the test tool to the printer.
4. Turn the rotary switch to PRINT.
5. Use D U to highlight the print function you want.
6. Press E to select the highlighted function.
The results of selecting each function are as follows:
• All Autotest Reports: Prints all of the reports stored in the test
tool’s memory. Before printing, the test tool’s report format, baud rate, printer
type, and flow control are displayed. You can change these settings in the
PRINT mode, as described in the earlier section “Configuring the Serial Port.”
Press E to start printing. To stop printing and return to the main print
screen, press e.
 Loading...