Need support? support@freenove.com
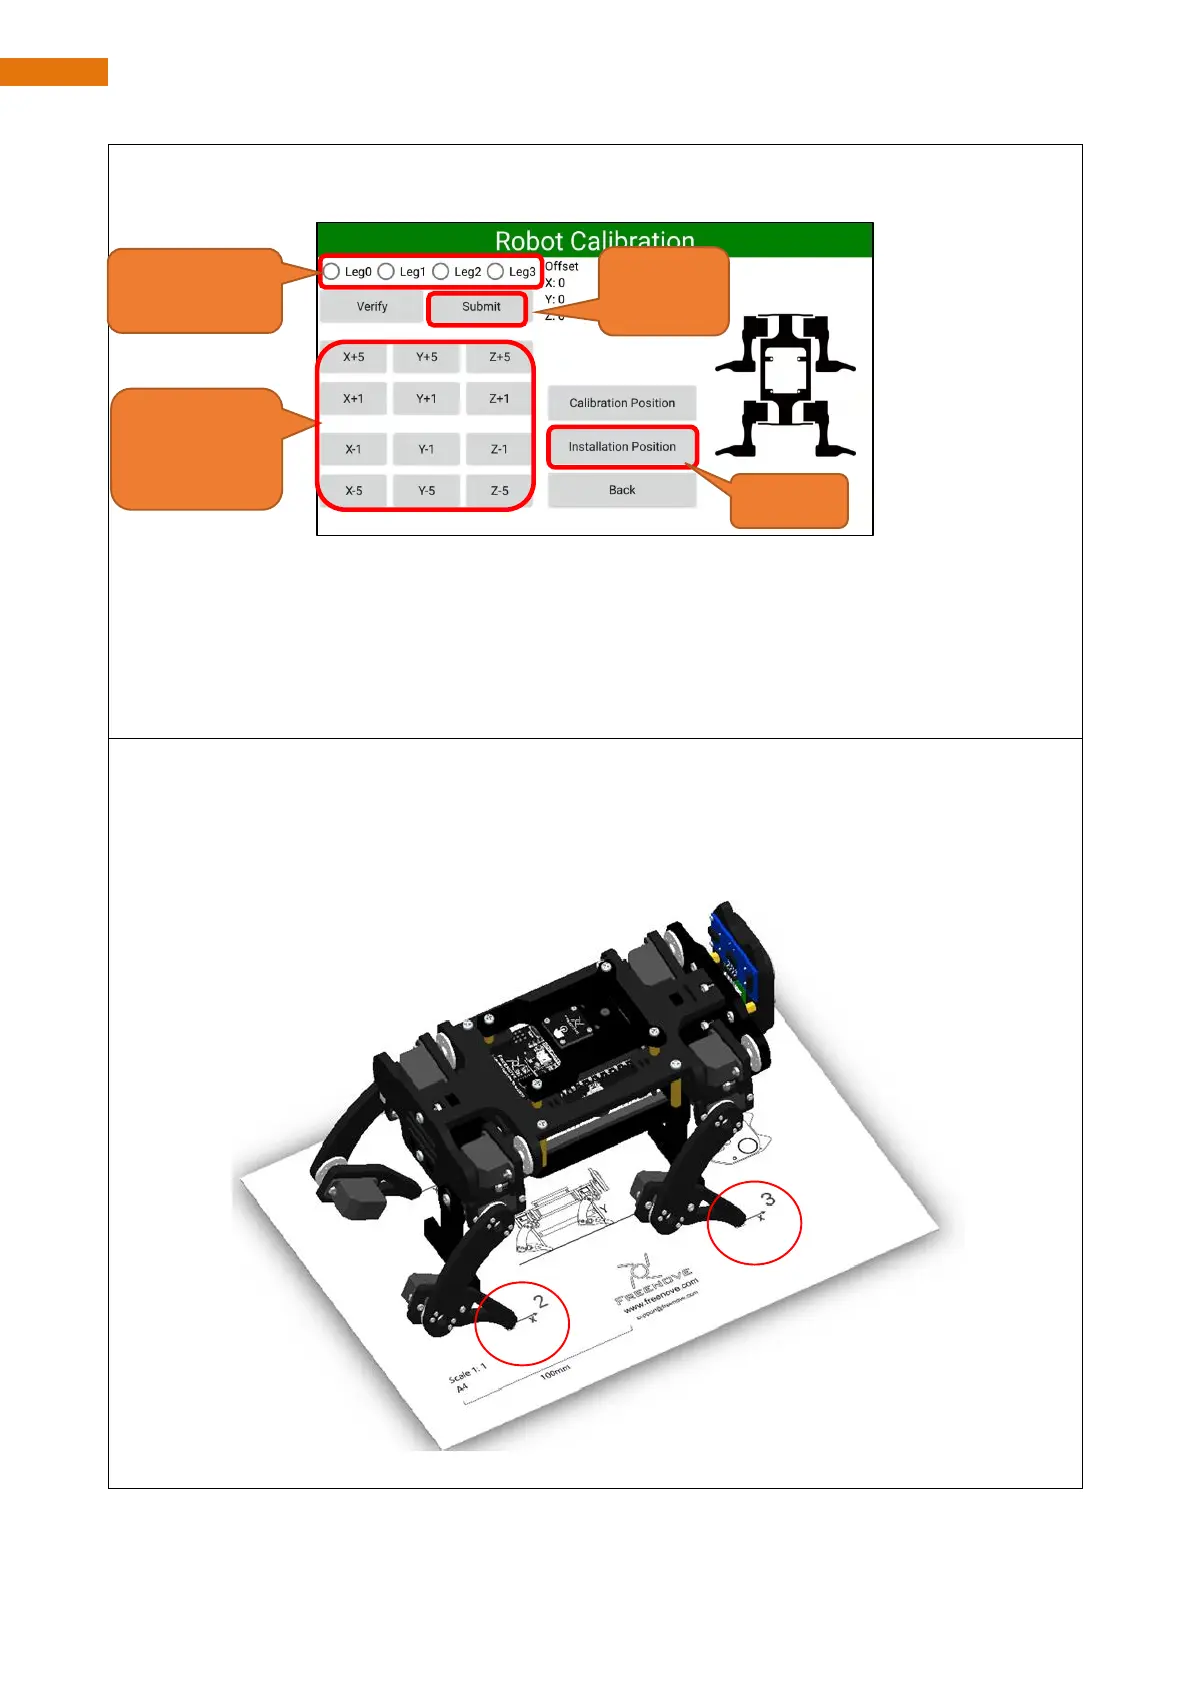
11. Select the leg to calibrate. Calibrate the legs by adjusting the X, Y and Z axes to make the tiptoe match
the point on the calibration graph.
Operation process of robot dog leg calibration:
1. Select the leg to calibrate. Tap the calibration button to adjust the position until the tiptop match the
point on calibration graph.
2. Tap “Submit” to upload the data after calibration to robot dog. Without this process, the result will not
be saved.
3. Repeat the above steps until all the four legs complete calibration.
The robot after calibration is as shown below:
During the adjustment process, you can click the Verify button to Verify that the calibrated leg is accurate.
If it is not accurate, the leg needs to be recalibrated. The corrected leg is allowed to have a certain error.
The error of +-5mm is allowed in the XZ direction. The Y direction needs to hit the ground right, not jacking
up the robot dog, and not hanging off the ground.
By now, all the preparation work for robot dog has been done. You can now play the robot for fun.
2. Select the
leg to calibrate
3. Tap the
calibration
button