En-6
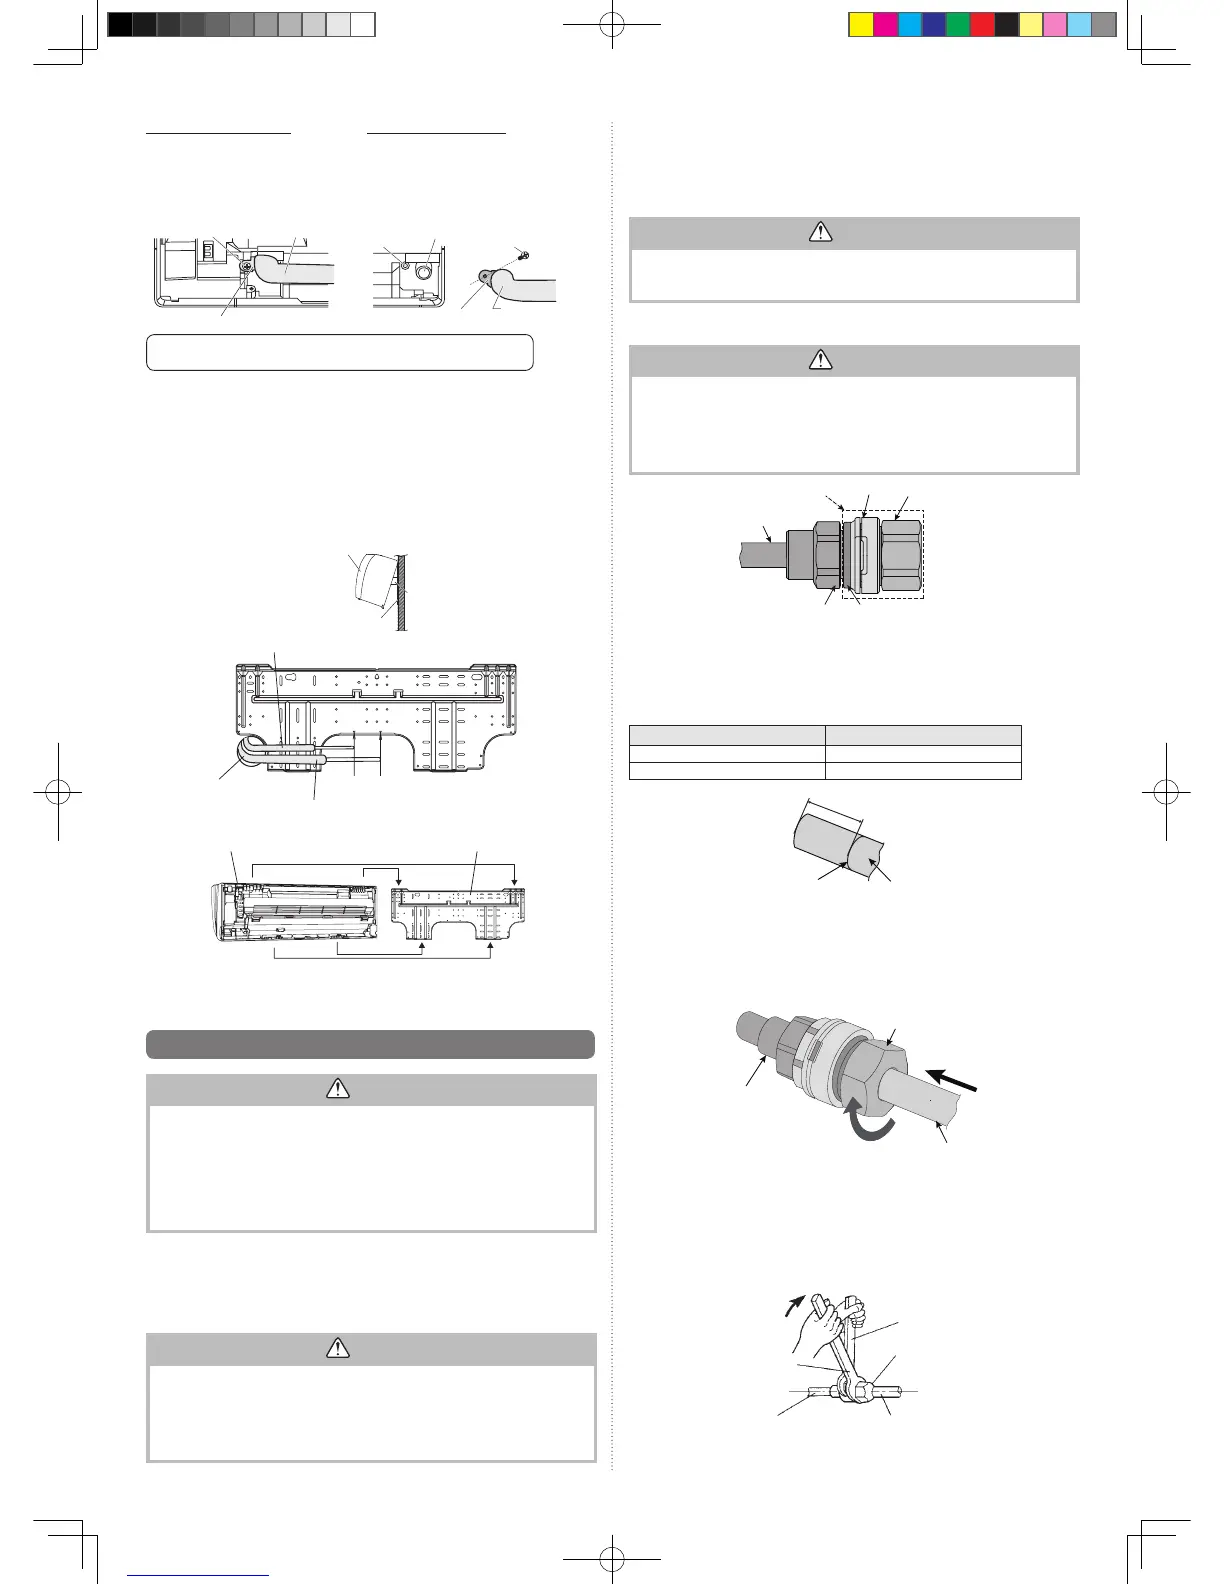
Removing the drain hose
Remove the screw at the left of
drain hose and pull out drain hose.
Installing the drain hose
Verticallyinsertthedrainhosetowardthe
inside,sothatthedrainxture(white)canac-
curately align with the screw hole around the
drain cock.
After inserting and before replacing, please
reinstallandxtheremovedscrews.
• Pleaseholdaroundthejointofthedrainhoseduringwork.
•
Asthescrewisinside,besuretousescrewdriverstreatedwithmagnet.
Screw
Drainxture
Drainhose
Screw hole
Draincock
Drainhose
Screw
Drainxture
•
For left piping and left rear piping, align the marks on the wall hook bracket and shape the
connection pipe.
•Bendtheconnectionpipingatabendradiusof70mmormoreandinstallnomorethan
35mmfromthewall.
•
Afterpassingtheindoorpipinganddrainhosethroughthewallhole,hangtheindooruniton
the hooks at the top and bottom of the wall hook bracket.
[Installing the indoor unit]
• Hangtheindoorunitfromthehooksatthetopofthewallhookbracket.
• Insertthespacer,etc.betweentheindoorunitandthewallhookbracketandseparate
the bottom of the indoor unit from the wall.
Indoor unit
Wallhookbracket
(Spacer)
Liquidpipe(6.35mmdia.)
Alignthemarks
Indoor unit
Gaspipe(12.70mmdia.)
Top hooks
Bottom hooks
Wallhookbracket
Bend R70 mm with
a pipe bender
•Afterhookingtheindoorunittothetophook,hookthettingsoftheindoorunittothe2
bottom hooks while lowering the unit and pushing it against the wall.
6.9. Connecting the pipe
CAUTION
Tightenthenutwithatorquewrenchasspecied.Overtightenednutcouldbreak•
after a prolonged period, and may cause a refrigerant leakage. If the leaking refriger-
antisexposedtoadirectame,itmayproduceatoxicgas.
Hold the torque wrench at its grip, keeping it in the right angle with the pipe, in order •
to tighten the nut correctly.
Connectthepipingsothatthecontrolboxcovercaneasilyberemovedforservicing.•
Topreventinowingofwatertothecontrolbox,makesurethatthepipingisproperly•
insulated.
6.9.1. Check the surface of the connection piping, the end face
Usespecialpipecutter.
(1) Cuttheconnectionpipetothenecessarylengthwithapipecutter.
(2) Holdthepipedownwardsothatcuttingswillnotenterthepipeandremoveanyburrs.
(3) Protect the pipesbypinching them orwithtape to preventdust, dirt, orwaterfrom
entering the pipes.
CAUTION
Donotusetheconnectingpipeas-isifthereareanyawsasdescribedbelowwithin
30mm from the tip of the pipe.
-Therearescratchesordentsontheouterperimeter(Excludingmarksmadebypipe
cutters).
-Is deformed or bent.
In such case, cut the pipe vertically with a pipe cutter and deburr the edges.
6.9.2. Bending pipes
•Thepipesareshapedbyyourhands.Becarefulnottocollapsethem.
•Donotbendthepipesinananglemorethan90°
•Whenpipesarerepeatedlybentorstretched,thematerialwillharden,makingitdifcult
to bend or stretch them any more.
•Donotbendorstretchthepipesmorethan3times.
CAUTION
To prevent breaking of the pipe, avoid sharp bends. •
Bendthepipewitharadiusofcurvatureof100mmto150mm.
If the pipe is bent repeatedly at one point, it will break. •
6.9.3. Pipe connection
CAUTION
Donotremovethetighteningnutandxingnutthatareattachedtotheindoorunit.•
(imagebelow)(theinteriorO-ringhasbeenremoved)
Ifthearelessjointnutassyhasbeenloosenedafterithasbeencompletelytight-•
ened,replacewithanewarelessjointnutassy.
Whenremovingthepipingtorelocateorrepairtheunit,replacewithanewareless•
joint nut assy.
 Loading...