How to Perform a Scan (for Mac OS Users)
263
4. Click the [Apply] button.
5. Click the [ ] button in the upper left corner to close the ScanSnap
setup window.
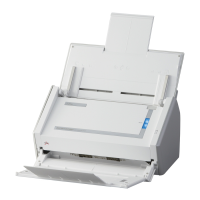
6. Load a document in the ScanSnap.
For details about how to load documents, refer to "How to Load Documents" (page 32).
7. Press the [Scan] button on the ScanSnap to start a scan.
D The [Scan] button on the ScanSnap flashes in blue throughout the scan.
The [ScanSnap Manager - Image scanning and file saving] window appears.
D The Quick Menu appears when the scanning is completed.
z The [Recommended] button is selected in default.
z For details about the default settings when using the Quick Menu, refer to the
ScanSnap Manager Help.
z You cannot change the settings for the [Recommended], [Small File], and [High Quality]
buttons. If you change any of these settings, the profile automatically switches to
[Customize].
For details about how to change scan settings, refer to "How to Configure Scan
Settings" (page 275).
z The [Scan] button setting is [Duplex Scan (Double-sided)] in default. Note that you can
switch the [Scan] button setting to [Simplex Scan (Single-sided)] in ScanSnap
Manager. For more details, refer to "Scanning Only One Side of a Document" (page
386).
z You can also start scanning from the ScanSnap Manager menu.
For more details, refer to "ScanSnap Manager Menu" (page 258).
z Do not connect or disconnect the ScanSnap and other USB devices during scanning.
z Do not close the ADF paper chute (cover) during scanning.
z Do not switch users during scanning.

 Loading...