Actions (for Mac OS Users)
318
Using the Quick Menu
1. Load a document in the ScanSnap.
For details about how to load documents, refer to "How to Load Documents" (page 32).
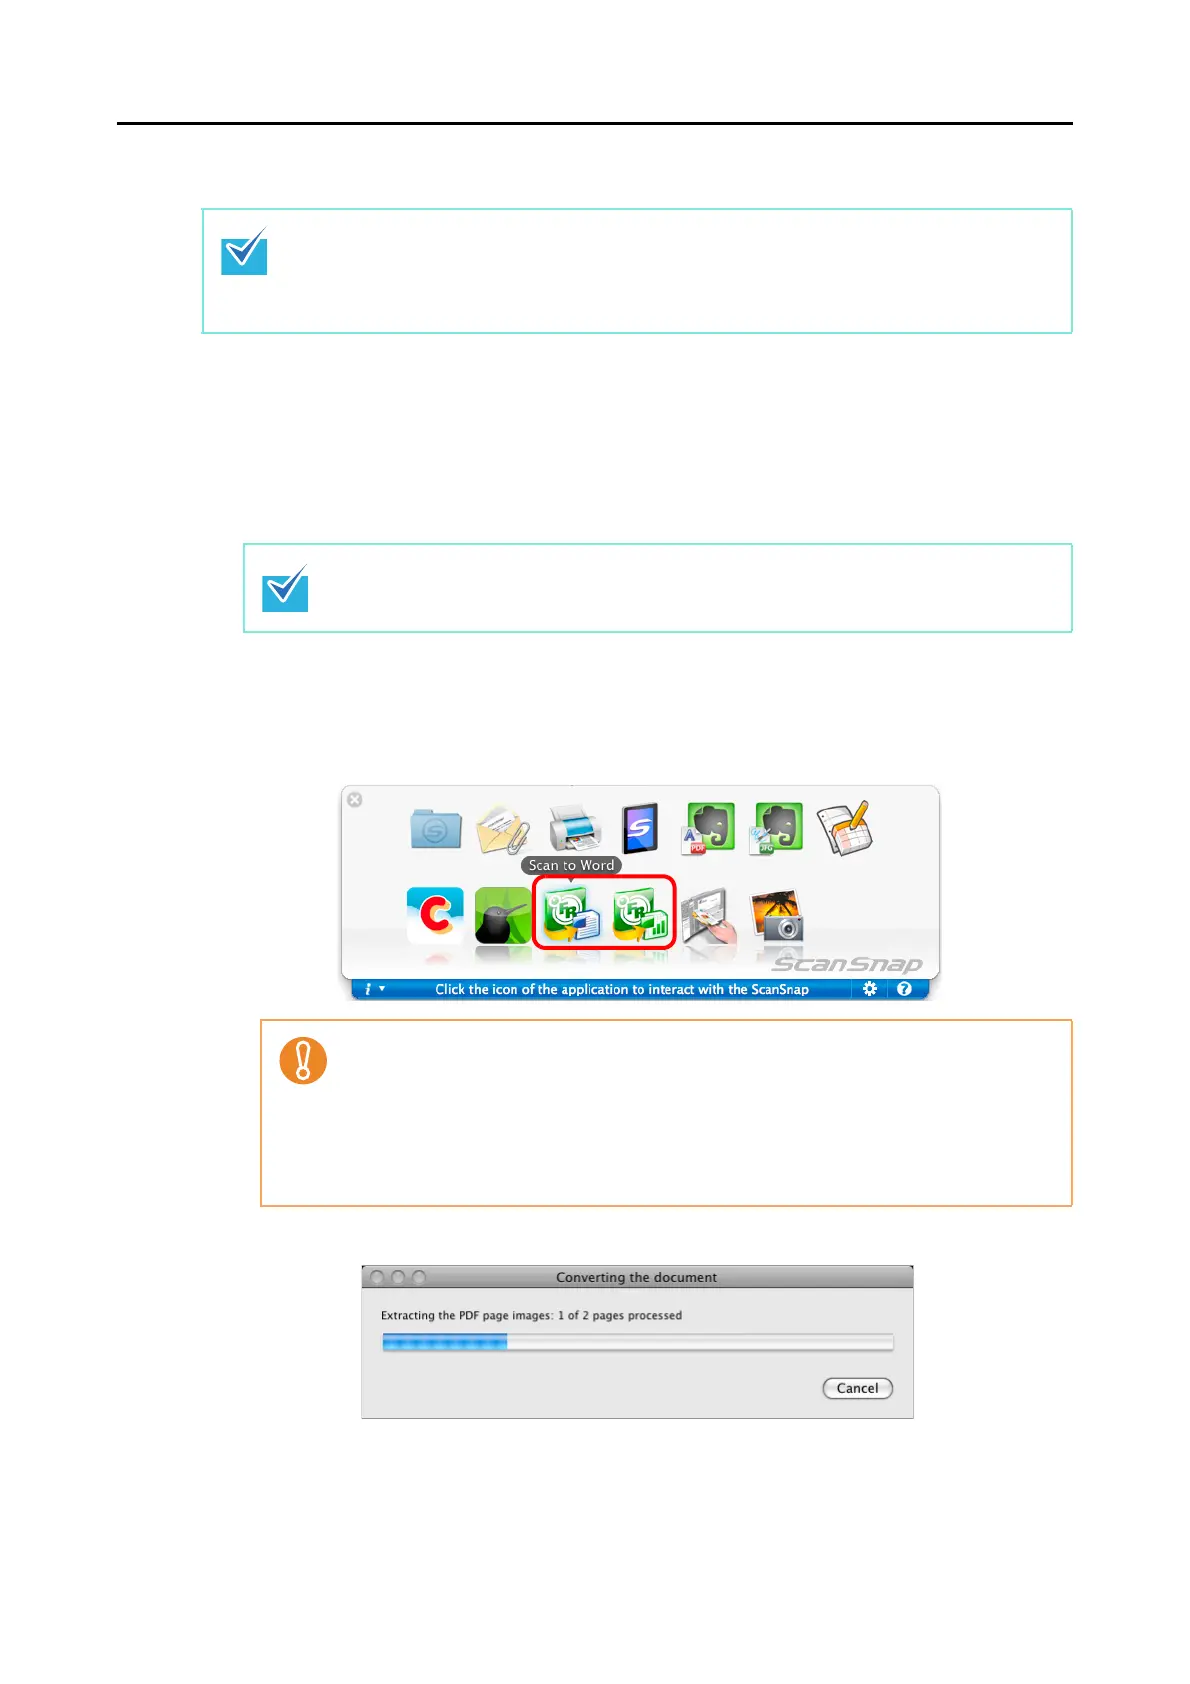
2. Press the [Scan] button on the ScanSnap to start a scan.
D The Quick Menu appears when the scanning is completed.
3. Click the [Scan to Word] or [Scan to Excel] icon.
D The following message appears and conversion starts.
D When the conversion is completed, Word or Excel starts up, and the conversion
result is displayed.
To use the Quick Menu, you need to select the [Use Quick Menu] checkbox in the ScanSnap
setup window.
For details about how to perform scanning by using the Quick Menu, refer to "Using the Quick
Menu" (page 262).
It is recommended that you select [Automatic resolution] or [Best] for [Image quality] in the
[Scanning] tab of the ScanSnap setup window.
z When you perform a scan with [JPEG(*.jpg)] selected for [File format] in the [File
option] tab in the ScanSnap setup window, scanned data cannot be converted into a
Word or Excel file.
z You cannot start scanning when the Quick Menu is displayed. Wait until the
conversion is over to scan another document.
z Do not move, delete or rename the scanned image in other applications when the
Quick Menu is displayed.

 Loading...