BIOS Setup Utility 7
Using BIOS Setup 2
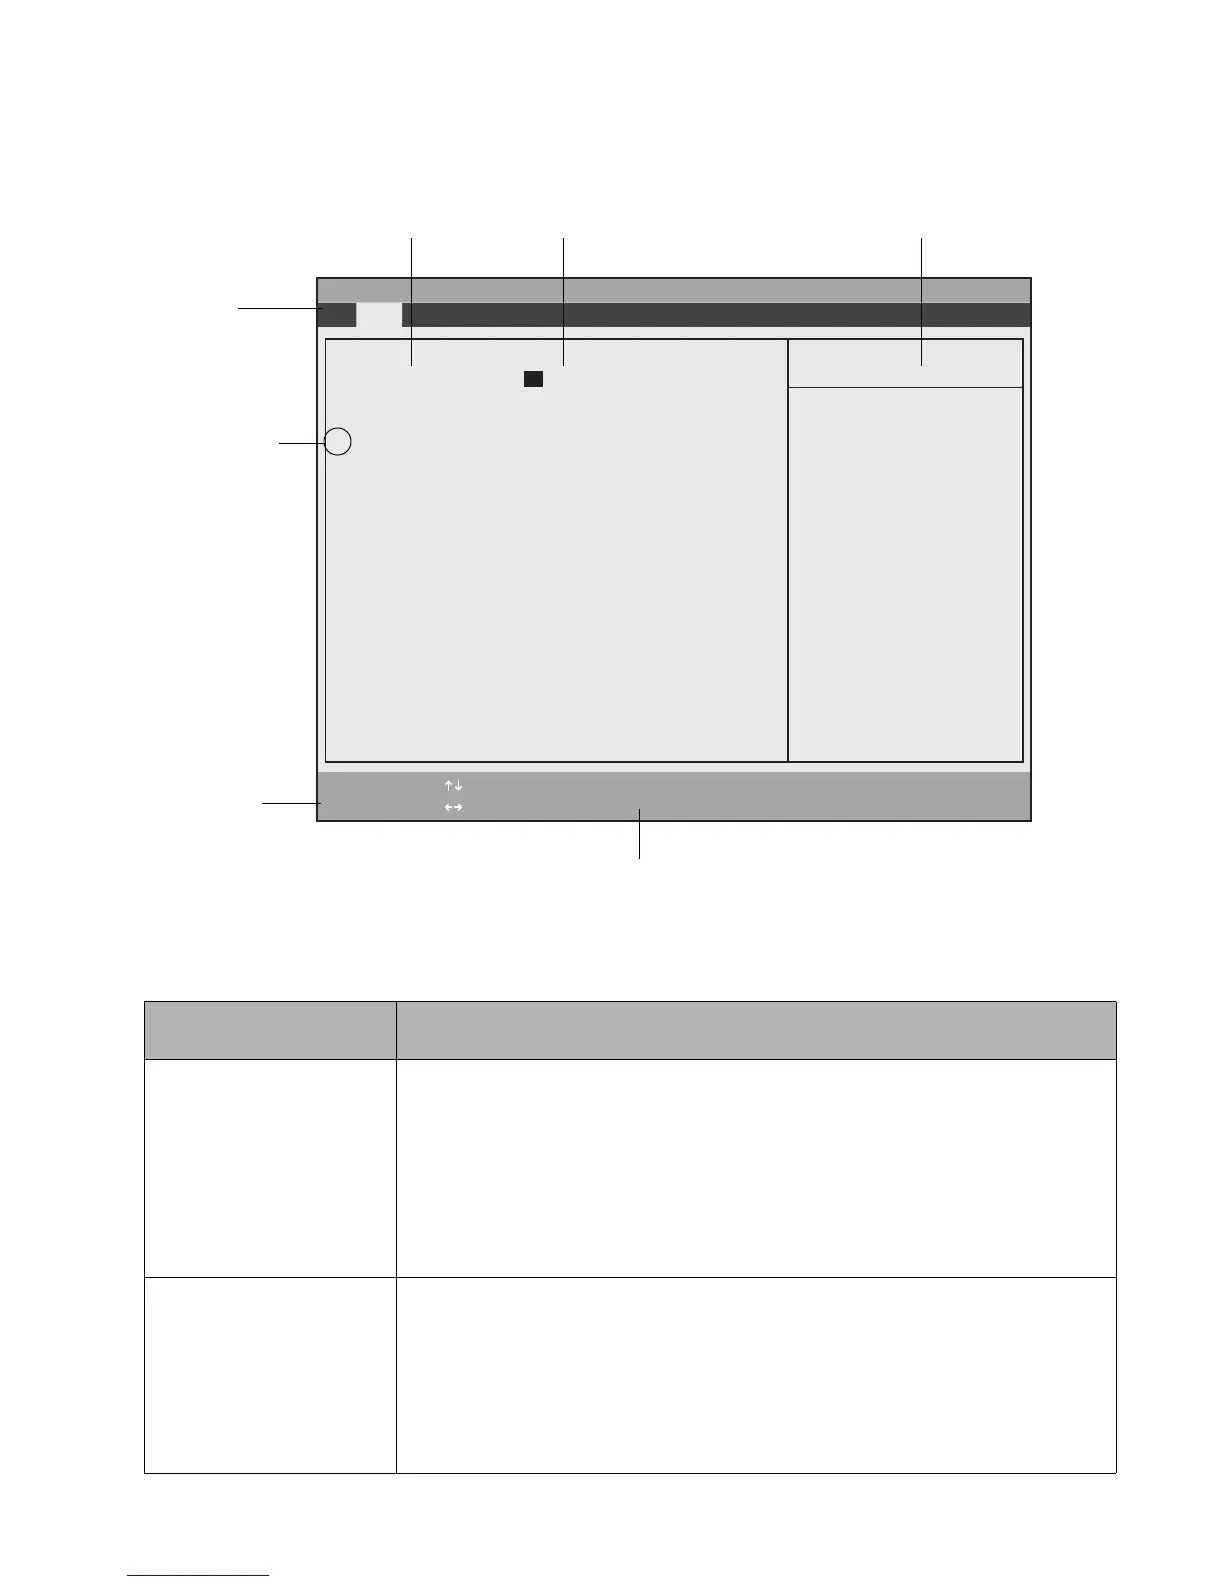
Once the BIOS Setup Utility is started, you can use BIOS Setup to change your system BIOS settings. The BIOS Setup
screen consists of a menu bar, menu items, a command bar, and a window for item-specific help as shown below.
Figure 2-1 BIOS Setup Screen
Instructions for selecting and changing BIOS options and navigating BIOS Setup menus:
If you want to... Do one of these...
Select a BIOS Setup menu
from the menu bar
To move left and right to highlight the menu and display a list of menu options, do
one of the following:
• Press either side of the lower navigation button (the one that is farthest from the
application buttons)
• Tap on the menu name in the menu bar
• Tap on the right or left side of the Select Menu field in the command bar
• Use the right or left arrow keys on an external keyboard
Select a BIOS option To highlight an option in the list of items for a given menu, do one of the following:
• Press either side of the upper navigation button (the one that is closest to the
application buttons)
• Tap on the setting field for the option
• Tap on the right or left side of the Select Item field in the Command Bar
• Use the up and down arrow keys on an external keyboard
System Time: [02:34:56]
System Date: [01/16/2004]
Primary Master [FUJITSU MHT2060AT -(PM)]
Language: [English (US)]
PhoenixBIOS Setup Utility
F1 Help
ESC Exit
Select Item
Select Menu
- Change Values Space
Enter Select Sub-Menu
F9 Setup Defaults
F10 Save and Exit
▲
Main Advanced Security Boot Info Exit
Item Specific Help
Adjust calendar clock.
<Tab>, <Shift-Tab>, or
<Enter> selects field.
▲
BIOS Configuration Options BIOS Configuration Settings Item-Specific Help Window
Menu Bar
(Triangle symbol
indicates that a
submenu is
available)
Command Bar
Highlighted text indicates equivalent keyboard command
 Loading...