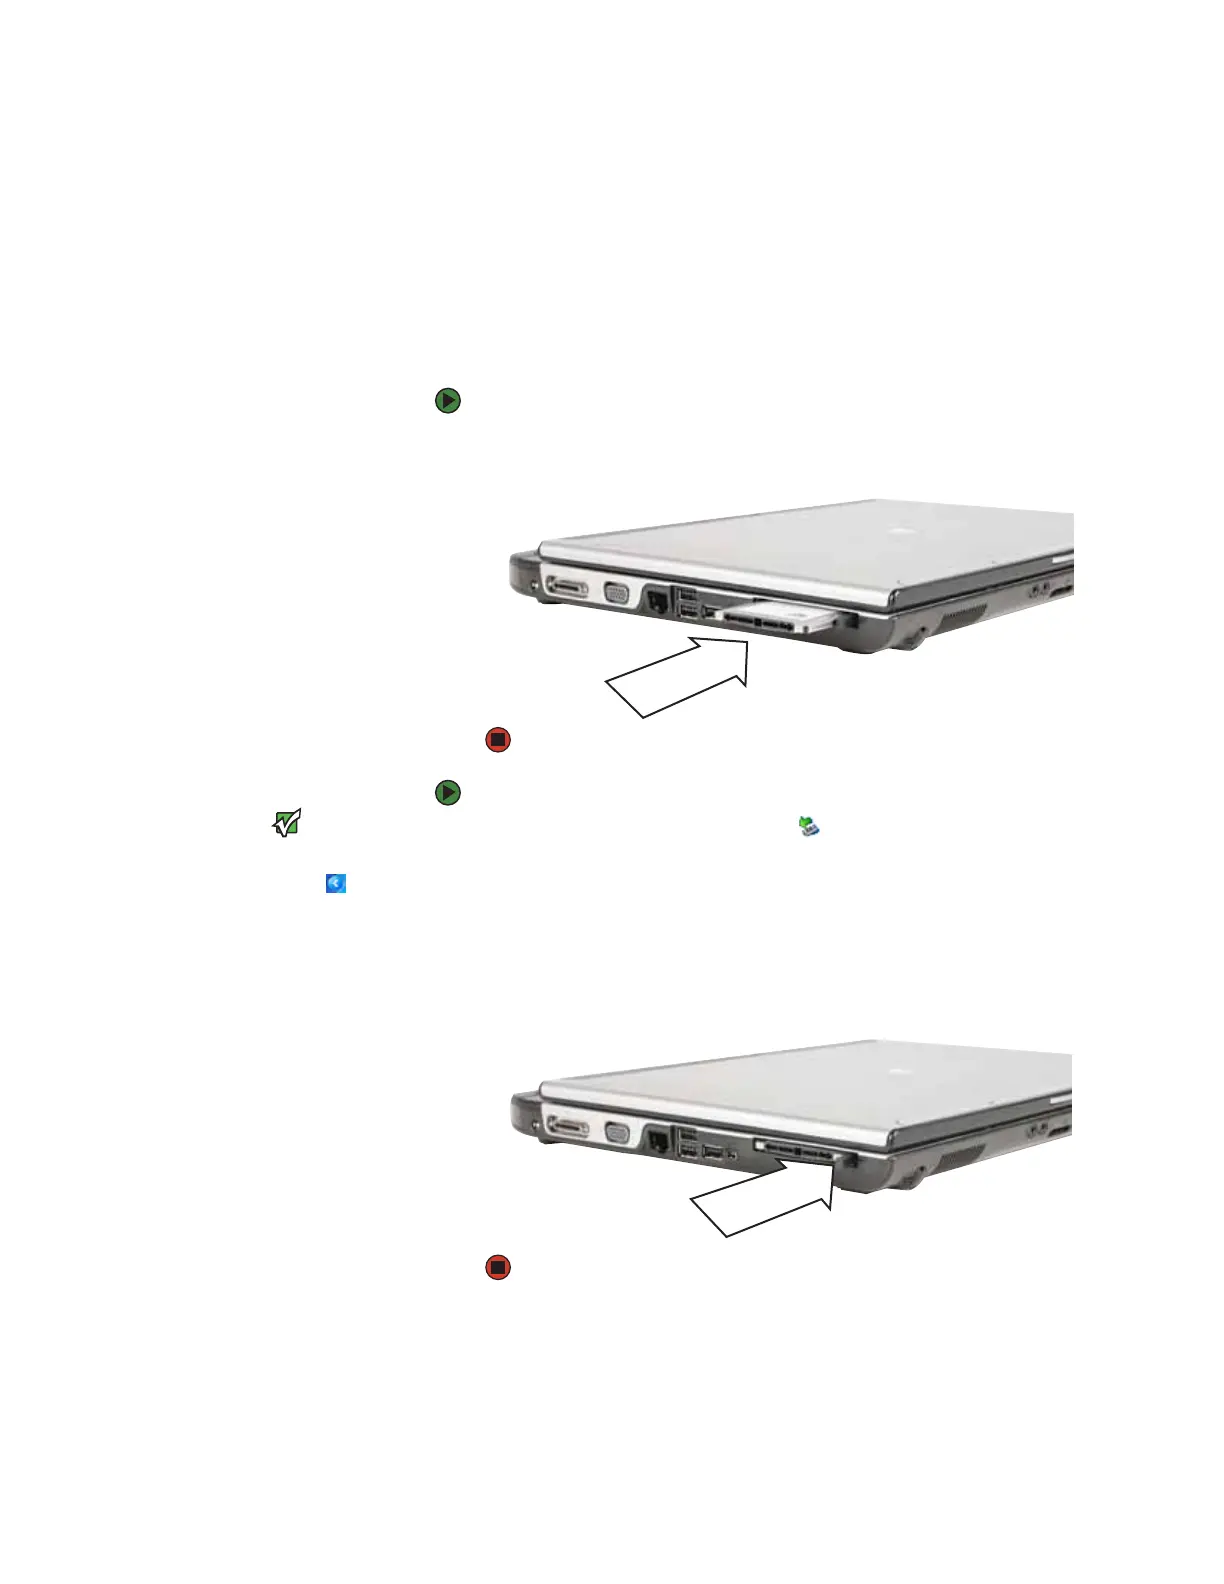
Adding and removing a PC Card
www.gateway.com
33
Adding and removing a PC Card
Your convertible notebook has a PC Card slot (also known as a PCMCIA card
slot). This slot accepts one Type II card. You do not need to restart your
convertible notebook when changing most cards because your convertible
notebook supports hot-swapping. Hot-swapping means that you can insert a
PC Card while your convertible notebook is running. If your PC Card does not
work after hot-swapping, see the PC Card manufacturer’s documentation for
further information.
To insert a PC Card:
■ Push the card firmly into the PC Card slot with the label-side up until the
outer edge of the card is flush with the side of your convertible notebook.
To remove a PC Card:
Important
If the remove hardware icon does not
appear on the taskbar, tap or click the
show hidden icons button.
1 Tap or click the remove hardware icon in the taskbar, the PC Card
name, then tap or click Stop.
-OR-
Turn off your convertible notebook.
2 Release the eject button by pressing the PC Card eject button once.
3 Eject the PC Card by pressing the eject button again.