EasyManuals Logo

Gateway Notebook Hardware Reference Guide

Gateway Notebook
72 pages
To Next Page IconTo Next Page
To Previous Page IconTo Previous Page
Page #43 background imageLoading...
Page #43 background image
Adding or replacing memory
www.gateway.com
39
5 Disconnect all peripheral devices and remove any PC cards.
6 Unplug from the optional port replicator from the notebook.
7 Turn your convertible notebook over so the bottom is facing up, then
remove the main and optional multibay battery. For more information, see
“Changing batteries” on page 34.
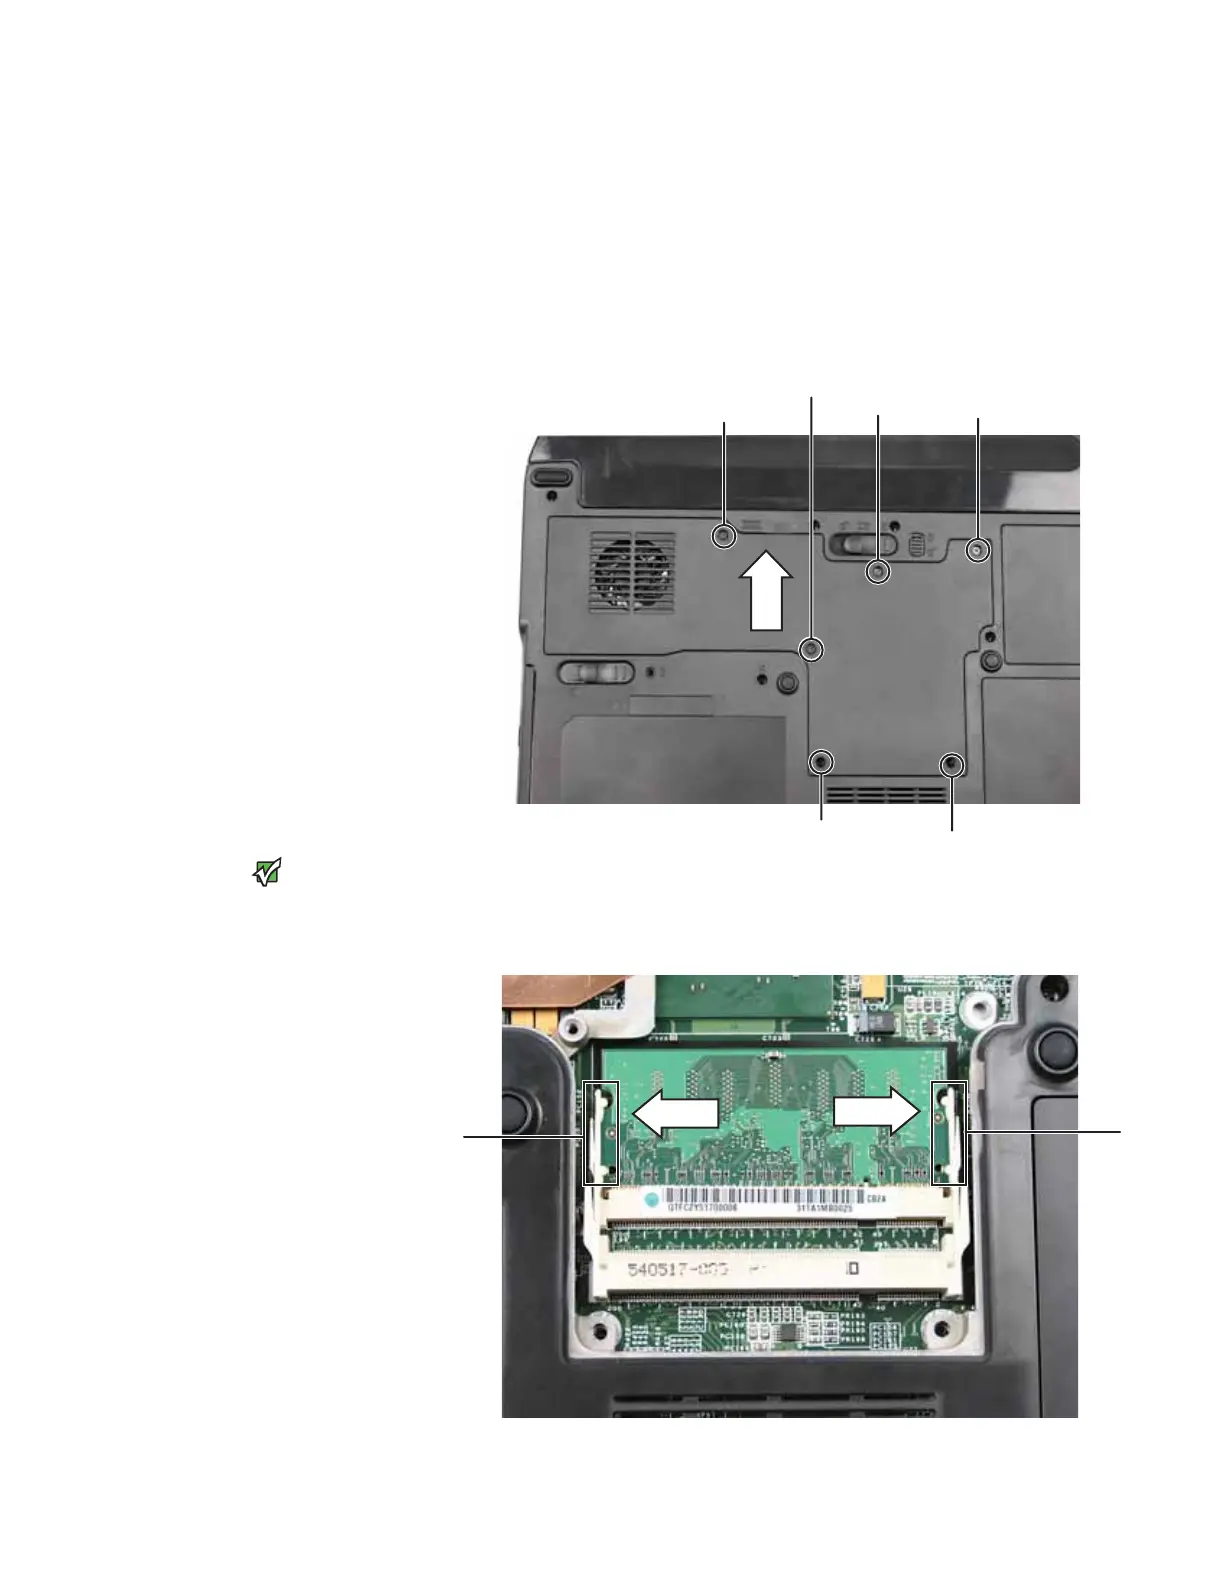
8 Loosen the six memory bay cover screws that secure the memory cover.
(These screws cannot be removed.)
Tips & Tricks
Be careful not to break off the tabs
located on the bottom of the cover. Slide
the cover in the direction shown. If the
cover does not slide easily, wiggle the
cover to loosen it.
9 Remove the memory bay cover.
10 If you are removing a module, gently press outward on the clip at each
end of the memory module until the module tilts upward.
Screw
Screw
Screw Screw
Screw
Screw
Clip
Clip

Table of Contents

Other manuals for Gateway Notebook

Questions and Answers:

Question and Answer IconNeed help?

Do you have a question about the Gateway Notebook and is the answer not in the manual?

Gateway Notebook Specifications

General IconGeneral
BrandGateway
CategoryLaptop
ProcessorVaries by model (Intel Celeron, Pentium, Core i3, Core i5, AMD Ryzen)
RAMVaries by model (8GB, 16GB)
StorageVaries by model (256GB SSD, 512GB SSD, 1TB HDD)
DisplayVaries by model (14-inch, 15.6-inch, FHD)
Operating SystemWindows 10 or Windows 11
GraphicsIntel UHD Graphics
BatteryVaries by model
WeightVaries by model

Related product manuals