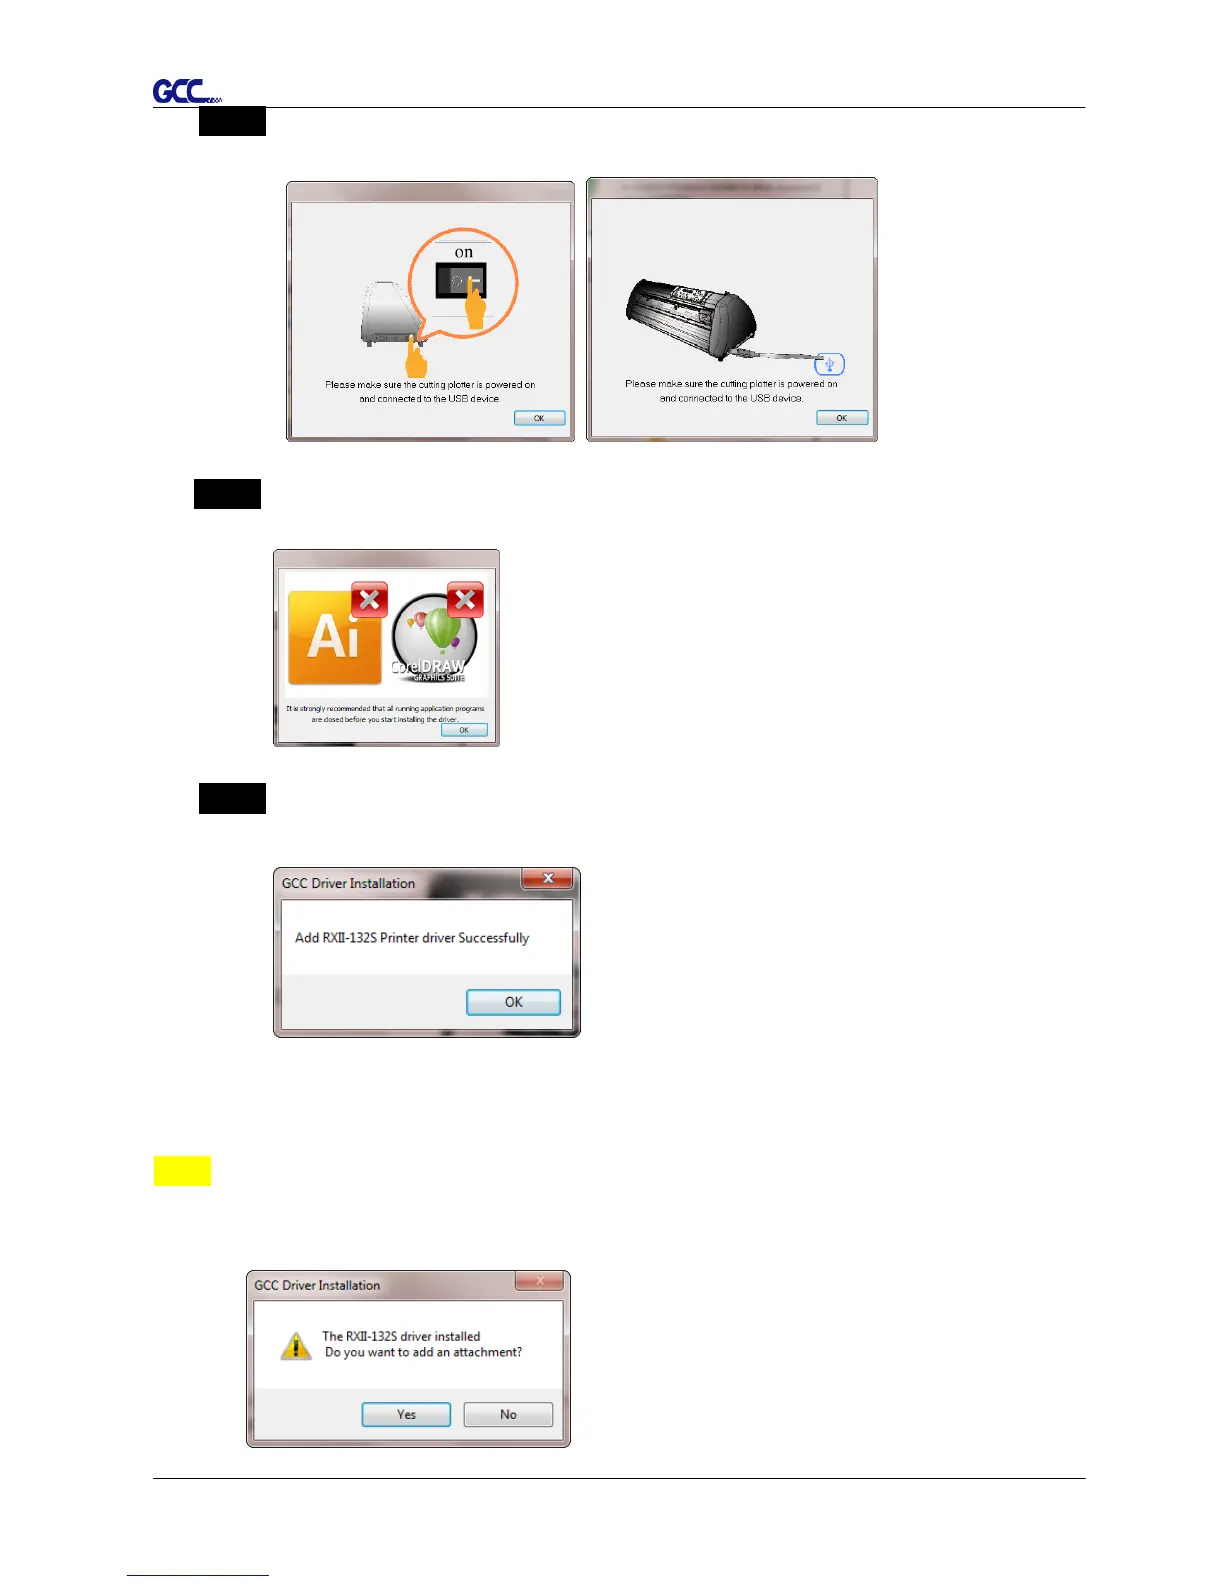
Step 5 Please make sure the cutting plotter is powered on and connected to theUSB
device, and then click OK to next step.
Step 6 Confirm to close all running application programs before you start installing the
driver, and then click OK.
Step 7 The installation will take a few minutes to complete and you will see a message
below and click on “OK” upon completion. Enjoy your GCC cutter!
Note:
(1) If the driver is being installed for a second time, the user will be prompted as to
whether a second copy of the driver installation is required.