61
Tip
The Black & White mode interprets the processed image by the varying colors
and shades. For the best results, we suggest you convert the image to a
grayscale image with your graphics software prior to engraving in the Black &
White mode.
NOTE
Selecting the Black & White mode will enable the Raster page on the LaserPro E200
Print Driver, allowing you to adjust advanced stamp-related settings.
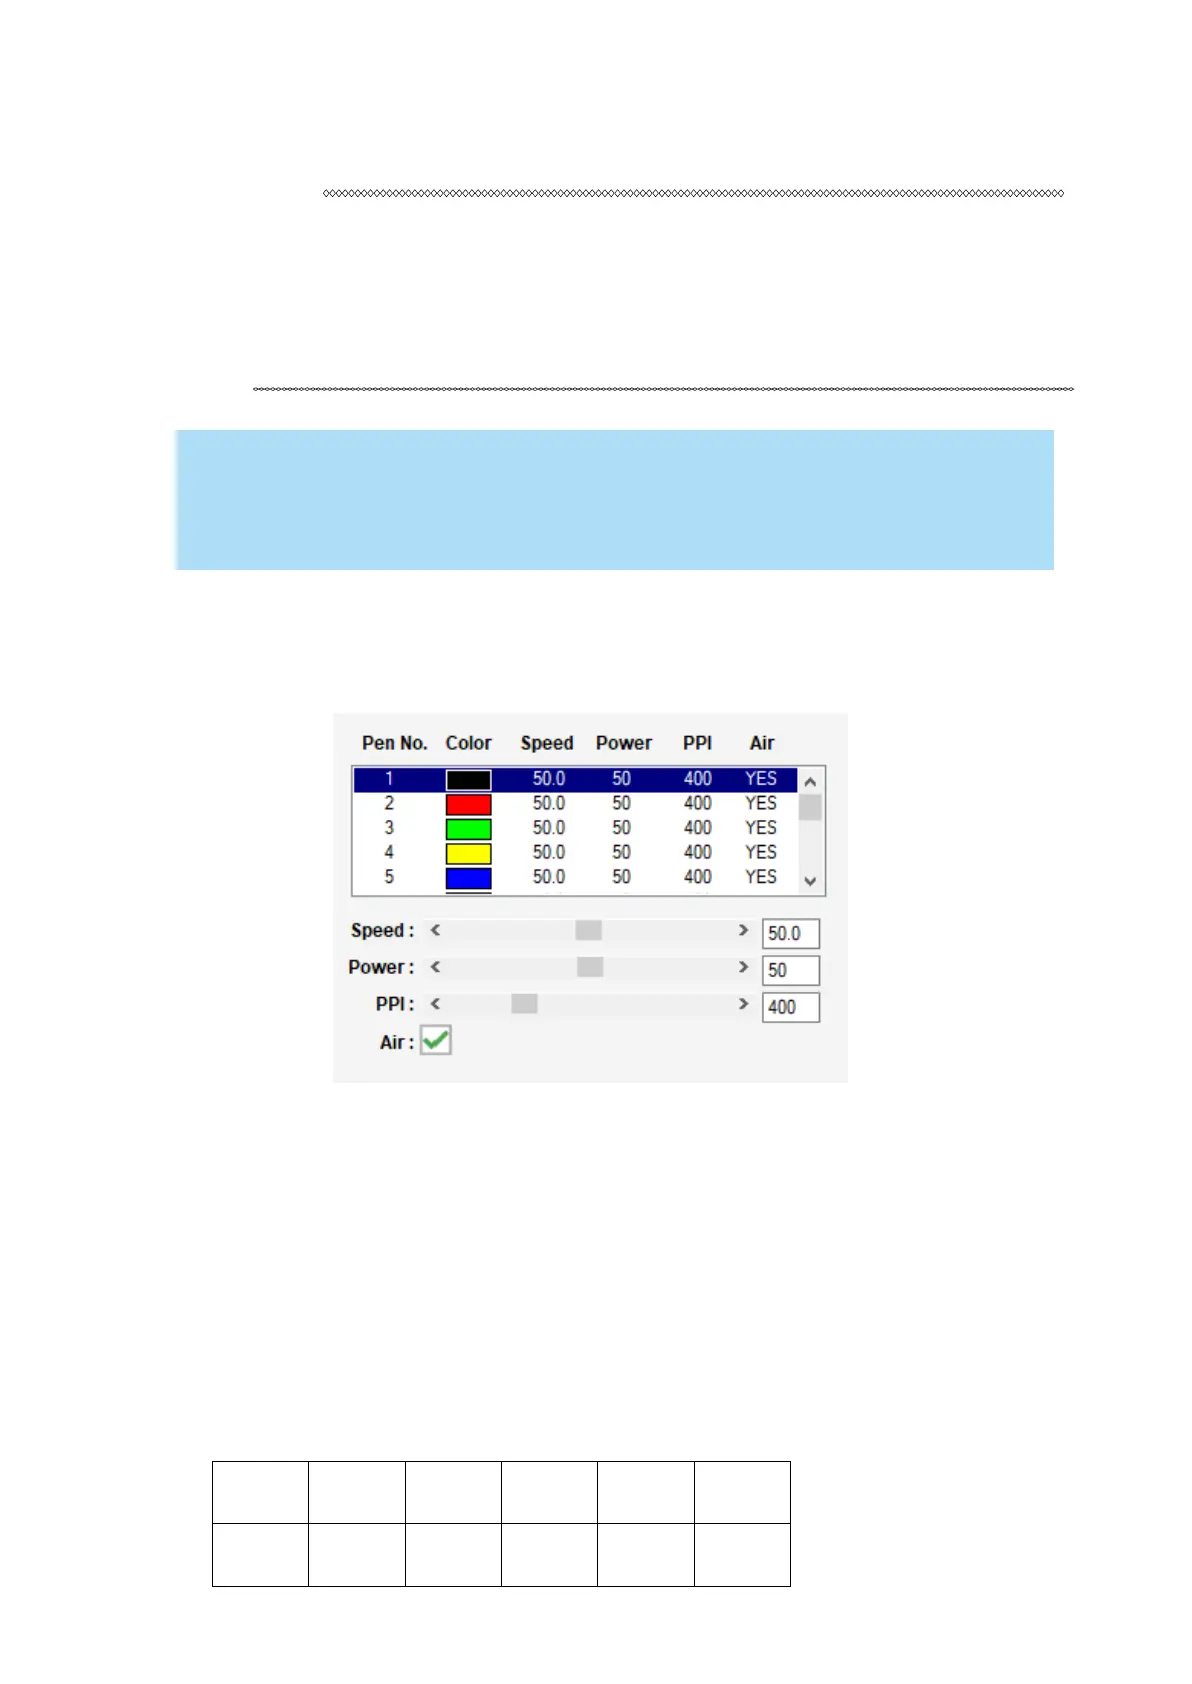
Manual Color Fill:
Specify laser type to different color pens. The GCC LaserPro print driver allows a maximum of 5
pen parameters to be set. It will help user to set different parameters easily in one file.
DPI [DEF
AUL
T SETTING: 500]
DPI (dots-per-inch) represents the number of times the laser will fire over a one-inch path. This setting
determines the image resolution and quality when performing raster engraving functions. Higher DPI
settings result in cleaner and deeper engravings, but require a more time to complete. Lower DPI
settings result in coarser and shallower engravings, but require less time to complete. The LaserPro
E200 offers 8 DPI options: 250, 380, 500, 760 and 1000 experiment with different settings to get your
desired effect.
Below is a chart for your convenience detailing the Set DPI (your input setting) vs. Actual
DPI (your output results).