APPENDIX D: USING CONFIGPRO WITH D20MX
D20MX INSTRUCTION MANUAL GE INFORMATION 119
2. Generate a report of the applications in the original D20 device configuration and
determine the unused applications.
2.1. Right-click on the created D20MX device and select Reports > Application List.
Result: The Select Reports dialog appears with the Application List report
selected.
2.2. Click Setup.
Result: The Print Setup dialog appears.
2.3. Select a printer in the Name field if the Name field is empty.
Result: A printer is selected in the Name field.
2.4. Click OK and OK.
Result: A new tab named Application List opens and contains the Application
List report for the original D20 device.
2.5. Compare the Application List report with Table 2 D20MX application definitions
on page 16. With the exception of LAN Redundancy Manager (B119-1N), note
the applications that appear in Table 2 but not in the report. You may want to
print Table 2 and mark these applications. These applications are referred to as
“unused” applications in the steps to follow.
2.6. Click the Door icon to close the Application List report.
Result: The project containing the created D20MX device reappears.
3. Edit the device properties of the created D20MX device so that it uses an appropriate
D20MX SAN firmware file and it has similar device properties to the desired D20MX
factory default configuration.
The D20MX SAN firmware files exist in two forms:
– SAN0001 contains the latest versions of all applications and should be used in all
new configurations.
– SAN0002 contains older versions of the Mailbox DTA [B009] and DNP v3.00 DPA
[B021] and is required for systems with older applications. If transferring
configurations containing B009 versions less than or equal to 310 and B021
versions less than or equal to 912, use the file SAN0002 firmware. For more
details, see Table 2, “D20MX applications,” on page 17.
3.1. Select the factory-based D20MX configuration file to be restored.
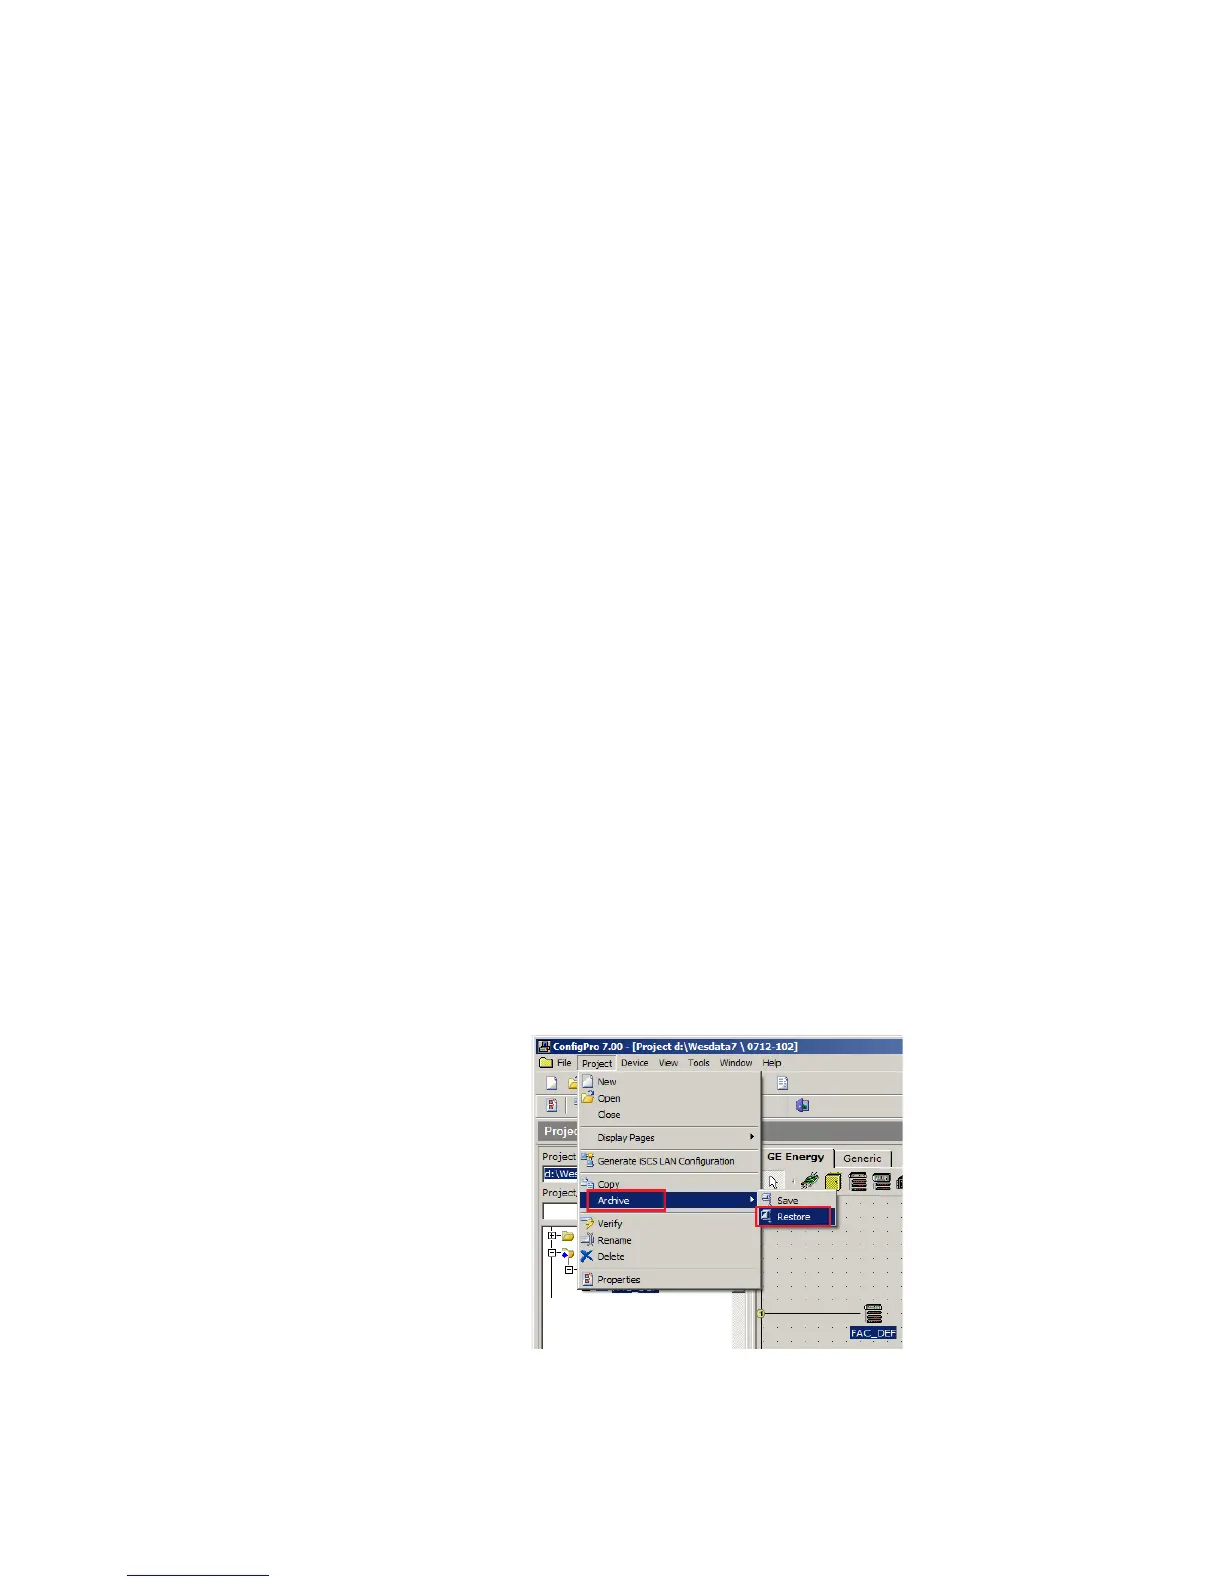
3.1.1. Right-click the D20MX device.
3.1.2. Select Archive > Restore.
Result: The Select a Device Zip file to Restore window appears.