Peripherals Installation
LOGIQ C9 Series – Basic Service Manual 3-27
5482298-100 English Rev. 5
Installation Procedure (continued)
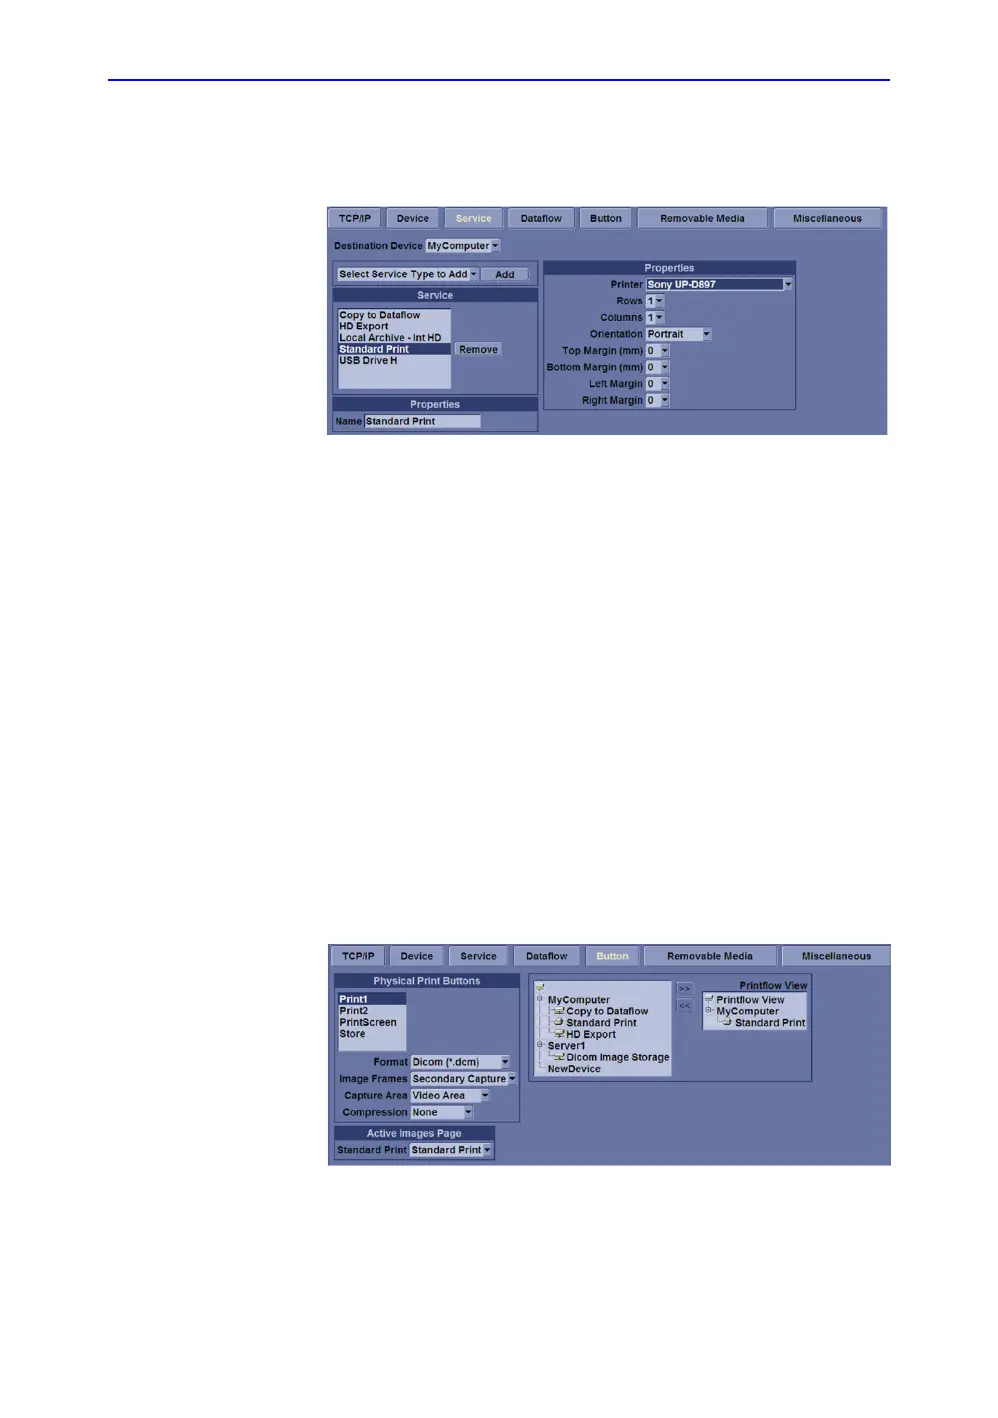
5. Select Utility--> Connectivity--> Service. Select or add the
Standard Print service.
Figure 3-5. Connectivity -> Service Screen
6. Select the printer from the Printer pull-down Properties
menu.
NOTE: After selecting the printer, the field turns white.
7. Set the following parameters in Properties:
• Rows=3
• Columns=2
• Orientation=Portrait
• Right Margin (mm)=10
8. Type the printer name in the Name field.
NOTE: This name is used on the Button screen.
9. Press Save, then select the Button tab.
10. Select the appropriate print key (Print1 or Print2) from the
Physical Print Buttons section.
11. Select the printer from the MyComputer column and press
“>>” to move it to the Printflow View column.
Figure 3-6. Connectivity -> Button Screen
 Loading...


