System Setup
3-34 LOGIQ C9 Series – Basic Service Manual
5482298-100 English Rev. 5
Connectivity setup
Setup the LOGIQ C9 Series for DICOM Communications
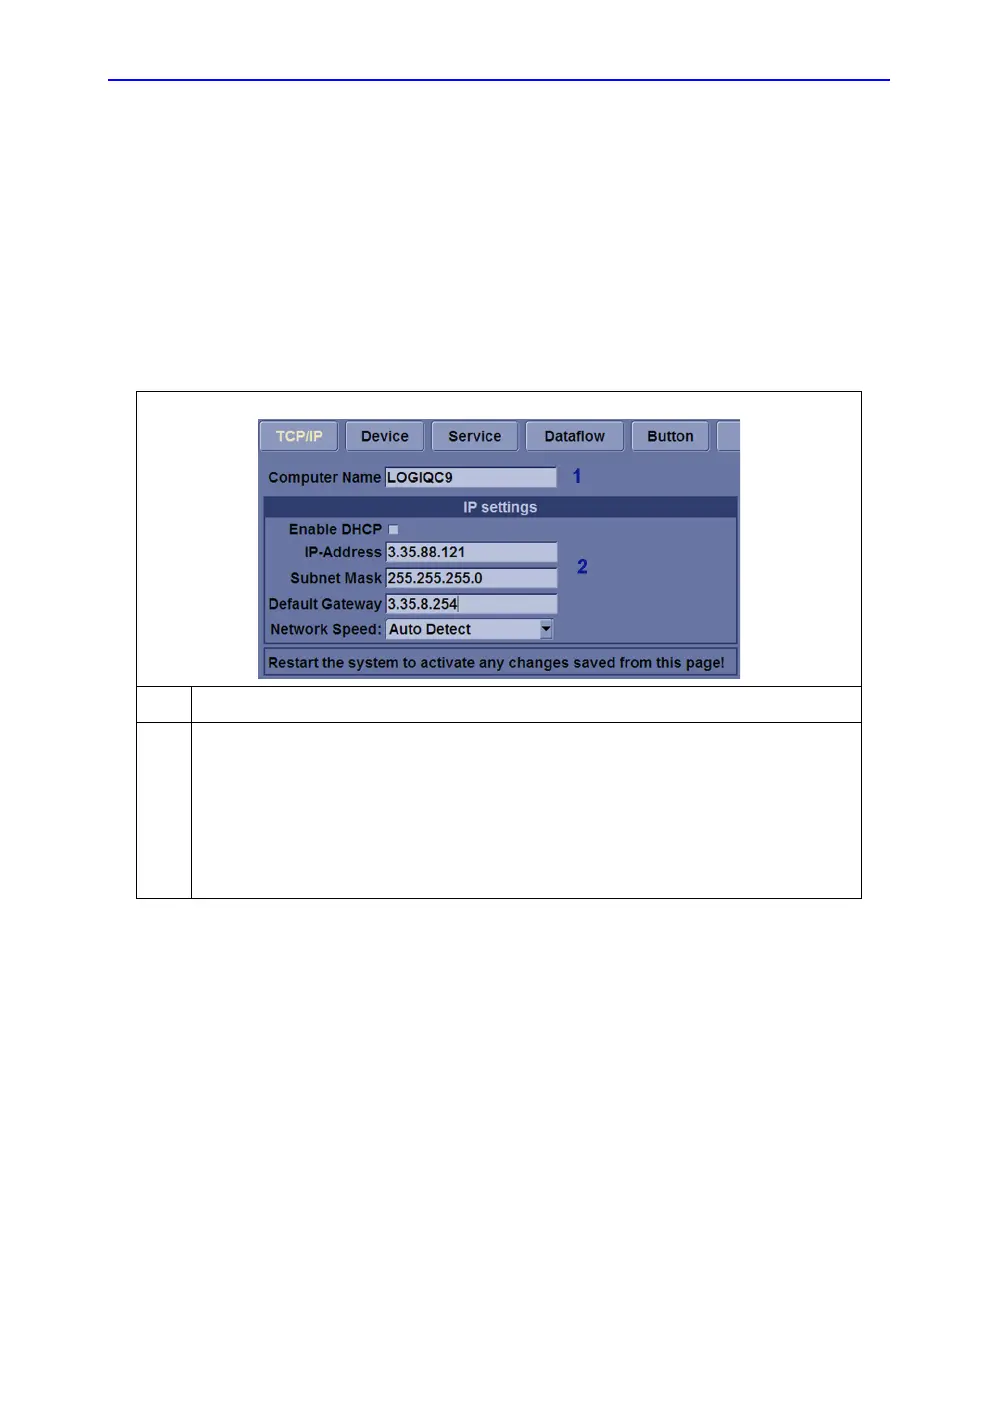
Table 3-15: Utility ->Connectivity ->TCP/IP screen
1 Enter the LOGIQ C9 Series computer name. This may be the same as the station name.
2 Enter the LOGIQ C9 Series IP address, subnet mask, default gateway and network speed.
For automatic assignment of IP address, subnet mask and default gateway, select DHCP.
Note: If possible, set the LOGIQ C9 Series netwoek Speed to match that of the Network
switch. if in doubt, set it to AutoDetect. Otherwise, transfer times can be two or five times
longer, during which the LOGIQ C9 Series will appear to be locked up. (If the Hard Drive
activity light on the front of the console is lit steady or blinks quickly, the LOGIQ C9 Series is
most likely not hung.)
 Loading...


