GE HEALTHCARE PROPRIETARY TO GE
D
IRECTION 5394227, 12 LOGIQ S8/LOGIQ E8 SERVICE MANUAL
Section 4-4 - Functional Checks 4 - 47
4-4-23 FibroScan module (Option)
NOTE: This test is only applied if the FibroScan option has been installed
Perform following tests. Make sure cables are well connected between system and FibroScan Module.
1.) Boot up and wait until the system show scan screen.
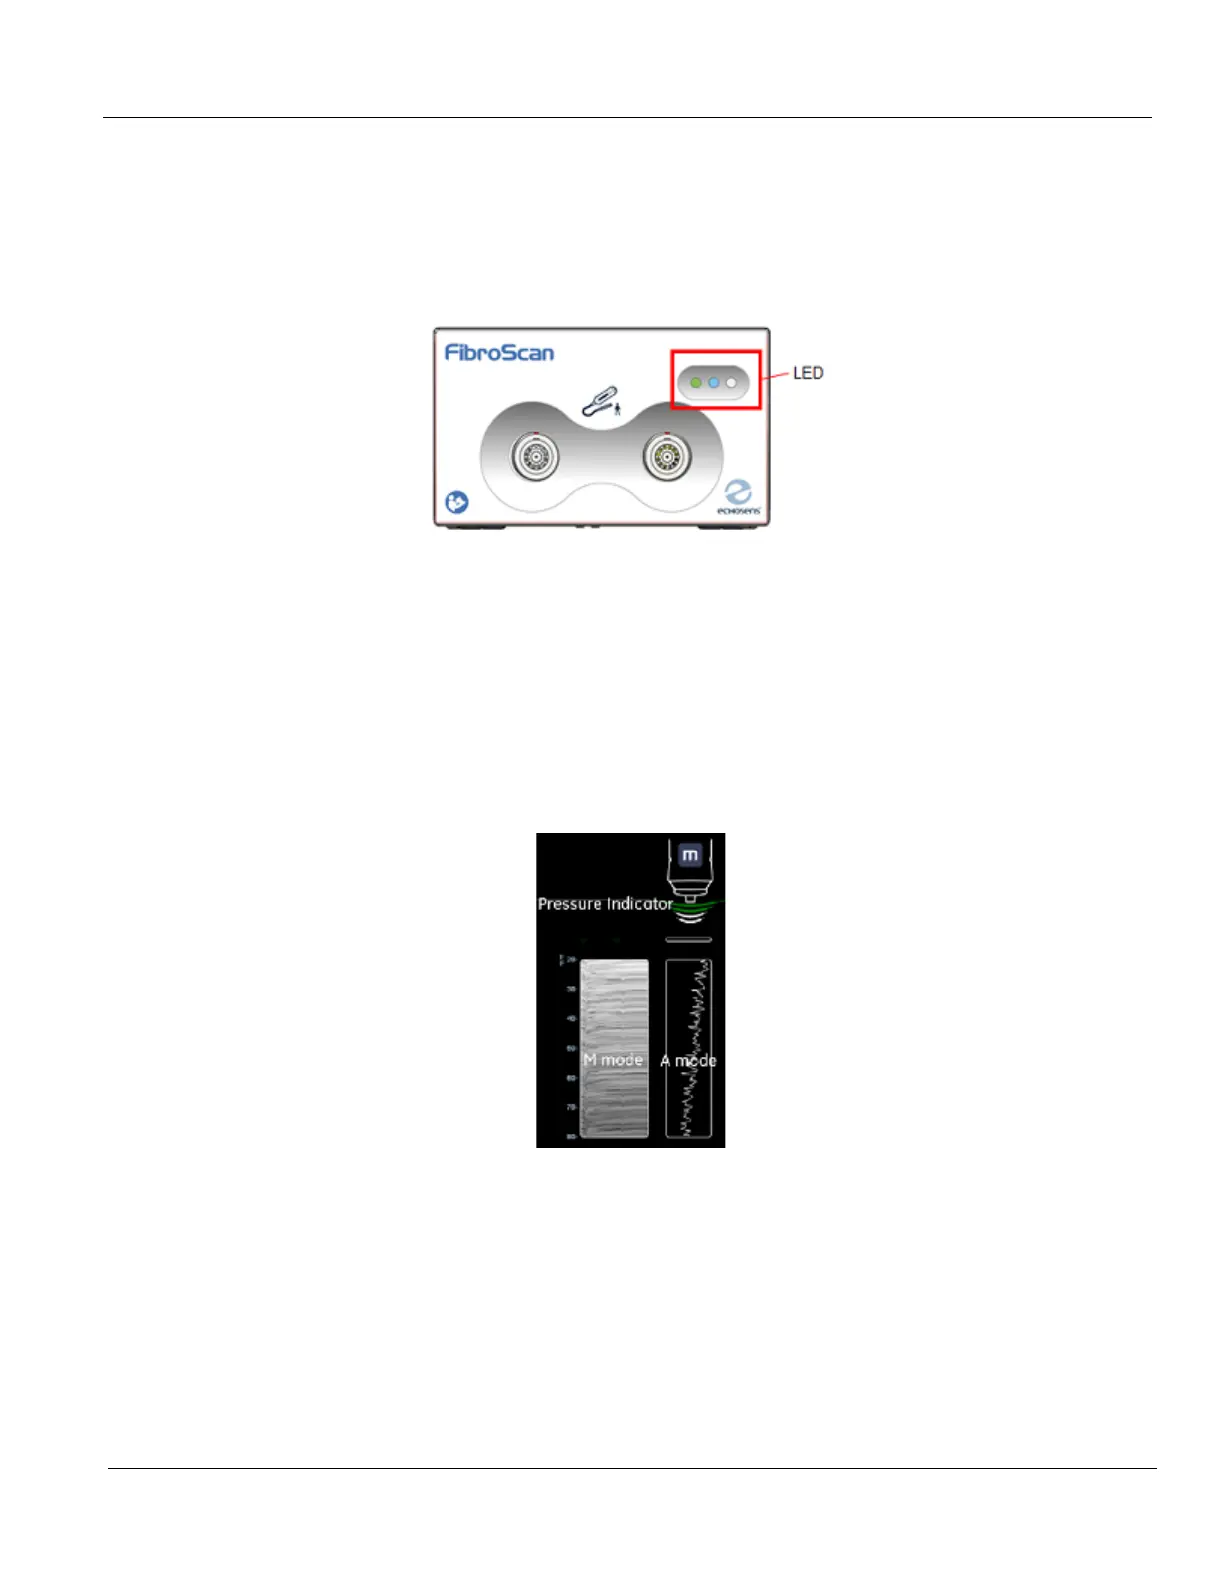
2.) Check the 3 LED (green, blue and white) on FibroScan Module front panel are lit.
Figure 4-35 LED on FIbroScan
3.) Select the assigned key to start FibroScan mode - Screen will be dual screen, FibroScan view will
be showed on right side of monitor, and Touch panel will be FibroScan tab.
4.) Connect either M+ or XL+ probe to FibroScan Module.
5.) Select the exam type button to activate the connected probe - The activated probe blue LED will
start blinking.
6.) Apply pressure to probe with you finger tips.
7.) Check on the FibroScan view that probe pressure indicator, A mode and M mode of FibroScan view
is showed.
Figure 4-36 A mode and M Mode of FibroScan
 Loading...


